Coastal Creators of Connecticut

Coastal Creators of Connecticut coastalcreatorsct.com

  • HOME
  • BLOG
  • YOU TUBE
  • CONTACT
    • Our Policies

DIY Coastal Home Decor Ideas

Give your home a coastal feel without spending a lot of money with these DIY coastal home style accents. From beach front art to coastal home accents, there is something for every room in the house.

You can easily find supplies like shells, rocks, and even driftwood for free depending on where you live. If you want to recreate some of these coastal accents, you will need to grab a variety of supplies to have on hand. Dollar Tree has many of the items you will need including shells, twine, glass vases and candle holders, burlap ribbon, and even sand. They even have glue guns and glue sticks, Mod Podge, paint and paint brushes, sand paper, tape and glue.


If you need wood, your local Lowe’s or Home Depot can supply that but you can also gather free pallets if you search Facebook Marketplace, your local “Buy Nothing” Facebook group and even Craigslist. Sometimes you will spot pallets on the side of the road and you can stop and ask the business owner if you can take them.

Many of these coastal home decor ideas also fit nicely into any Farmhouse style room you have in your home. It even has a name, “Coastal Farmhouse”!

Pottery Barn Inspired Rope Wrapped Sand Dollar Candle holders

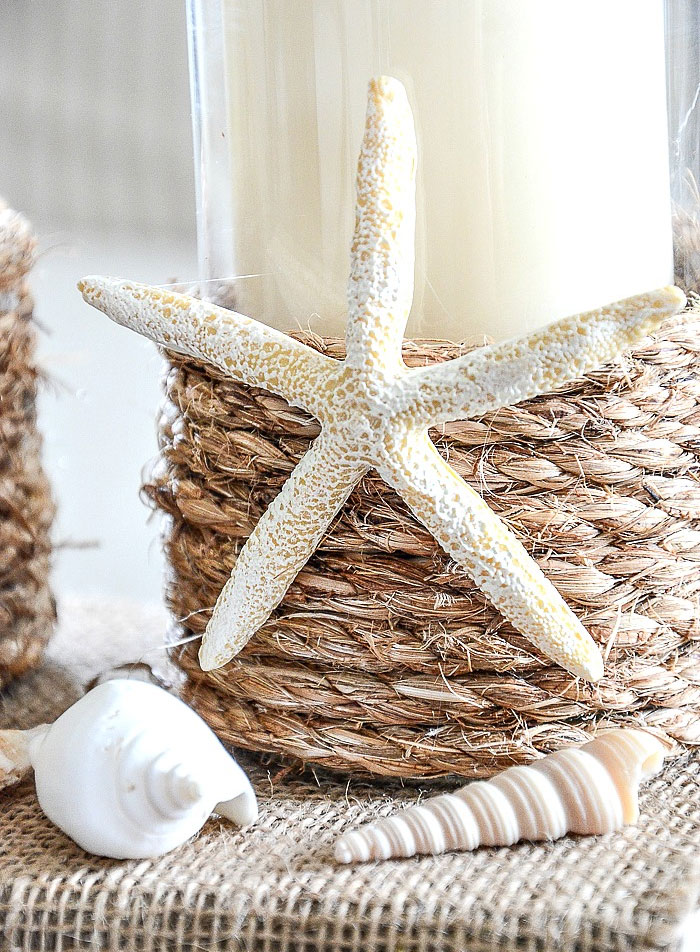
Pottery Barn Inspired Rope Wrapped Sand Dollar Candle holders from Stone Gable give you that high-end look for a lot less.

Shell Succulent Planter

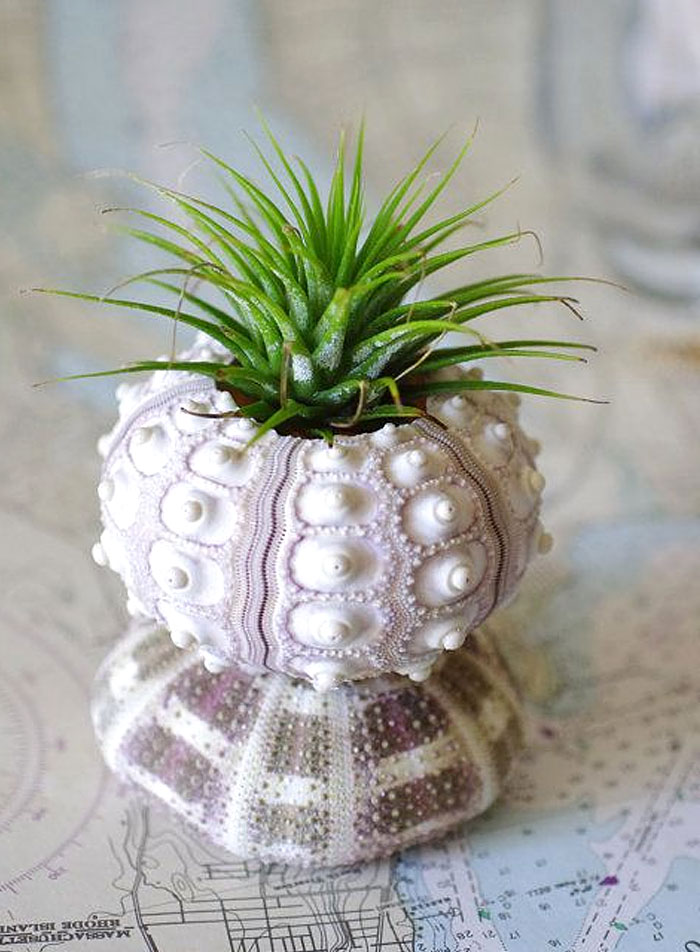
Shell Succulent Planter (source unknown) can be made by taking multiple shells and hot gluing them together.

Wine Bottle Candle Centerpiece

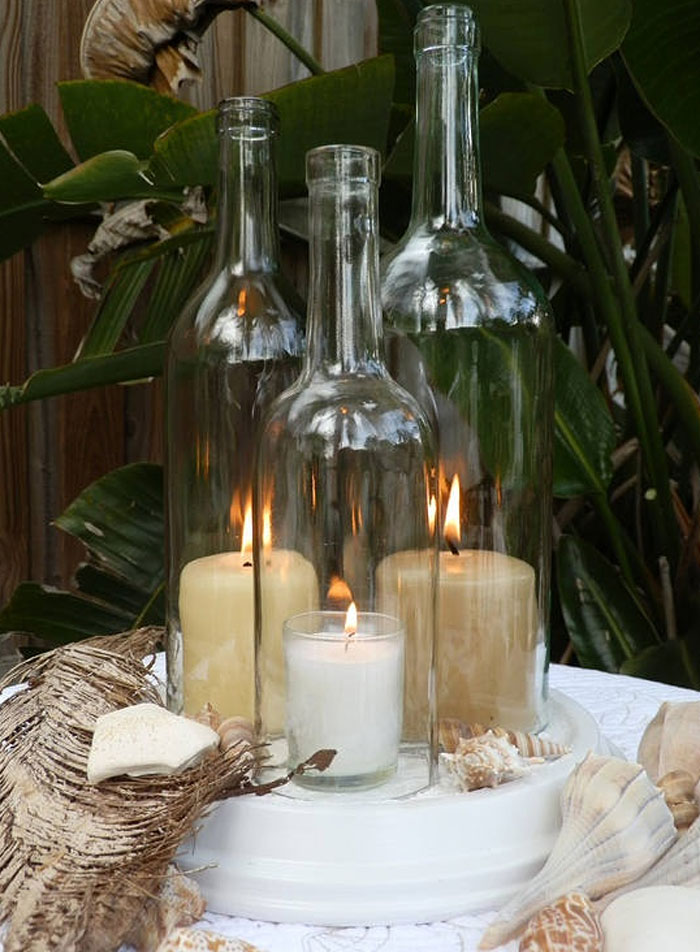
Wine Bottle Candle Centerpiece (source unknown). Get a friend to cut the bottom out of 3 wine bottles of various sizes  and place them on top of candles. It looks so elegant and it didn’t cost much to put together.

Coastal Farmhouse Decor from Glass Candle Holders

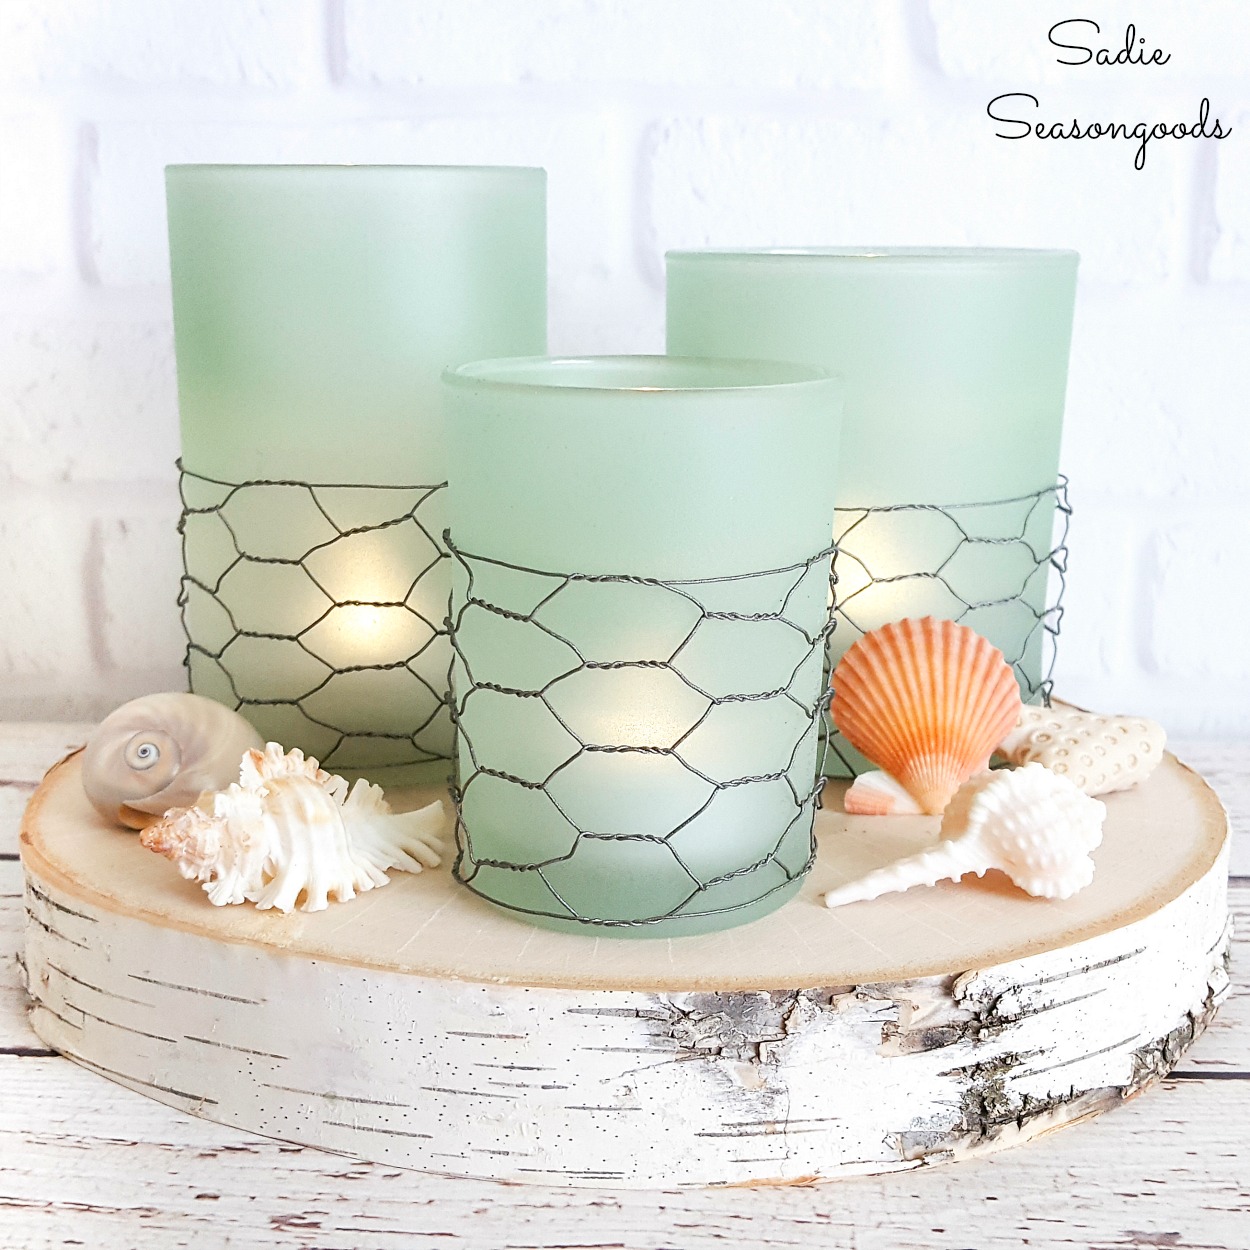
Coastal Sea Glass Farmhouse Candles from Sadie Season Goods combines the look of sea glass with the pattern of fishing net by substituting it for chicken wire.

Round Beach Candle Fishbowl Centerpiece

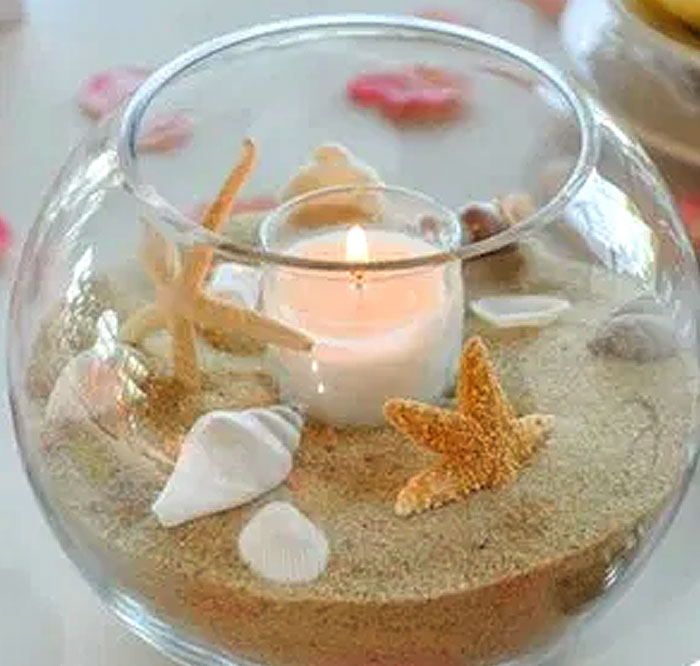
Round Beach Candle Fishbowl Centerpiece (source unknown). Coastal home decor features a lot of blues and sandy color and LOTS of shell. Here’s another centerpiece that is shells, sand, a glass fishbowl and a candle.

Pottery Barn Inspired "Monkey Fist" Rope Knot Lamp

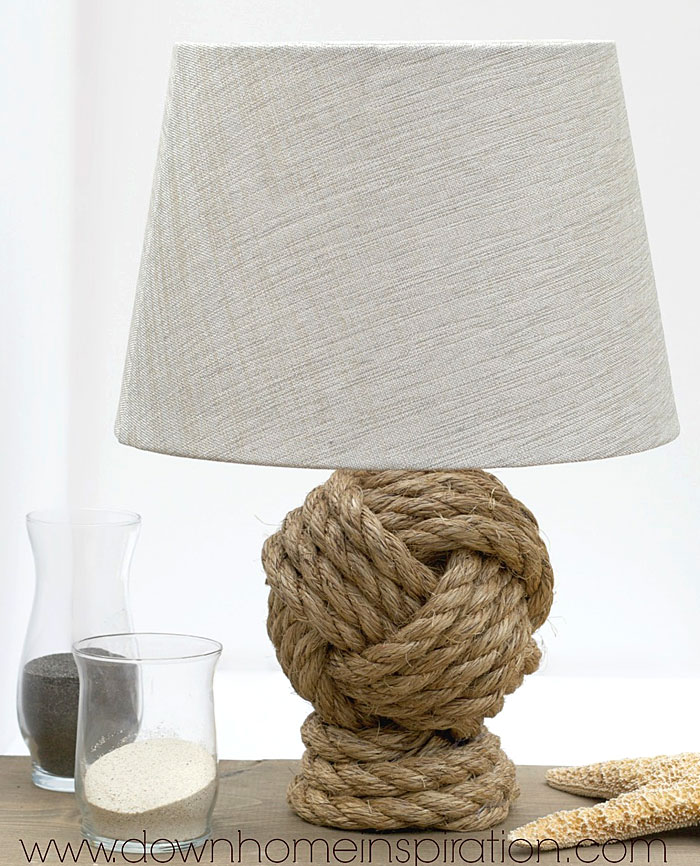
Twine and rope are also a big part of coastal home decor. This Pottery Barn Inspired “Monkey Fist” Rope Knot Lamp made by Down Home Inspiration utilizes basic 3/4″ rope and a little bit of talent to make a monkey fist knot but you’ll have a coastal lamp that costs $25 to make instead of $225 to buy.

DIY Sisal Coastal Lamp Shade

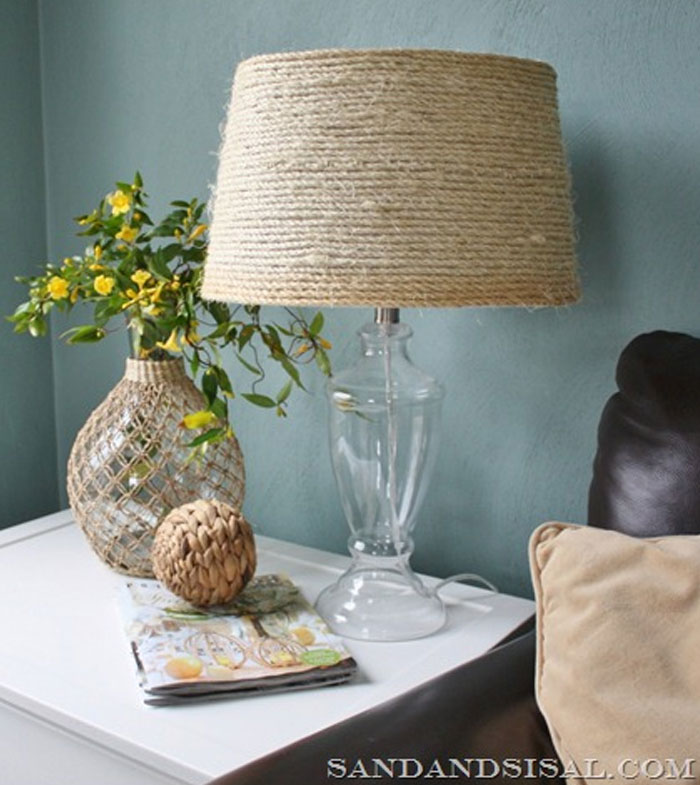
If you have a plain shade you want to turn into a Coastal lampshade, try this DIY Sisal Coastal Lamp Shade idea from Sand and Sisal. All you need is some 1/4″ sisal rope and a glue gun and in an instant you have a natural fiber lampshade to add to your coastal home decor.

wood bead strands

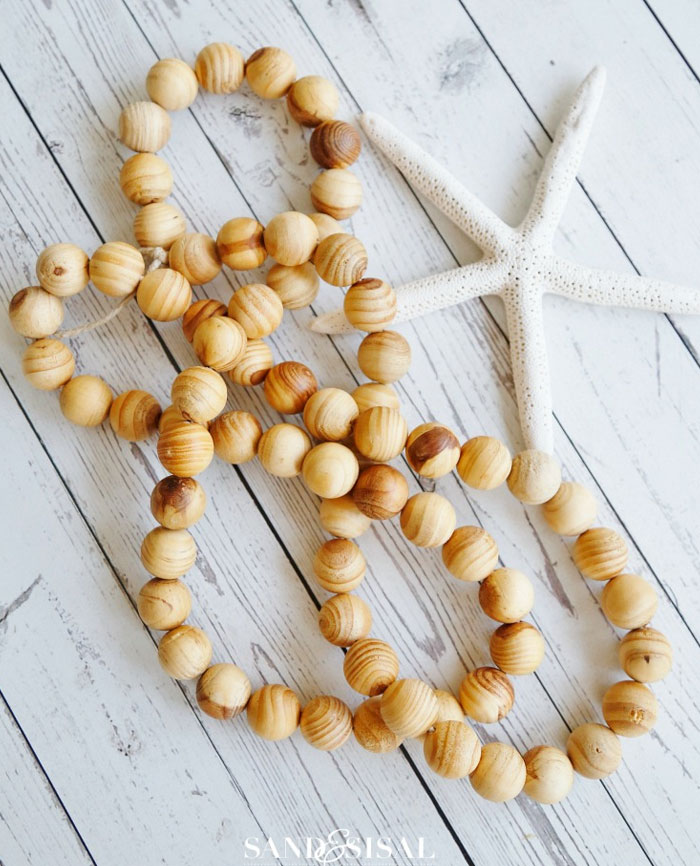
You probably have seen these wood bead strands all over the Internet, Pinterest and in stores like Homegoods but now you can make a strand yourself and save a buck or two. Sand and Sisal also shows us how easy it is to make them with a box of round wood beads, a drill and hemp cord. In about an hour you’ll have a fantastic strand of beads you can use in your coastal home decor scheme.

Printer's Box Shadow Box Shell Coastal Display

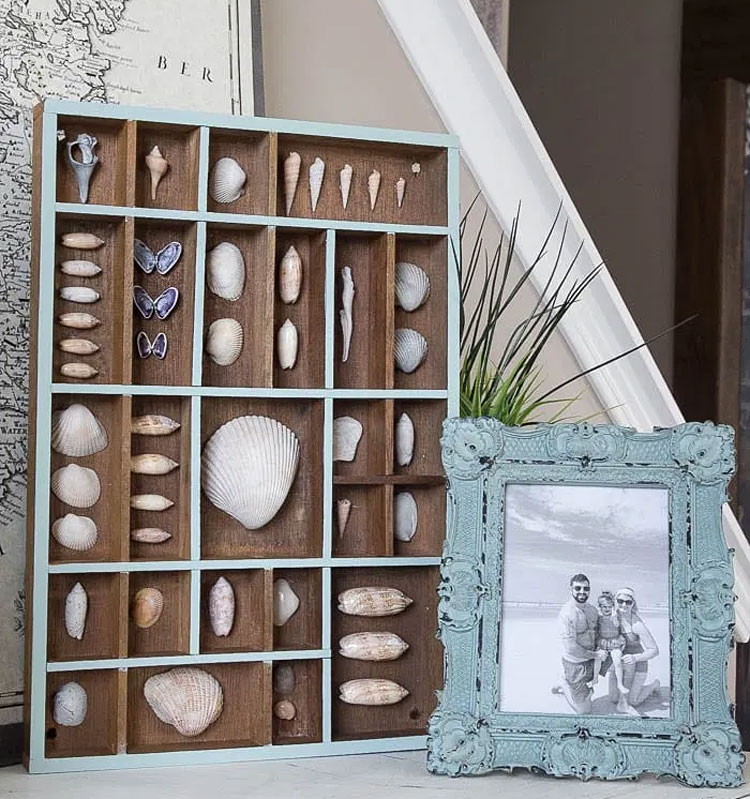
If you like to hunt for antiques and spot a printer’s tray or even purchase one on Etsy, you can use it as kind of a shadow box to display a variety of shells. Blesser House shows us how she did it. his is a great accent for your Coastal home.


Coastal Driftwood Mirror

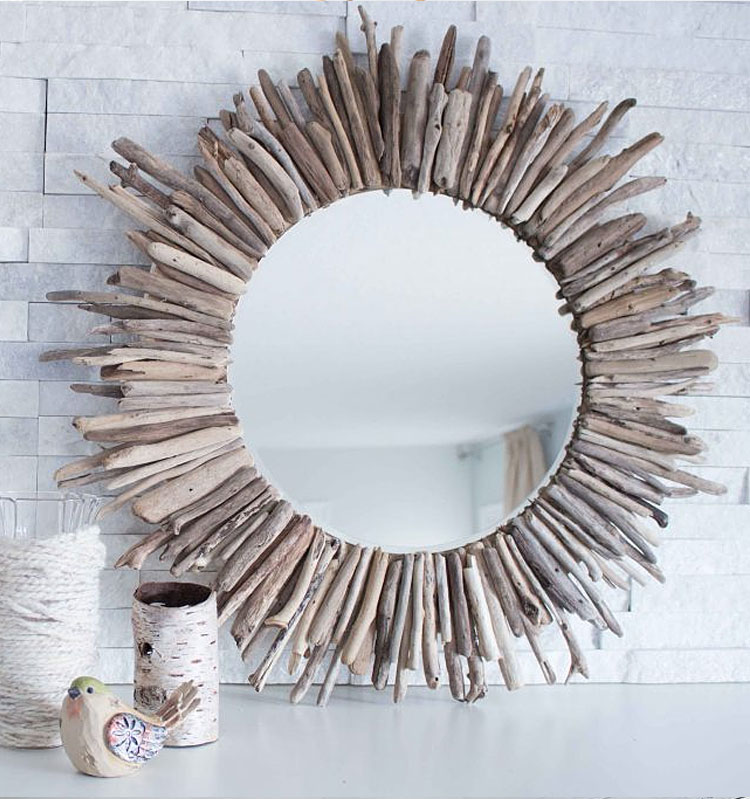
One of my favorite coastal pieces is this Coastal Driftwood Mirror made by Sustain My Craft Habit. It’s so versatile and can do in any room of the house. If you can’t find driftwood in your area you can buy it on Etsy and even Amazon. You’ll need a 14″ beleveled mirror to complete your project. This mirror is stunning.

lighthouse lantern centerpiece

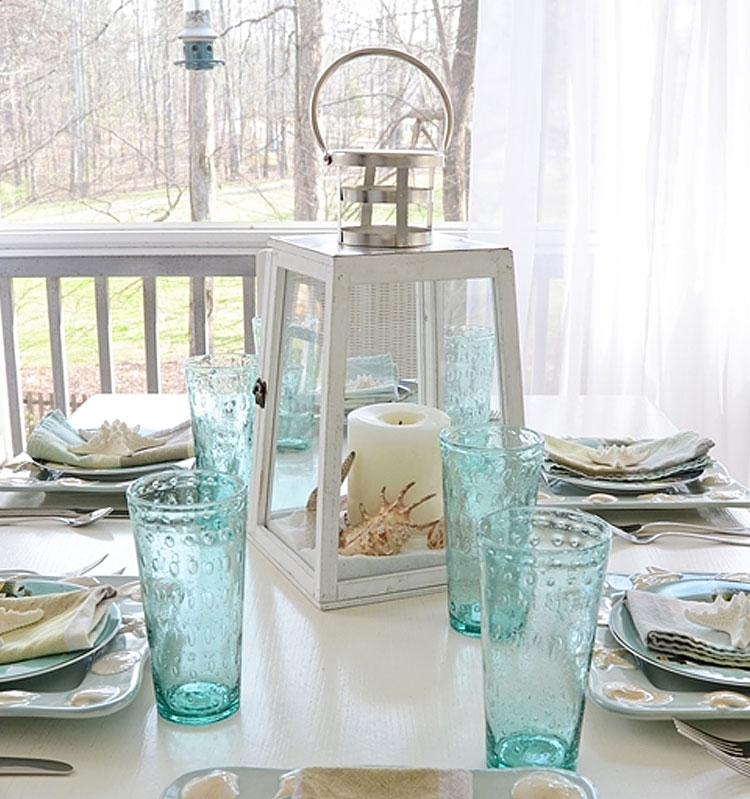
This is more of an idea than a coastal craft you make. Lanterns make great table centerpieces. They can also be placed just about anywhere you have a shelf. This lighthouse lantern makes a statement on the dining table. Between Naps on the Porch gives you ways to arrange the table.

DIY Rope Coasters
source unknown

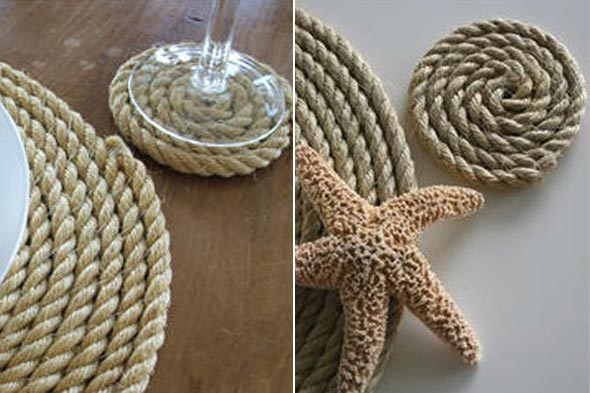
DIY Rope or Jute Coasters work up super quick. You just need sisal rope or thick twine and a glue gun.

DIY Coastal Rope Rug

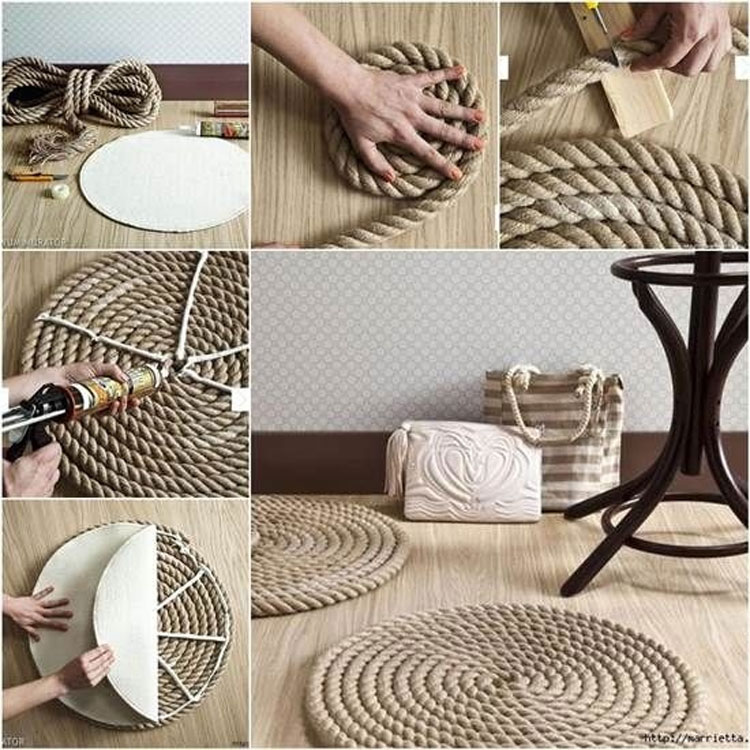
Source: Marrietta.ru

If you’re going to make rope coasters, why not use some of that rope and make a DIY rope rug that is super useful. You could also turn them into rope placements. Just don’t make the circle as large as you would for the rug.

DIY Rope Placemats

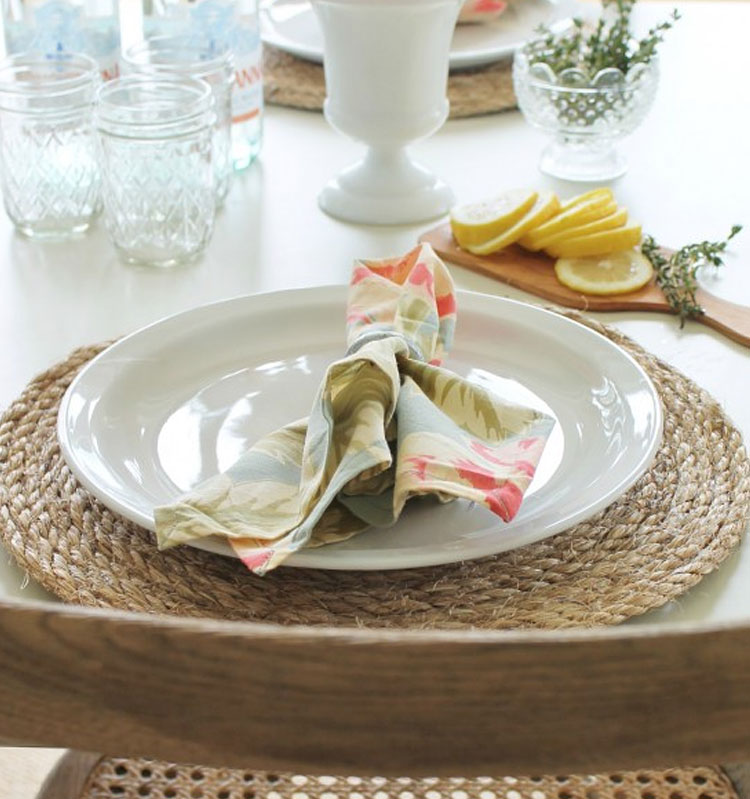
Rope Placement from City Farmhouse

DIY Rope Cushion from an old tire
Source unknown

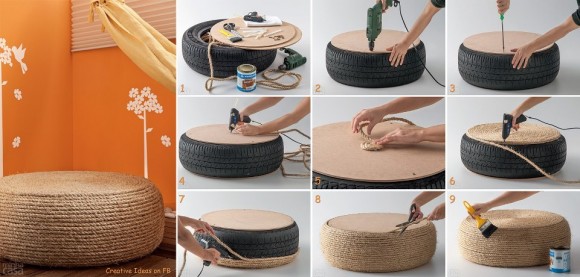
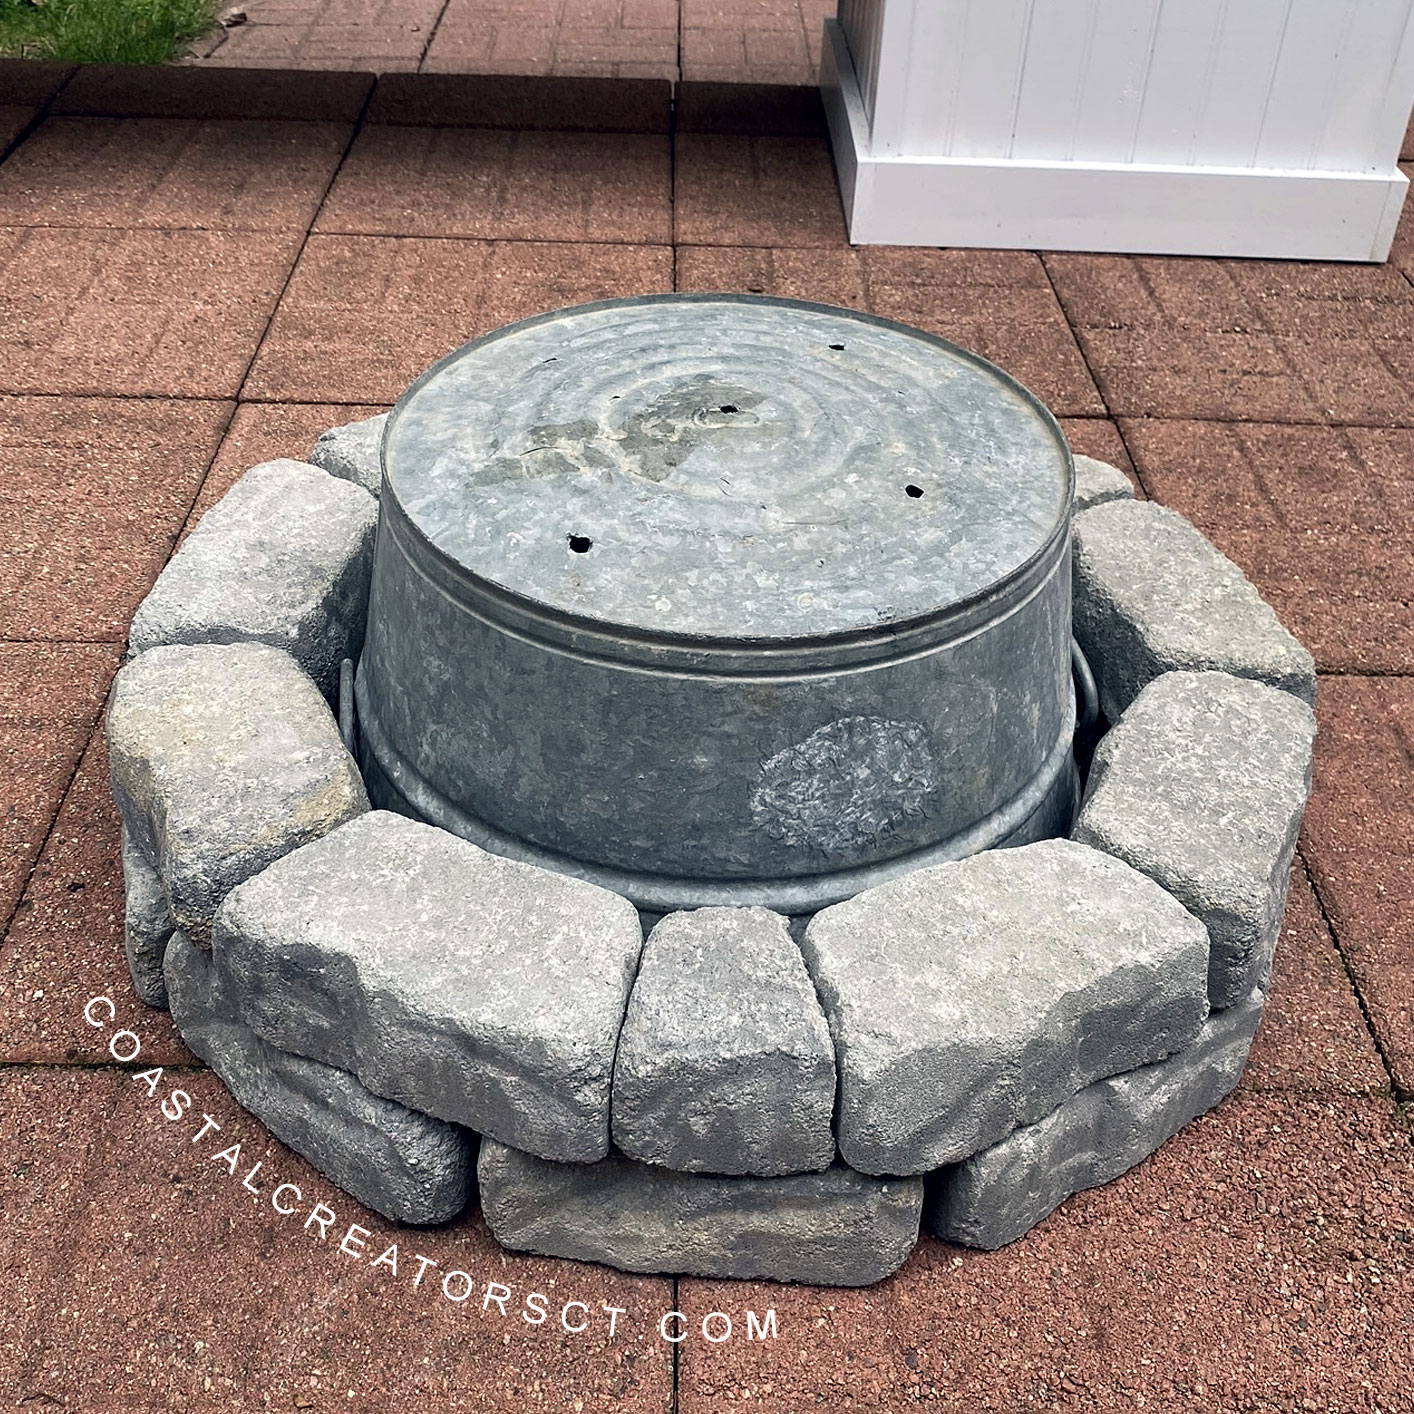
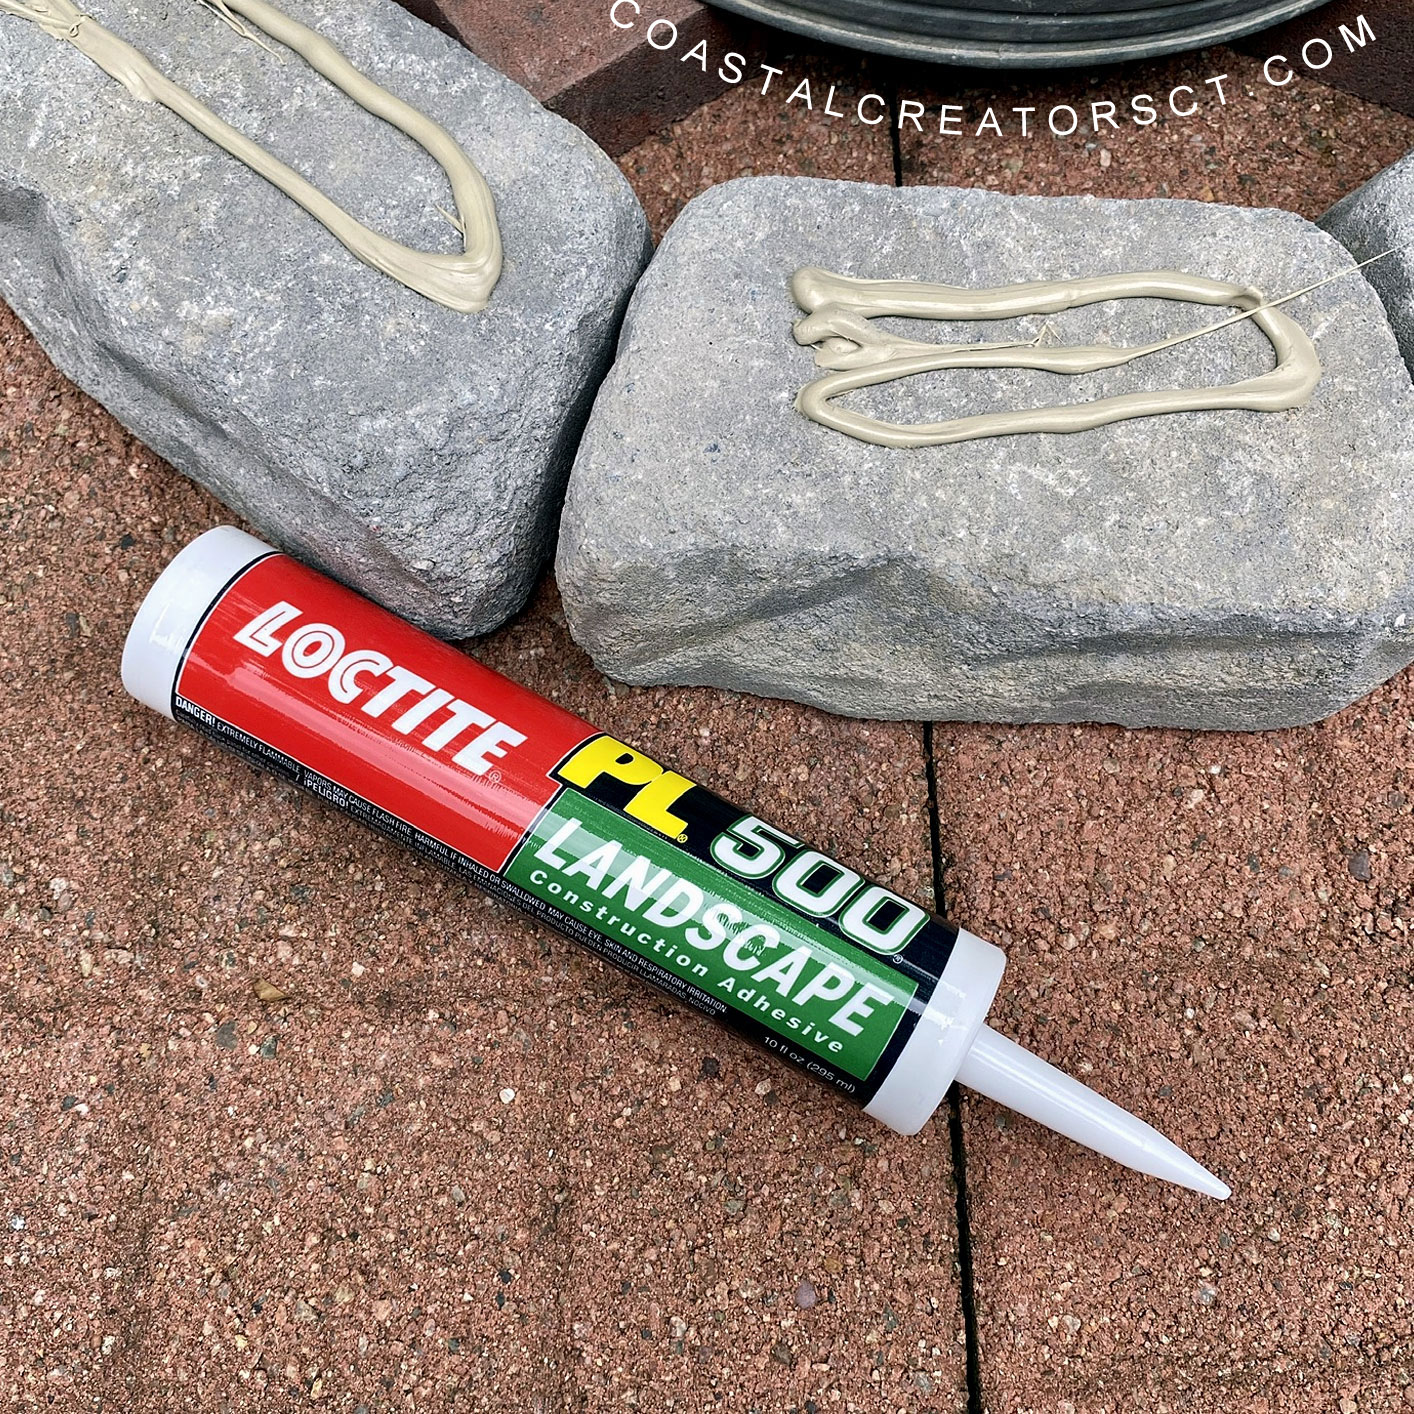
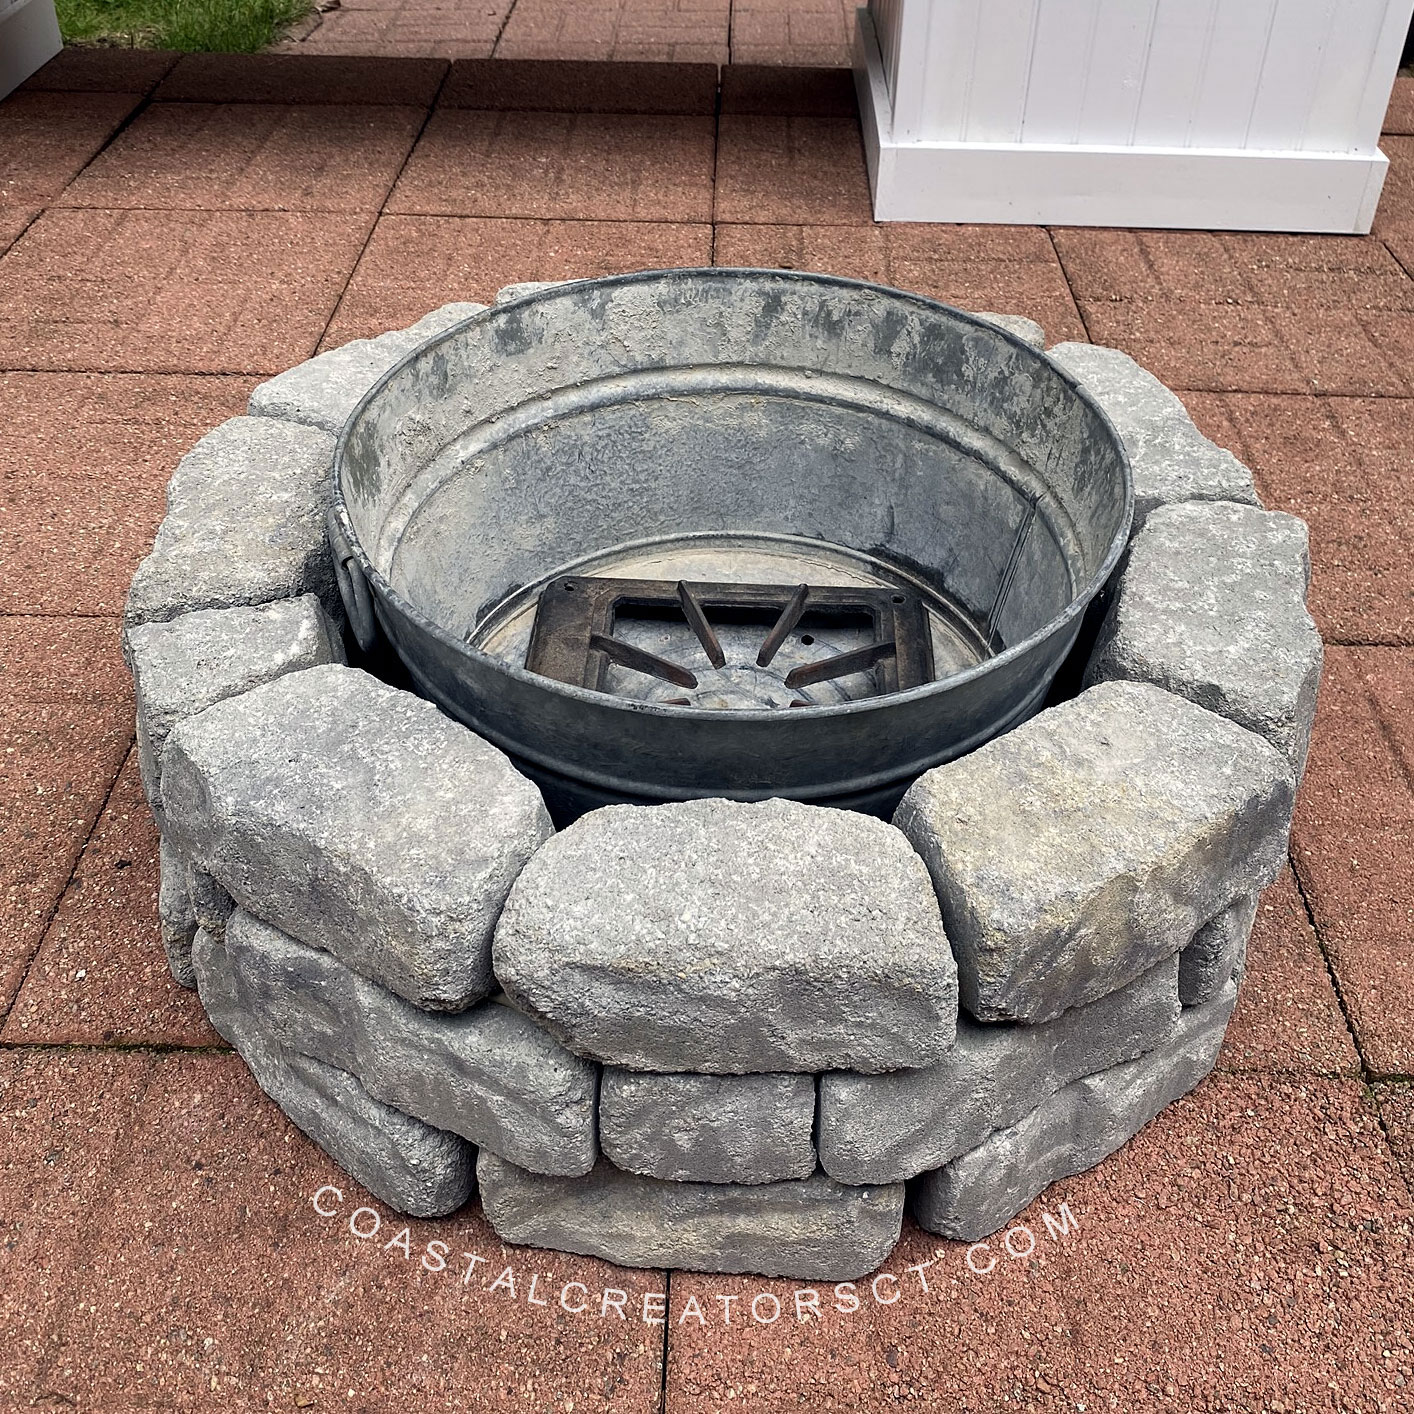
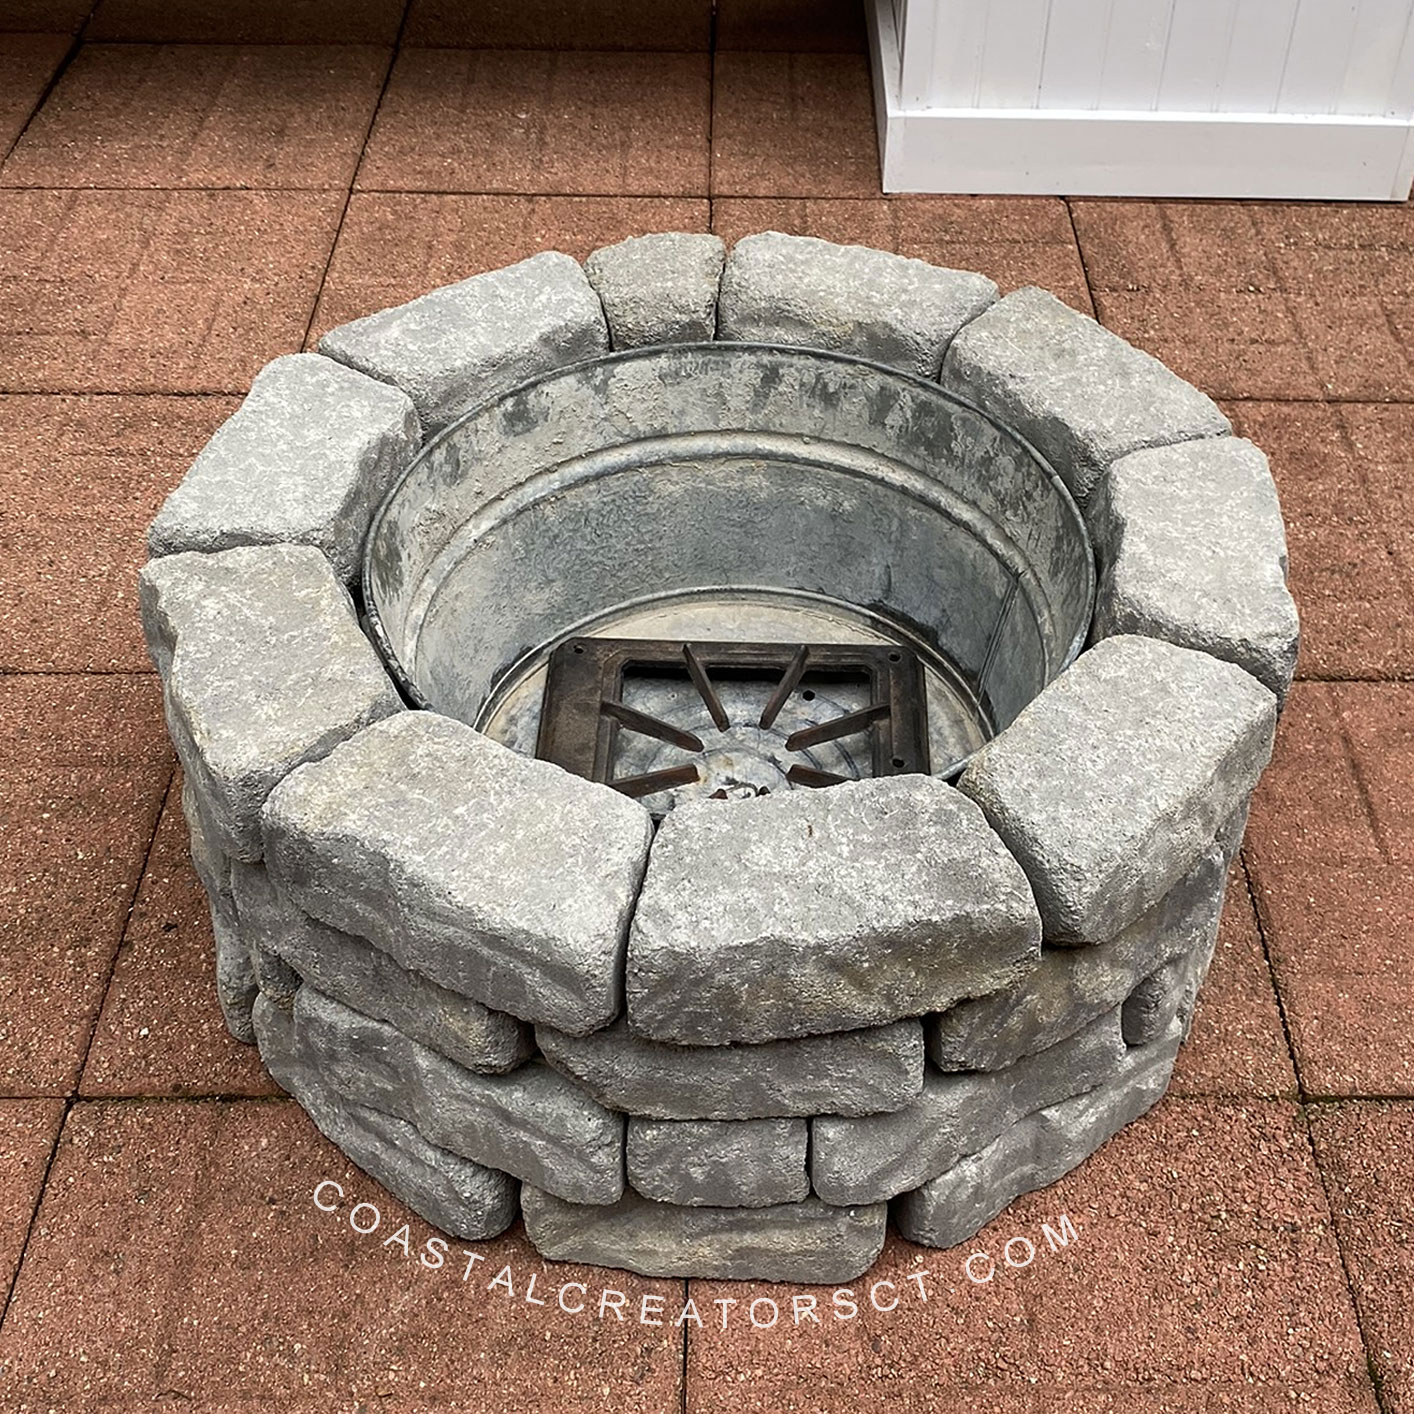
Or how about making a coastal rope cushion by covering an old tire with rope. This would look great on the porch or patio.

DIY Coastal Rope Lamp
source unknown

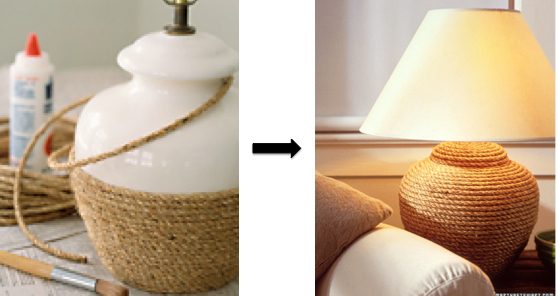
Continuing with sisal rope, let’s cover an old lamp and make a coastal rope lamp you can be proud of.

Sea Glass Mosaic Table

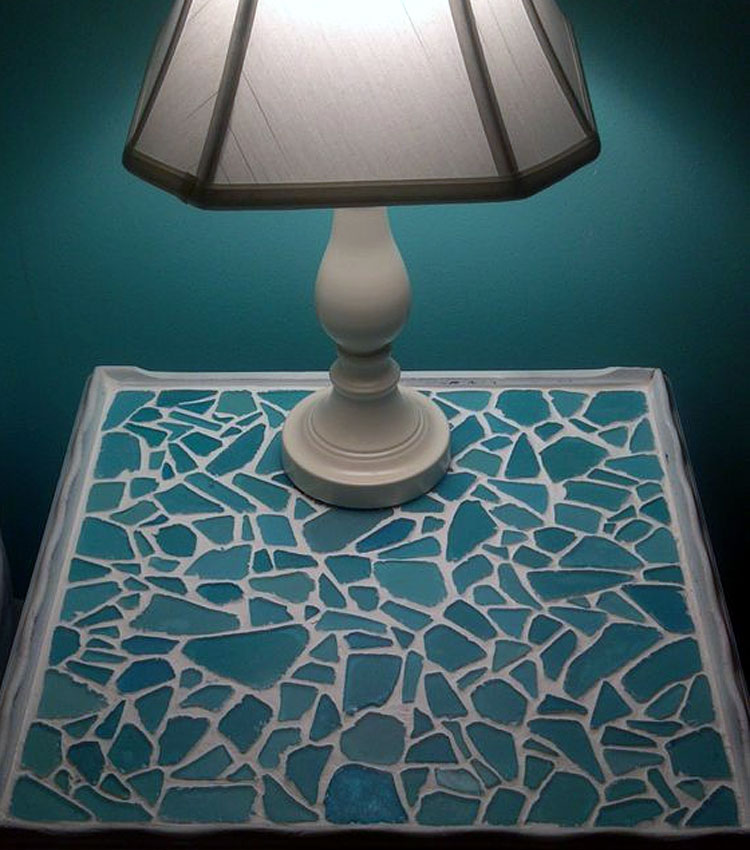
Switching gears to sea glass. This unique sea glass table accents any coastal home decor style.

Pallet Beachy Coastal Garland

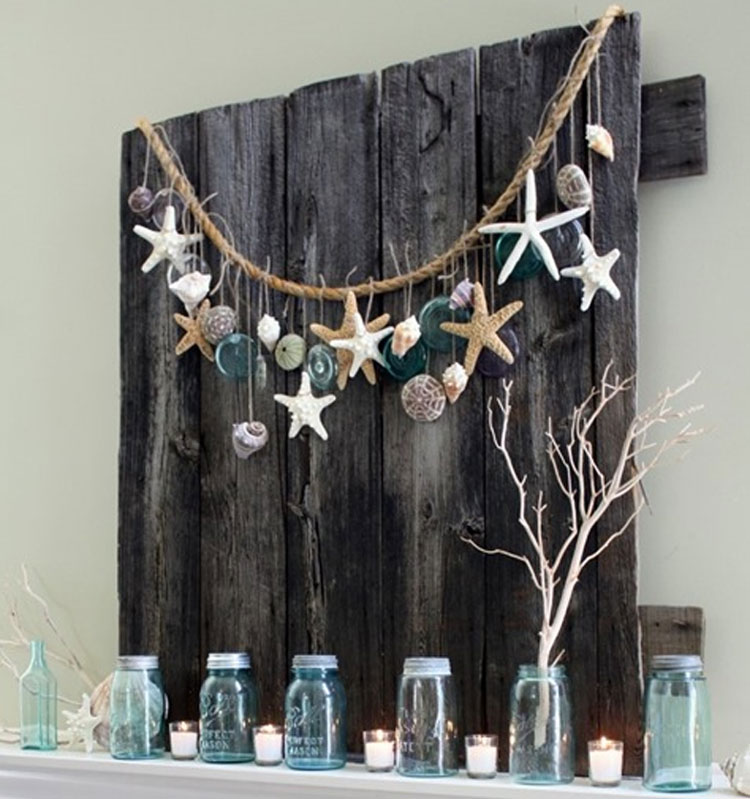
Pallet Beach Coastal Garland from Finding Home Farm is made using a hot glue gun to attach shells, starfish and old Mason jar lids to twine. The twine is then tied to a piece of rope. The wood backdrop is made from old pallets.

Coastal Wood Pallet Shelf

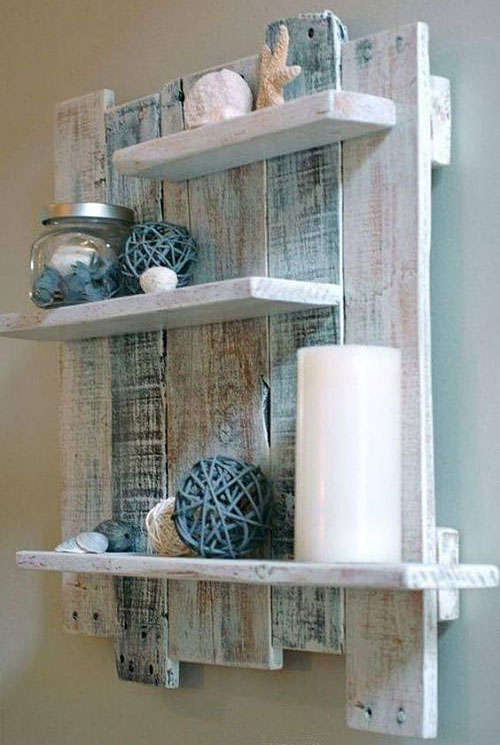
Coastal Wood Pallet Shelf can be made to hold all of your coastal goodies like candles and shells.

DIY Coastal Driftwood Headboard
Source: Houzz

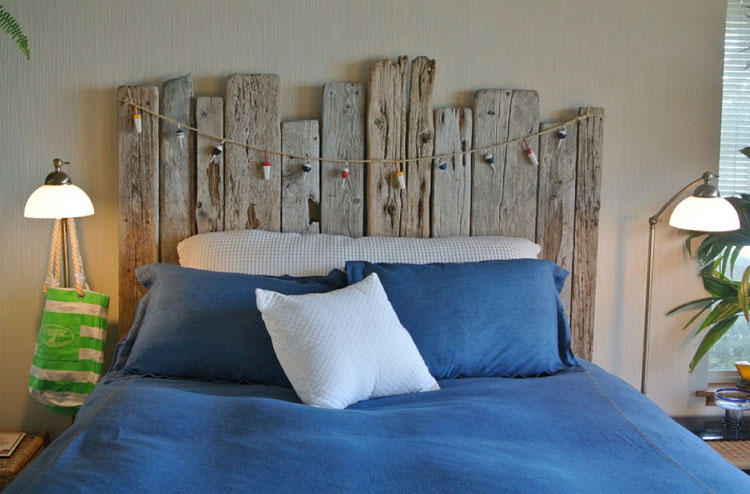
After some time beach-combing and acquiring enough flat driftwood you too can create a coastal-style driftwood headboard.

Driftwood Crab Art

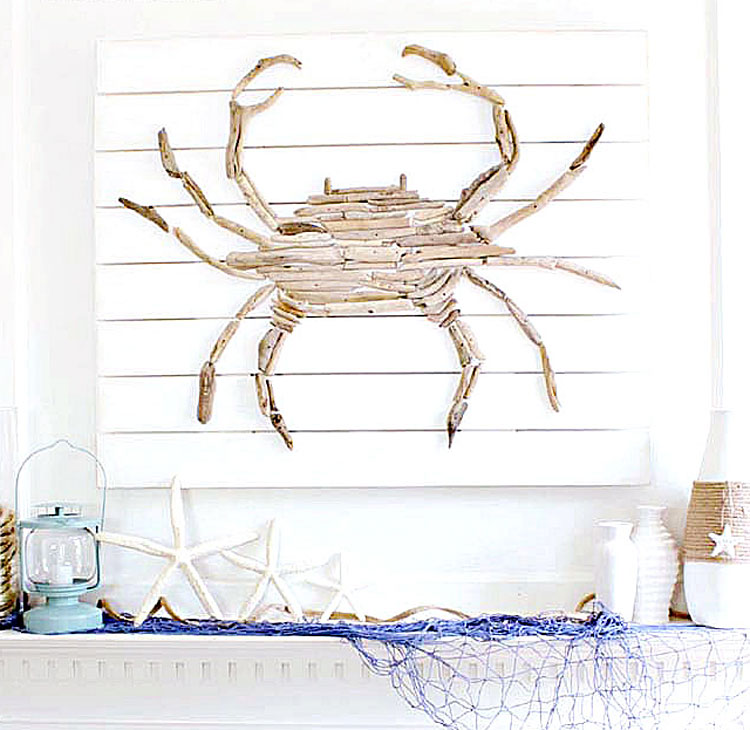
Driftwood Crab Art from Remodelando La Casa is made by taking bits of driftwood and basically laying them out like a puzzle until the pieces fit.

Coastal Rope Handle Wood Tray

This Coastal Rope Handle Wood Tray from H20 Bungalow can be made in a few hours from start to finish.

DIY Sea Blue Wood Starburst Mirror

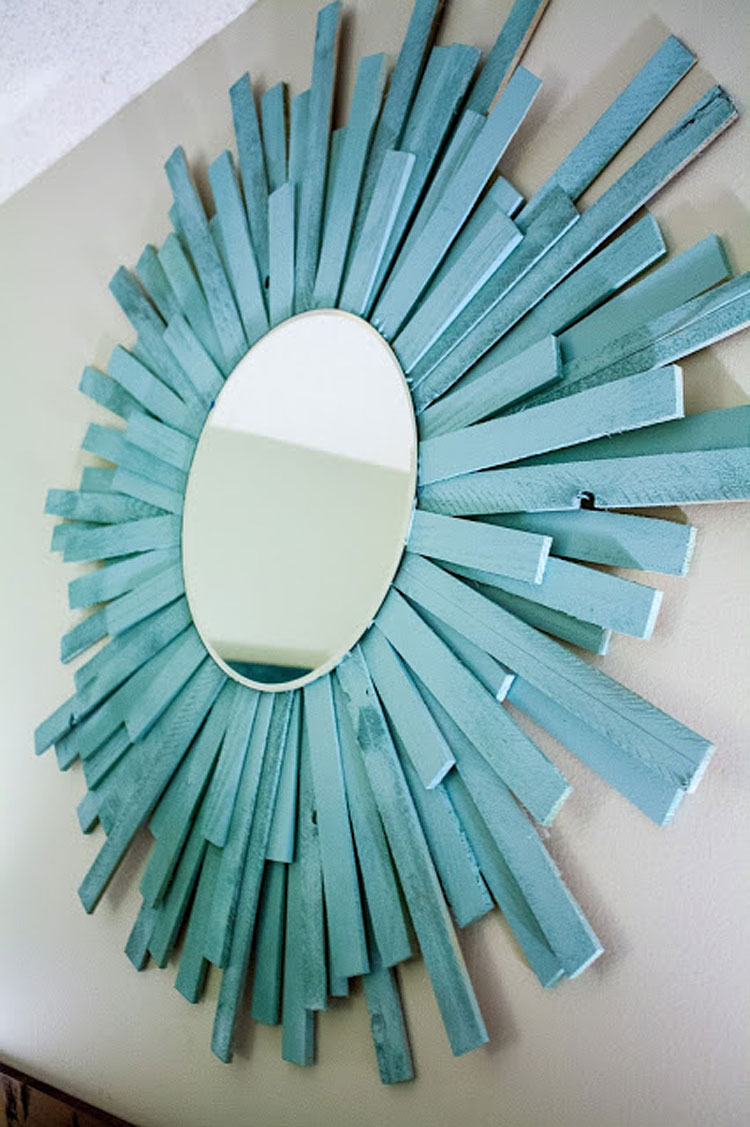
This DIY Sea Blue Wood Starburst Mirror from Sgt. Pepper’s Kitchen isn’t made with driftwood but it is made using wood shims. You can purchase them for cheap at your local hardware store and the finished mirror looking stunning once it is painted a sea blue color.

DIY Wood Buoys

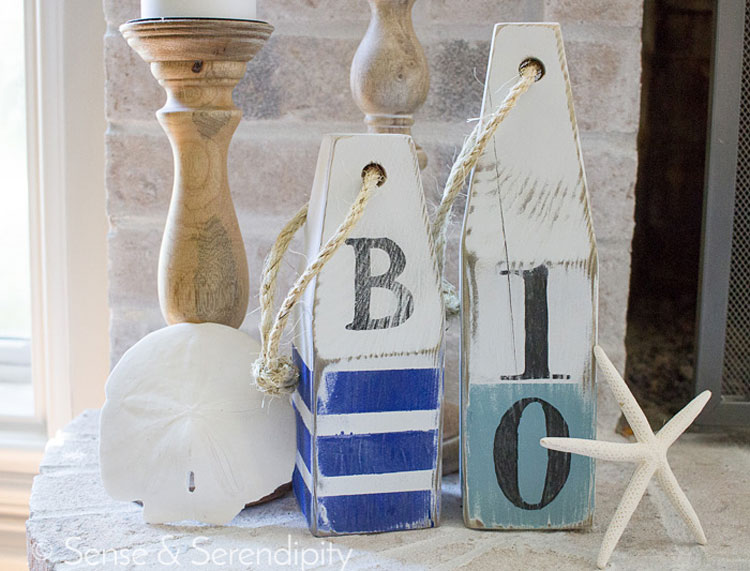
People have been decorating their coastal homes for years with wood buoys. Now you can make your own for cheap. Sense & Serendipity shows us that with a 4×4, a saw, a drill, sandpaper, rope and some paint you can whip some up in no time.

Beach wall art
Purchase on Etsy

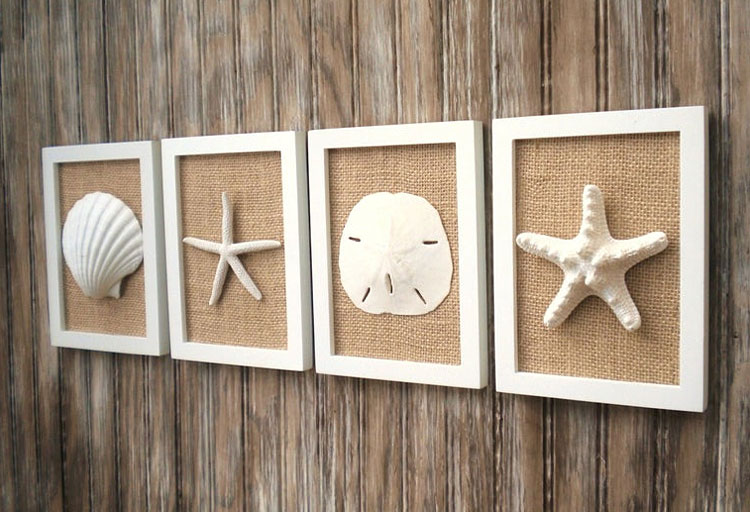
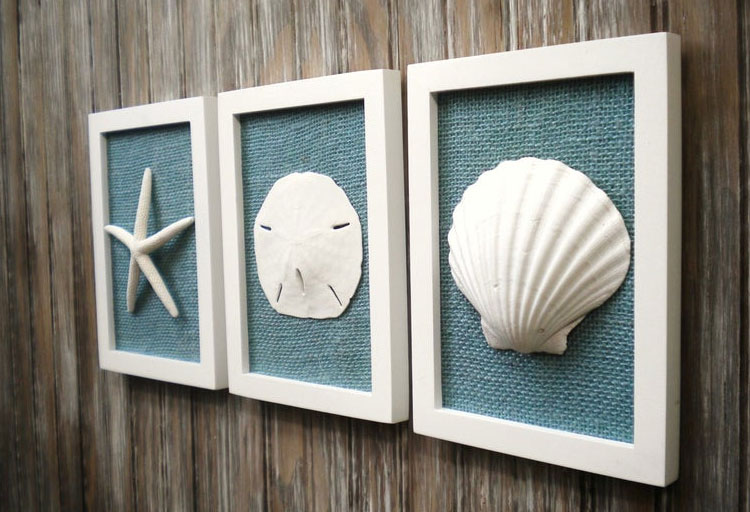
Beach wall art is easy to create. Go to the Dollar Store and get a simple picture frame and a canvas. Paint the canvas a beige or blue color, inset it in the frame, remove the glass and glue a large shell in the center. Or you can purchase it on Etsy.

Dollar Tree Beach Wall Art
Purchase on Etsy

Build a Backyard Fire Pit in One Hour

It’s easy to build a backyard fire pit for fun Fall nights and hours of Smore’s enjoyment. We built our patio fire pit in just about a hour. You can buy most of the supplies you need at your local hardware store (Ace, Lowe’s, Home Depot). The supplies list is minimal and you won’t need many tools. Building a fire pit should only take you about an hour (or maybe two) to complete so it’s a quick project even beginner DIYers can complete.

How to Build a Backyard Fire Pit in One Hour

Safety First! You will want to make sure your fire pit is not going to be located under any low-hanging trees. Safety is always key when setting up your fire pit.

Your first step is to decide the best spot to place your fire pit. Because you will be using Flagstone wall blocks that are heavy, you won’t be moving your fire pit anytime soon. You will want to find a permanent area to build your fire pit. Will you build in the ground or above ground? We constructed our fire pit on our patio.

Fire Pit Supplies List

If you want to build our exact fire pit, here are the supplies we used. Our fire pit measures 18 inches in diameter by 12 inches in height.

  • (39) Mini Flagstone Allegheny Retaining Wall Landscaping Blocks
  • LOCTITE Pl500 Landscape Block Adhesive Off-White Landscape Construction Adhesive
  • (3) Holland Red/Charcoal Concrete Pavers (bricks)
  • Galvanized Metal Tub
  • Metal Grate
  • Heavy duty steel file
  • Hammer
  • Concrete/Brick Chisel


About the Galvanized Tub: You can buy a galvanized metal tub from Tractor Supply, Amazon, Lowes, or even Target stores. You can substitute a galvanized tub for an actual fire ring that has been specifically designed for DIY fire pits. Fire rings are often quite large though and since we wanted to keep our fire pit smaller, we went with the galvanized metal tub.

About the Metal Grate: We had on hand an old single burner from a propane stove that we used for our metal grate. You will probably want a raised metal grate of some sort to stack the wood on to keep it from the bottom of the tub. You could use an grate from an old grill, a portable camp fire grill, or a raised fire grate. Check out the free section on Craigslist, Facebook Marketplace or even your local Goodwill store and you may find something that can be used and it will save you money.


About the Retaining Wall Blocks: we used mini Flagstone Allegheny Retaining Wall Blocks to put around the galvanized tub. This created the wall for our fire pit. The common size of these blocks is 3-in x 8-in and the actual size is 3-in x 8.2-in.

Determine the Number of Landscaping Blocks Needed

To determine the number of landscaping blocks you will need to make a circular fire pit, just multiple the desired diameter by 3.14 then divide by the shortest length of the block.  For the fire pit pictured, the greatest diameter was 18 inches at the top of the galvanized tub. So, 18 times 3.14 equal 56.52; 56.52 divided by 6 (which was the shortest length for the trapezoid block used) equal 9.42. If one does not have a predetermined diameter, just buy the number of blocks needed to make a circle close to the size fire pit desired without having to cut any blocks.

If you aren’t good with math equations, you can also “eye” it. You may not buy the exact number of block needed but you can always return or purchase more as needed. We purchased 39 landscaping blocks and had to cut three in half to make them fit.

Adjusting the Landscaping Blocks to Fit Properly

You may have to cut a few of your landscaping blocks to fit properly. In our fire pit we had to cut several blocks as shown in the photos. To cut a landscaping block, draw a line where it needs to be cut and then score that line using either a concrete/brick chisel; a heavy duty file; or, for more accurate cuts, a circular saw with a concrete blade. Once the block is scored, place the chisel on the score line and strike it with a hammer until the block splits.


Fire Pit Drainage

It is a good idea to drill a few holes in the bottom of the galvanized tub for drainage. You don’t want rain water collecting in the bottom of your fire pit without any place to go.

How to Build a Backyard Fire Pit in One Hour

Assembling the Fire Pit

After obtaining the number of landscaping blocks needed, it is time to assemble the fire pit.

How to Build a Backyard Fire Pit in One Hour

Place three concrete pavers (bricks) in the center of the area where you will construct the fire pit. The galvanized tub will sit on these pavers for support and ventilation once the fire pit is complete.

How to Build a Backyard Fire Pit in One Hour

Place the galvanized tub upside down over-top of the pavers (bricks). By placing the tub upside down, you ensure that the first layer is the widest and will accommodate the largest widest of the tub when it is turned upright.

Lay the first row of blocks in the desired pattern.

How to Build a Backyard Fire Pit in One Hour

Apply Landscape Construction Adhesive to the top of each block and then add the second layer of blocks.  Continue these steps until the desire height is reached.

Place the metal grate inside, stack the wood and your fire pit is almost ready for use. We do suggest at that you give the Landscape Construction Adhesive 24 hours to completely dry.


How to Build a Backyard Fire Pit in One Hour

Who will you share your fire pit with?

Build a Backyard Fire Pit in One Hour

Coastal Christmas Trees

DIY Coastal Home Decor Ideas

Sea Glass Crafts to Make and Sell

10 Beautiful Rustic Wood Centerpiece Boxes

Coastal Creators participate in the Amazon Services LLC Associates Program, an affiliate advertising program designed to provide a means for sites to earn advertising fees by advertising and linking to Amazon and other affiliate programs. Read more

  • HOME
  • BLOG
  • YOU TUBE
  • CONTACT

Copyright © 2025 · Coastal Creators · Our Policies