Coastal Creators of Connecticut

Coastal Creators of Connecticut coastalcreatorsct.com

  • HOME
  • BLOG
  • WHOLESALE
  • CONTACT
    • Our Policies

How to Make a Set of Reversible Wood Blocks

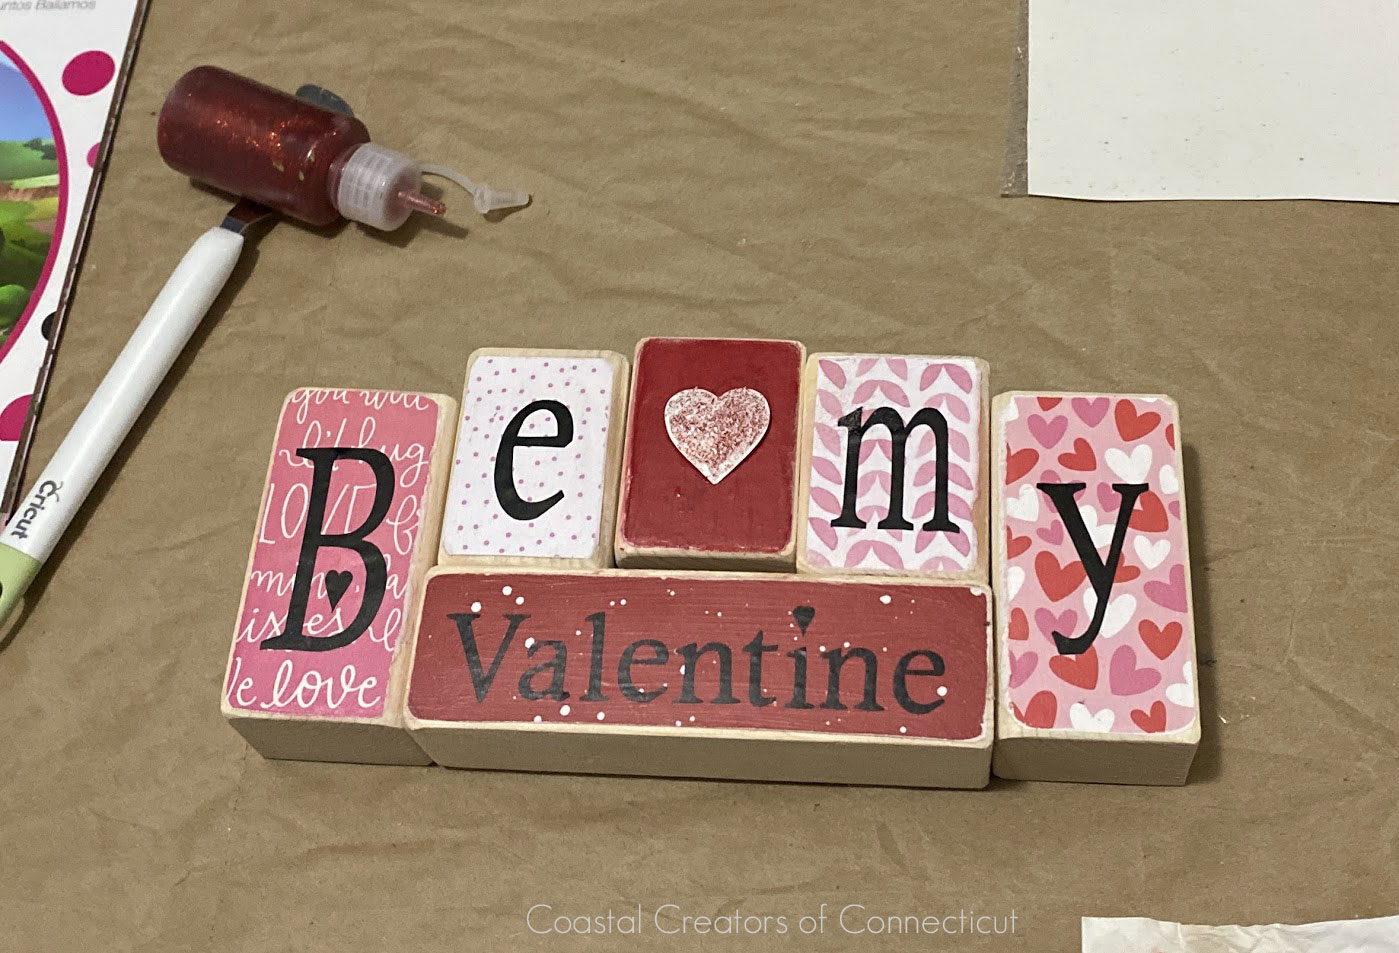
These cute handmade, wood blocks sets are easy to make. You can give them away as gifts, to your grandkids, or even teach a craft class, like I did. They only require scrap pieces of wood or 2x4s so they are cheap to make. Don’t let anyone charge you $30 a set on Etsy for these decorative wood blocks when you can make them yourself for a few dollars.

Disclaimer: this article contains affiliate links. Please read our affiliate policies.

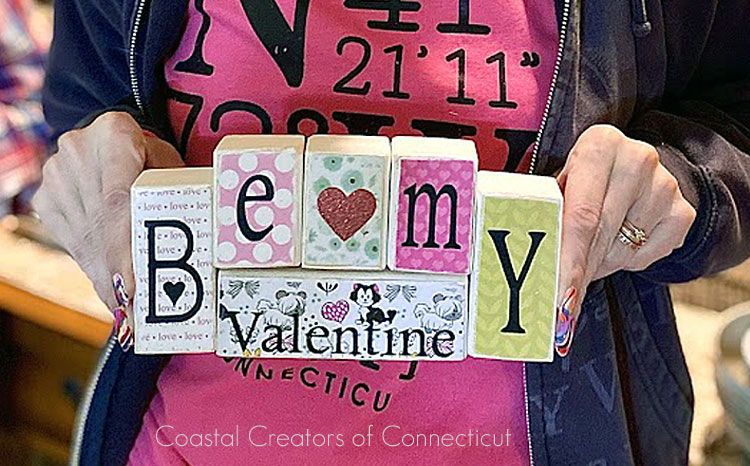
Since they are reversible they have multiple uses. You can put different holidays on each side, seasonal wording, or even Happy Birthday or Happy Anniversary.

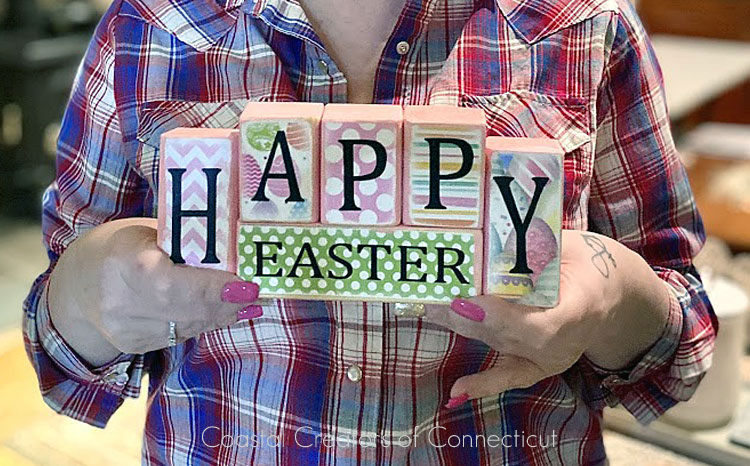
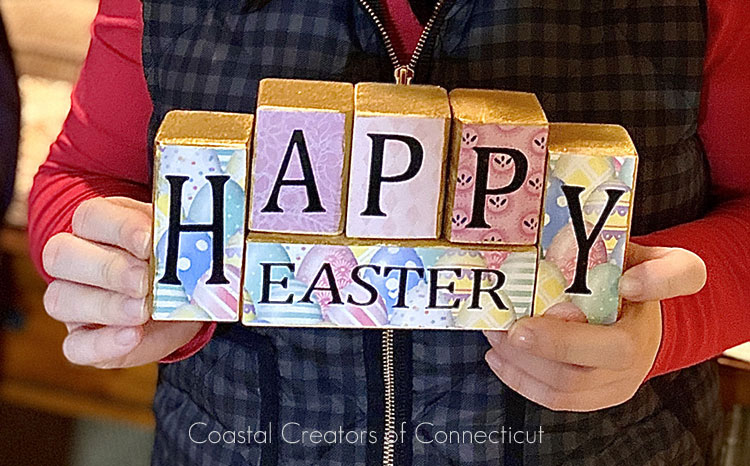
Kids love them! They are fun to decorate your home with to give a mantle or shelf a burst of color during a fun holiday like Valentine’s Day, St. Patrick’s Day, Easter, Fourth of July, Halloween, Thanksgiving, or Christmas.

Wood Blocks Supplies


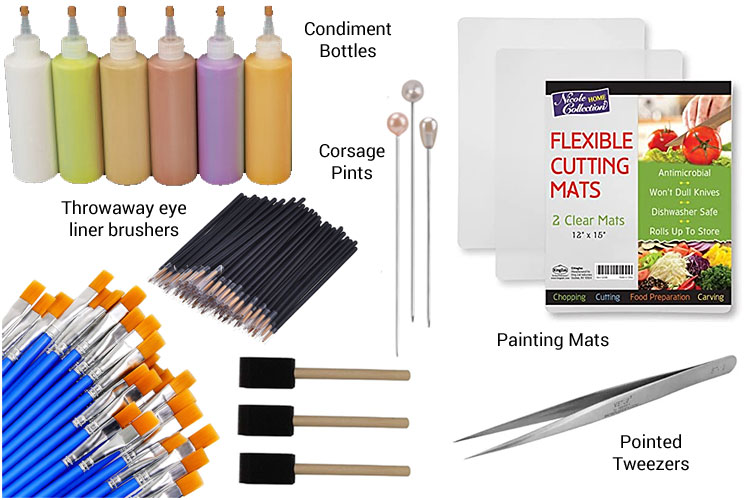
Wood Blocks Supplies:

  • 2×4 pine boards or scrap wood
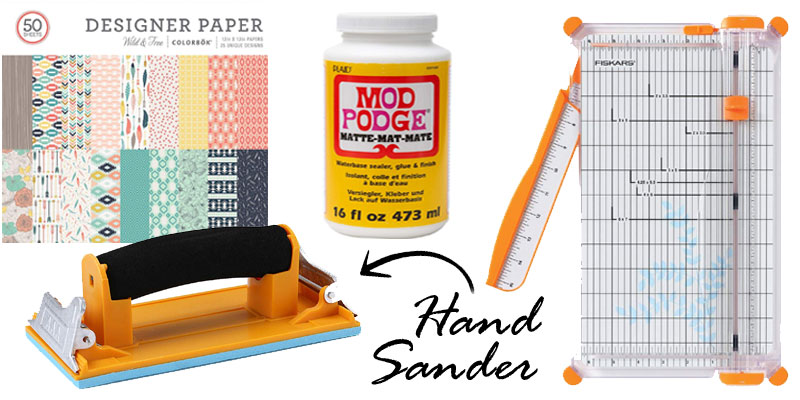
  • Scrapbook paper (Colorbok has a nice selection)
  • Modge Podge (suggested: Matte or Satin finish)
  • Acrylic paints
  • Burnishing tool
  • Vinyl letters
  • Hand Sander (great because you can replace the sand paper)

Vinyl letters are made using a Cricut vinyl cutter and black vinyl. You won’t be able to find these unique letters if you buy pre-made vinyl letters. I used Calisto MT and Cupid de Locke fonts to make my letters.

Suggested Vinyl: I prefer 651 ORACAL but just about any matte vinyl will do. You can use removable vinyl if you want to move the letters easily. Otherwise, use permanent vinyl.


Wood Blocks Tools:

  • Miter saw or hand saw
  • Paper cutter or scissors
  • Paint brushes
  • Vinyl cutter like a Cricut or Silhouette

Wood Blocks Dimensions:

  • Tall Blocks 1-1/4″ x 1-1/2″ x 3-1/4″
  • Short Blocks 1-1/4″ x 1-1/2″ x 2-1/4″
  • Wide Blocks 1-1/4″ x 1-1/2″ x 5″

How to Make a Set of Reversible Wood Blocks

Wood Blocks Directions:

If you are making a lot of these decorative wood block sets, you will probably want to use 2×4 pine boards. Cut – or rip – the 2×4 down the middle using a miter saw. Then cut each piece using the measurements above.

Cut the Scrap Paper: Cut the papers the same size as the block. You can trim off the edges with scissors later or use the hand sander to make the edges rustic and distressed.

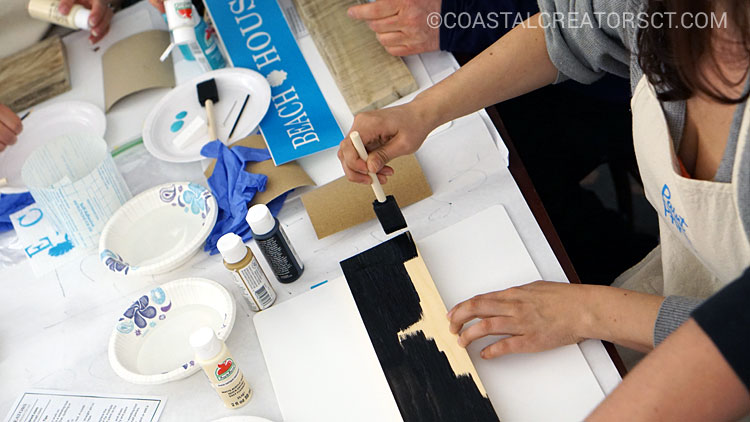
Paint the Blocks: you can paint the blocks if you don’t have scrap paper. Pastels or Bright colors seem to work the best. Another idea is to paint the block black and then add a color on top so you have a black edge. You could also paint the block and use black or white paint or a Sharpie on the edges. Paint the sides or leave them unpainted.

How you decorate your blocks is all based on our personal preference and taste.

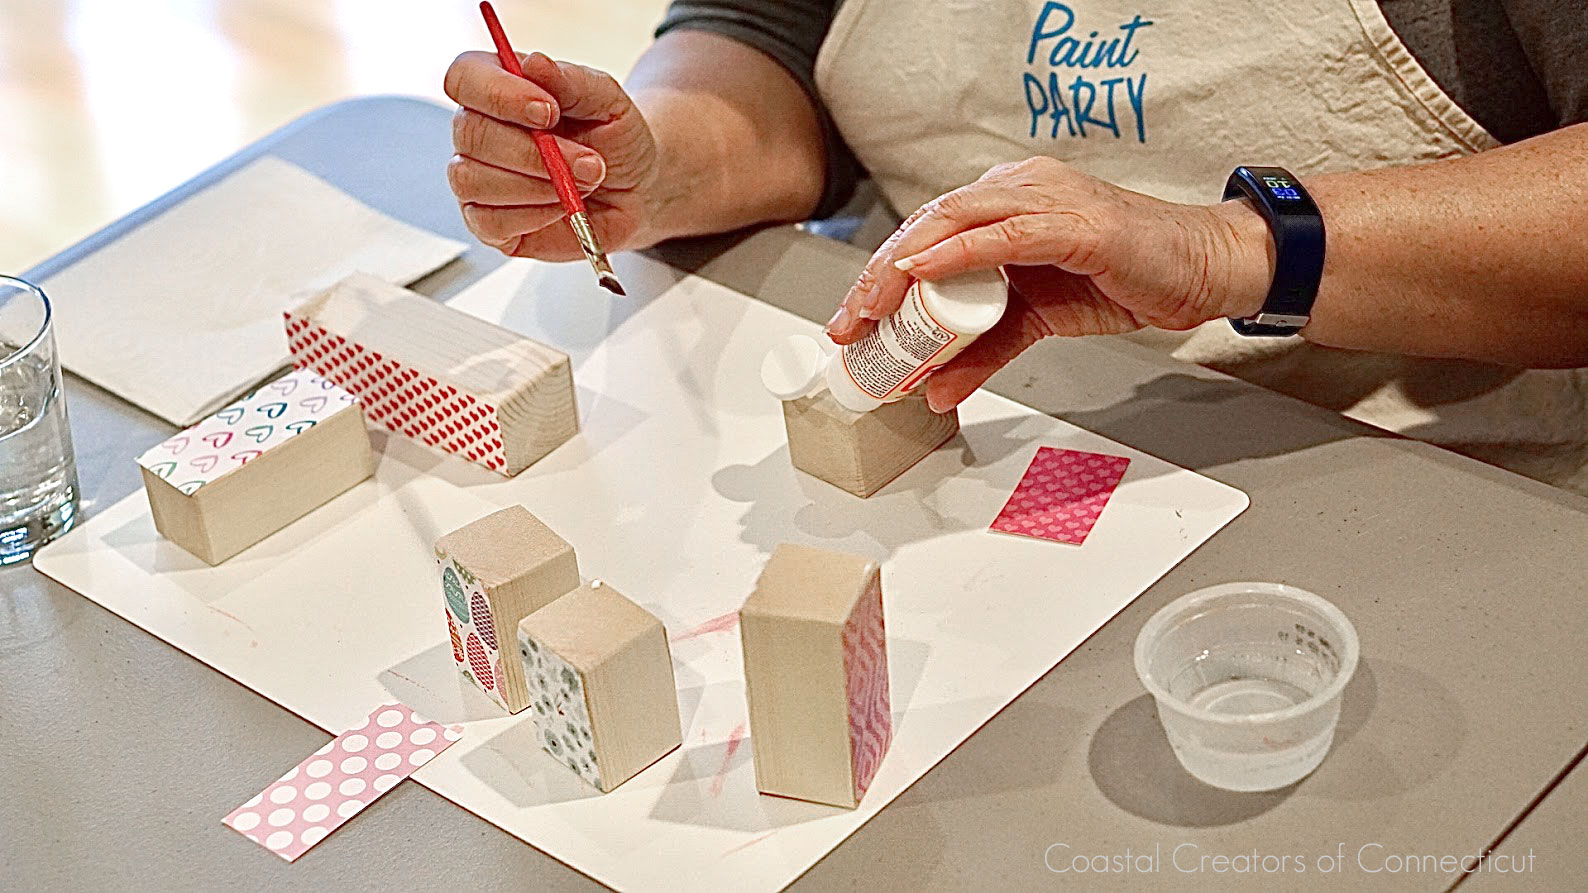
Attach the Scrap Paper: Using Modge Podge and a paint brush, apply to one end of a block first. Put the scrapbook paper piece down on one end and position it in place. Then add the rest of the Modge Podge on the other end and smooth the paper down. Do this to make sure you don’t get wrinkles. I then used a Burnishing tool to make sure there were no bubbles.

How to Make a Set of Reversible Wood Blocks

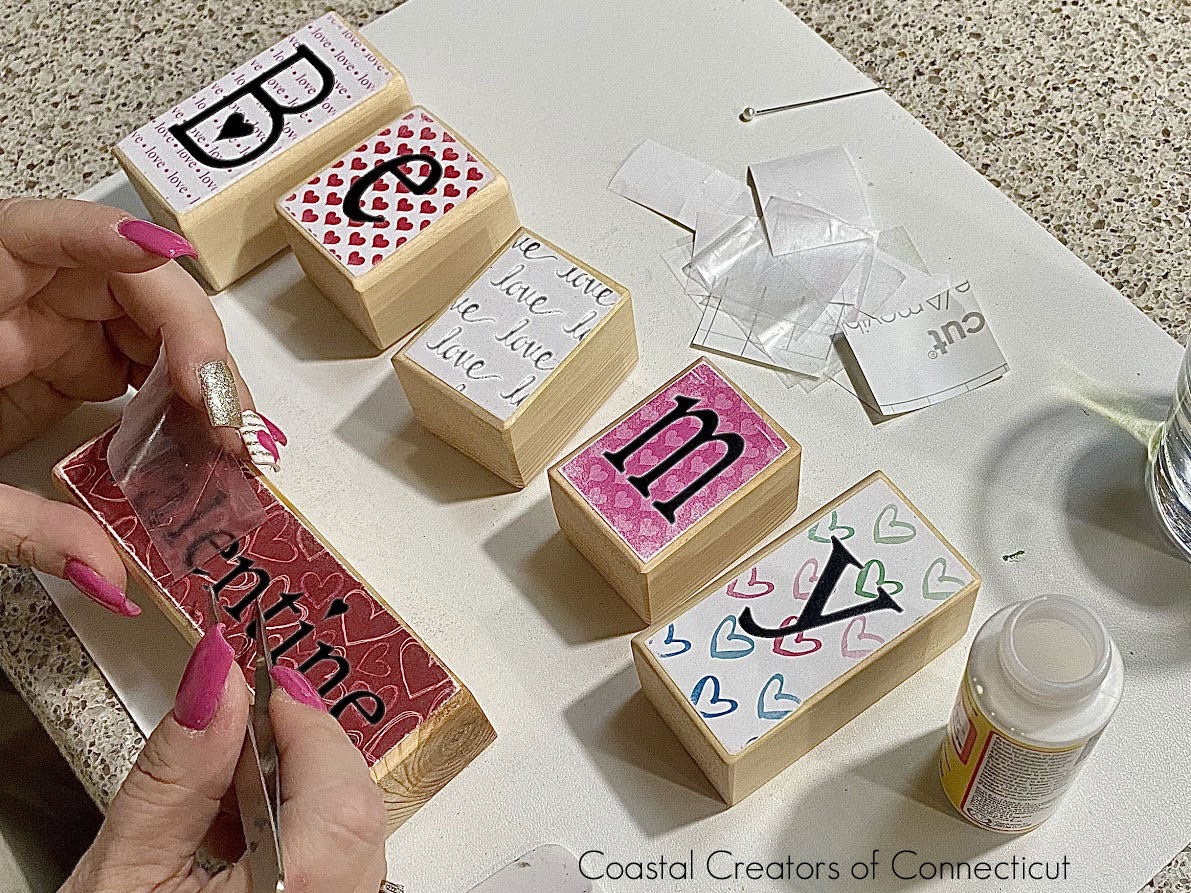
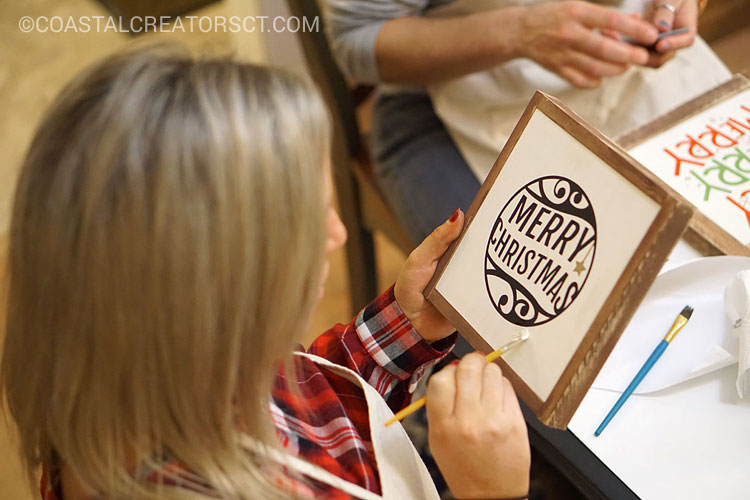
Attach the Letters: Once the letters are cut out, you will add each letter individually to each block.

How to Make a Set of Reversible Wood Blocks


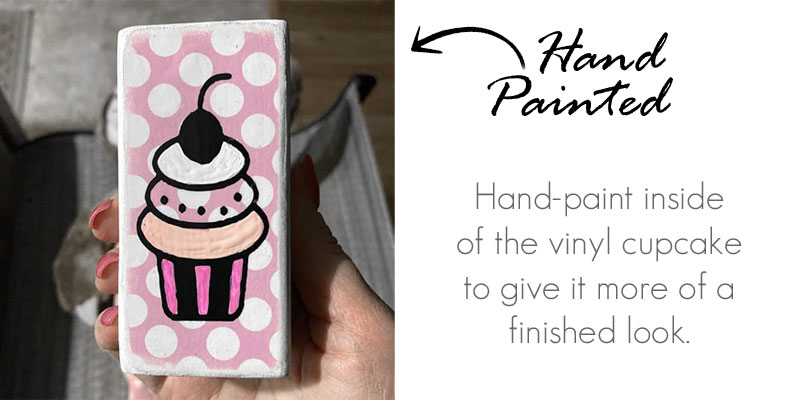
The Happy Birthday block set that was slightly larger. For the cupcake I cut out a vinyl design (from clipart, .png file), attached it to the block and then painted inside with acrylic paints to get the colors you see in the photo.

How to Make a Set of Reversible Wood Blocks

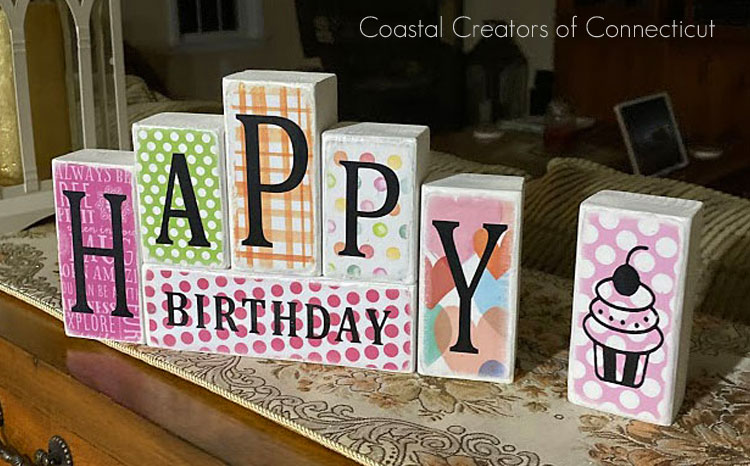
Update: After I  made the Happy Birthday block set, I realized I didn’t like the red dotted paper behind the word Birthday. I redid that block and painted the background a solid color and it looked better. Sometimes the paper can overwhelm the words. I didn’t choose the paper very well for the block. The patterns should be small and the letters should stand out.

How to Make a Set of Reversible Wood Blocks

Feel free to make your own set of wood blocks, sell them or give them away as gifts.

How to Host a Fun Wood Sign Making Party

Wood signs are so much fun to make. Hosting a wood DIY sign making party is a way for friends and family to get together to enjoy some crafting fun in a relaxed setting.

You can invite guests to your home, our home, host a party at a restaurant, library or other meeting place. Use a party for a fundraiser or just a fun night out. Everyone who attends get to make a wood sign that they can keep or giveaway.

Disclaimer: this article contains affiliate links. Please read our affiliate policies.

How to Host a Fun Wood Sign Making Party

When you host a party you should provide multiple designs so your attendees will have a good variety to to choose from. We suggest that you either provide pre-made stencils or sticker stencils you make using your Cricut, Silhouette, or other vinyl cutter. Using a sticker stencil cuts out a lot of the bleeds you would get if you used regular stencils.

You will need a stencil for each person and if you are using vinyl sticker stencils you will want to make sure to have some extra in case someone makes a mistake (it always happens).

Remember! Your attendees (or students) may not be as crafty or have any artistic ability so you need to think of everyone as a beginner and try to remove as many things that would cause them stress as you can. You want to make it fun for them.

How to Host a Fun Wood Sign Making Party

Where to Get Free SVG Files

Here is a list of great sites that offer free SVG files you can use for your sign making party.

  • freesvgdesigns.com
  • lovesvg.com
  • caluyadesign.com
  • fontbundles.net
  • happinessishomemade.net
  • shopcraftables.com
  • thegirlcreative.com

Take a look at some of the signs our students have made in our wood sign making classes. Looking at the smiles on their faces show you just how much find they had.

Students Making Wood Signs

Students Making Wood Signs

Wood Sign Making Party Supplies

You will need a variety of supplies to teach a wood sign-making class.

Large paint brushes. We like wide flat brushes for painting. We found that our students like this method the most.

Tiny paint brushes. We suggest these throwaway eye liner brushes that can be used to clean up any paint bleeds. They are super cheap, around 9 cent each.

Makeup Sponge Wedges. You can have students dab on the paint instead of paint with a paint brush. You found good ones at Dollar Tree. They are also super cheap, especially if you get them for $1 at Dollar Tree.

Acrylic Paints. Our favorite is the Apple Barrel brand. They are cheap at Walmart at only 50 cent a bottle. But, if you want to save even more money, buying house paint at Lowes or Home Depot. We buy the gallon size when it is on sale and it last a year. We pour the paints into condiment bottles. That way you can have them lined up on a table and the students can see the colors.

TIP: Limit the amount of colors you offer. If you have them in the condiment bottles they are easy to see and they know that is what they get. Too many choices can cause confusion for your students.

Wood Sign Making Party Supplies

Paint Mats. We put out one for each students. These are made out of plastic and you will find them listed as flexible kitchen cutting mats. They are sold in packs or 2 or 3. They are easy to clean and then you don’t have to worry so much about paint getting on the table or buying table clothes.

Table Cloths. If you don’t have the paint mats we suggest you can always go to the dollar store and get through away plastic tablecloths.

Throw-away sponge paint brushes. This is another option but we found students didn’t like this so much. These are also cheap and can be found at Michael’s, Walmart, Amazon and more.

Paper plates. We suggest everyone has a paper plate and only put dollops of paint of each color on their plates.

Paper towels. We use the Select-a-Roll paper towels and have one section folded next to their mat.

Water containers. We find that yogurt cups make great paint brush containers but these deli food containers work well too. Make sure you remind your students to always keep their brushes in the water so they don’t dry out. We find this is something they do not think about and have to be reminded about. You can also just put one water container in between every 2 people.

Corsage or Hat Pins. You probably won’t have enough weeding tools for everyone to use so corsage pins (or hat pins) work really well to weed vinyl sticker stencils. Hat pins are longer and have a large head. You can also buy weeding tools in bulk if you choose.

Pointed Tweezers. Pointed Tweezers are often needed to help pick out small pieces of vinyl off of the painted wood. You can buy them in bulk really cheap. Make sure you have a pair of tweezers for every two people.

Wood. We like to use pine wood. It is easy to cut with a circular saw or manual saw.

Stencils. you can purchase pre-made stencils at Walmart, Joannes, Michaels or online. You can also make vinyl sticker stencils using your Cricut, Silhouette, or other vinyl cutter. Using a sticker stencil cuts out a lot of the bleeds you would get if you used regular stencils. Remember, you will need a stencil for each person.

How to Host a Fun Wood Sign Making Party

How to Host a Fun Wood Sign Making Party

How to Take Party Registrations

If you are teaching a class to make money you will probably want a registration form. If you don’t have a website you may be wondering how you can do this.

You can use Google forms to create a registration form. Google makes it easy and you can set it up so you are notified when students sign up. This gives you a way to know exactly how many people are coming too.

What to include in your form

I suggest you ask for name, email and phone number only.

Text Reminders: These days many people have to be reminded multiple times to show up for a class. I suggest you send everyone a text message one week and 1 day before the class. I have even had to send text reminders the day of the class too.

It’s just the world we live in these days. You get text alerts from you hair salon and doctor so this is just what you will need to do if you want people to show up. I found that many people don’t check email so texting is the guaranteed way to get right in front of them.

Respond Using a Text Service

I use a service called Textedly. It is very affordable and it allows me to send all students one text. A lot of people don’t want others to see their phone so sending out one text to a group using your own phone number isn’t a great idea.

By using a text service you look more professional if you are running classes as a business. You can also grow your list of people who will receive text alerts from you, the same way you grow your email list.

How to Setup a Google Registration Form

Note: A Gmail account is required to use Google Forms.

1. Visit docs.google.com/forms

2. Click Start a new form and then Contact Information for the type.

3. Delete the Address information section. Click on it and you will see the trashcan icon.

4. You can change the color scheme by clicking on the paint palette icon at the top.


How to Setup a Google Form

Set a Google Form Confirmation Message

1. Click the Gear icon at the top.

2. Click Presentation.

3. Type the message you want them to see once they submit the form. You can also give them ability to change their response.

4. Click Save.

I always like to include links to follow me on social media or sign up for my text list in this message.  You can’t add HTML to link words but you can include your full links with https:// and they will show as clickable on the public side.

ALWAYS remind them about Cancellations.

TIP: Once you have created your form, register as if you were a student to see what they see. This way you can check for errors and fix them. You can always delete your entry later.

Set a Google Form Confirmation Message

Install the Form Limiter Add-on

Google Forms has something called Add-ons. You can add-on the formLimiter and you can then limit how many people attend your class. It also will send you an email when you have reached your limit.

1. Click the 3 dots at the top right and click on Add-ons.

2. Search for formLimiter.

3. Click on it and click Install.

4. Click Continue when prompted. It will ask you to log into your Gmail account.

5. Log into your Gmail account and click Allow.

6. You should see the Form Limiter window on the right. If you don’t click the Add-on icon at the top and click Set Limit.

7. Fill out the amount of people and also a message they will see when the class is full.

8. Check the box next to Email form owner when submissions are closed.

9. Click Save and enable.

You can always go back into this window and make changes as needed and click Save and Enable each time.


How to Limited Google Form Registrations


Hopefully now you will have a good guideline as to how to plan, organize and execute a sign making party. Good luck and happy painting.

  • « Previous Page
  • 1
  • …
  • 3
  • 4
  • 5

250th United States Anniversary Wholesale Laptop and Water Bottle Stickers Products

Wholesale 250th Anniversary Products for Retailers (America 1776–2026)

250th United States Anniversary Wholesale Bookmarks Products

The 250th Anniversary of the United States: A Semiquincentennial Moment

Coastal Christmas Trees

DIY Coastal Home Decor Ideas

Coastal Creators participate in the Amazon Services LLC Associates Program, an affiliate advertising program designed to provide a means for sites to earn advertising fees by advertising and linking to Amazon and other affiliate programs. Read more

  • HOME
  • BLOG
  • WHOLESALE
  • CONTACT

Copyright © 2026 · Coastal Creators · Our Policies