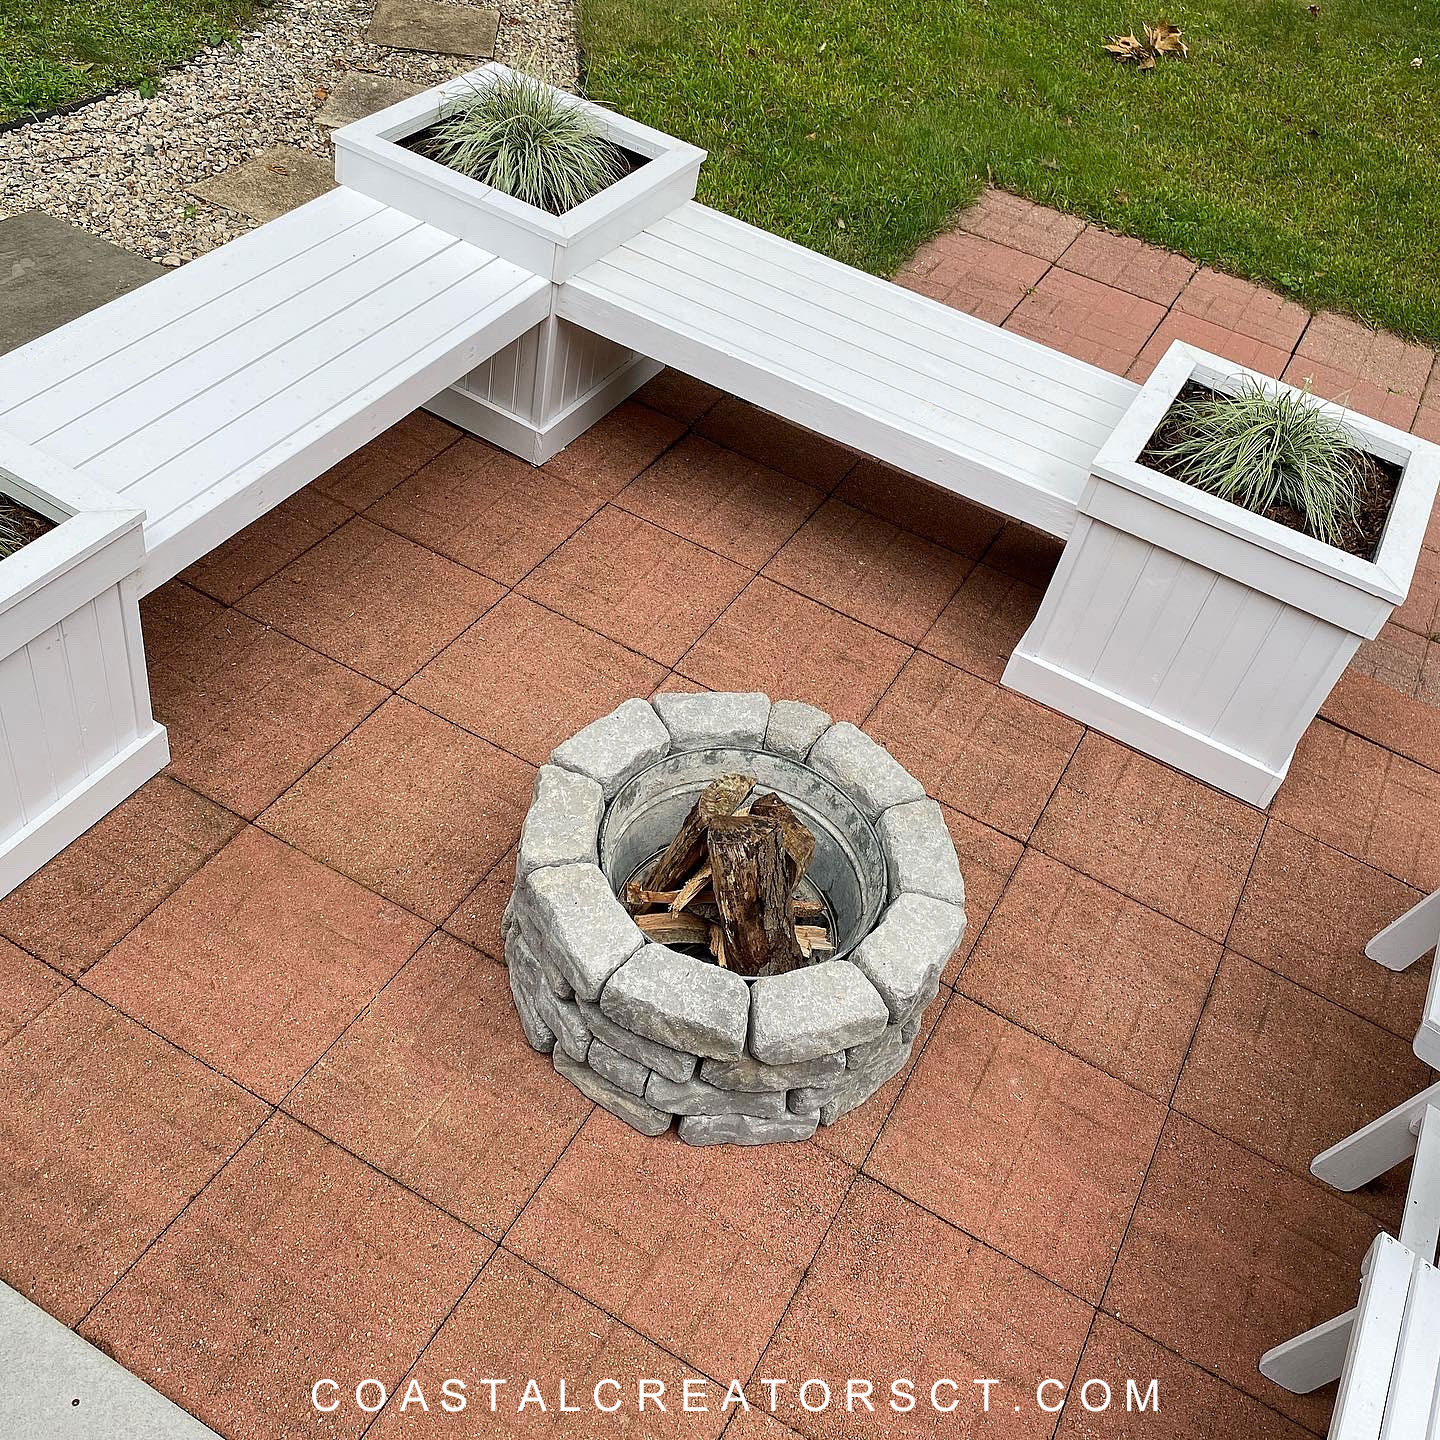
It’s easy to build a backyard fire pit for fun Fall nights and hours of Smore’s enjoyment. We built our patio fire pit in just about a hour. You can buy most of the supplies you need at your local hardware store (Ace, Lowe’s, Home Depot). The supplies list is minimal and you won’t need many tools. Building a fire pit should only take you about an hour (or maybe two) to complete so it’s a quick project even beginner DIYers can complete.
Safety First! You will want to make sure your fire pit is not going to be located under any low-hanging trees. Safety is always key when setting up your fire pit.
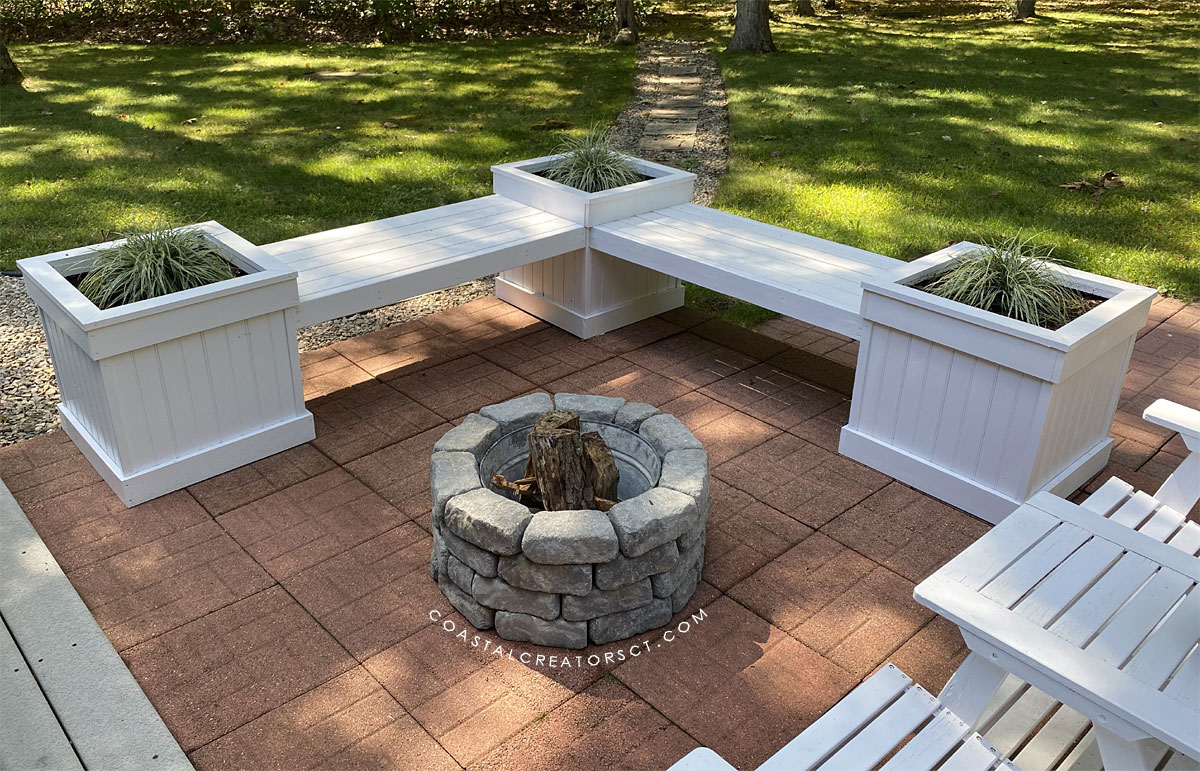
Your first step is to decide the best spot to place your fire pit. Because you will be using Flagstone wall blocks that are heavy, you won’t be moving your fire pit anytime soon. You will want to find a permanent area to build your fire pit. Will you build in the ground or above ground? We constructed our fire pit on our patio.
Fire Pit Supplies List
If you want to build our exact fire pit, here are the supplies we used. Our fire pit measures 18 inches in diameter by 12 inches in height.
- (39) Mini Flagstone Allegheny Retaining Wall Landscaping Blocks
- LOCTITE Pl500 Landscape Block Adhesive Off-White Landscape Construction Adhesive
- (3) Holland Red/Charcoal Concrete Pavers (bricks)
- Galvanized Metal Tub
- Metal Grate
- Heavy duty steel file
- Hammer
- Concrete/Brick Chisel
About the Galvanized Tub: You can buy a galvanized metal tub from Tractor Supply, Amazon, Lowes, or even Target stores. You can substitute a galvanized tub for an actual fire ring that has been specifically designed for DIY fire pits. Fire rings are often quite large though and since we wanted to keep our fire pit smaller, we went with the galvanized metal tub.
About the Metal Grate: We had on hand an old single burner from a propane stove that we used for our metal grate. You will probably want a raised metal grate of some sort to stack the wood on to keep it from the bottom of the tub. You could use an grate from an old grill, a portable camp fire grill, or a raised fire grate. Check out the free section on Craigslist, Facebook Marketplace or even your local Goodwill store and you may find something that can be used and it will save you money.
About the Retaining Wall Blocks: we used mini Flagstone Allegheny Retaining Wall Blocks to put around the galvanized tub. This created the wall for our fire pit. The common size of these blocks is 3-in x 8-in and the actual size is 3-in x 8.2-in.
Determine the Number of Landscaping Blocks Needed
To determine the number of landscaping blocks you will need to make a circular fire pit, just multiple the desired diameter by 3.14 then divide by the shortest length of the block. For the fire pit pictured, the greatest diameter was 18 inches at the top of the galvanized tub. So, 18 times 3.14 equal 56.52; 56.52 divided by 6 (which was the shortest length for the trapezoid block used) equal 9.42. If one does not have a predetermined diameter, just buy the number of blocks needed to make a circle close to the size fire pit desired without having to cut any blocks.
If you aren’t good with math equations, you can also “eye” it. You may not buy the exact number of block needed but you can always return or purchase more as needed. We purchased 39 landscaping blocks and had to cut three in half to make them fit.
Adjusting the Landscaping Blocks to Fit Properly
You may have to cut a few of your landscaping blocks to fit properly. In our fire pit we had to cut several blocks as shown in the photos. To cut a landscaping block, draw a line where it needs to be cut and then score that line using either a concrete/brick chisel; a heavy duty file; or, for more accurate cuts, a circular saw with a concrete blade. Once the block is scored, place the chisel on the score line and strike it with a hammer until the block splits.
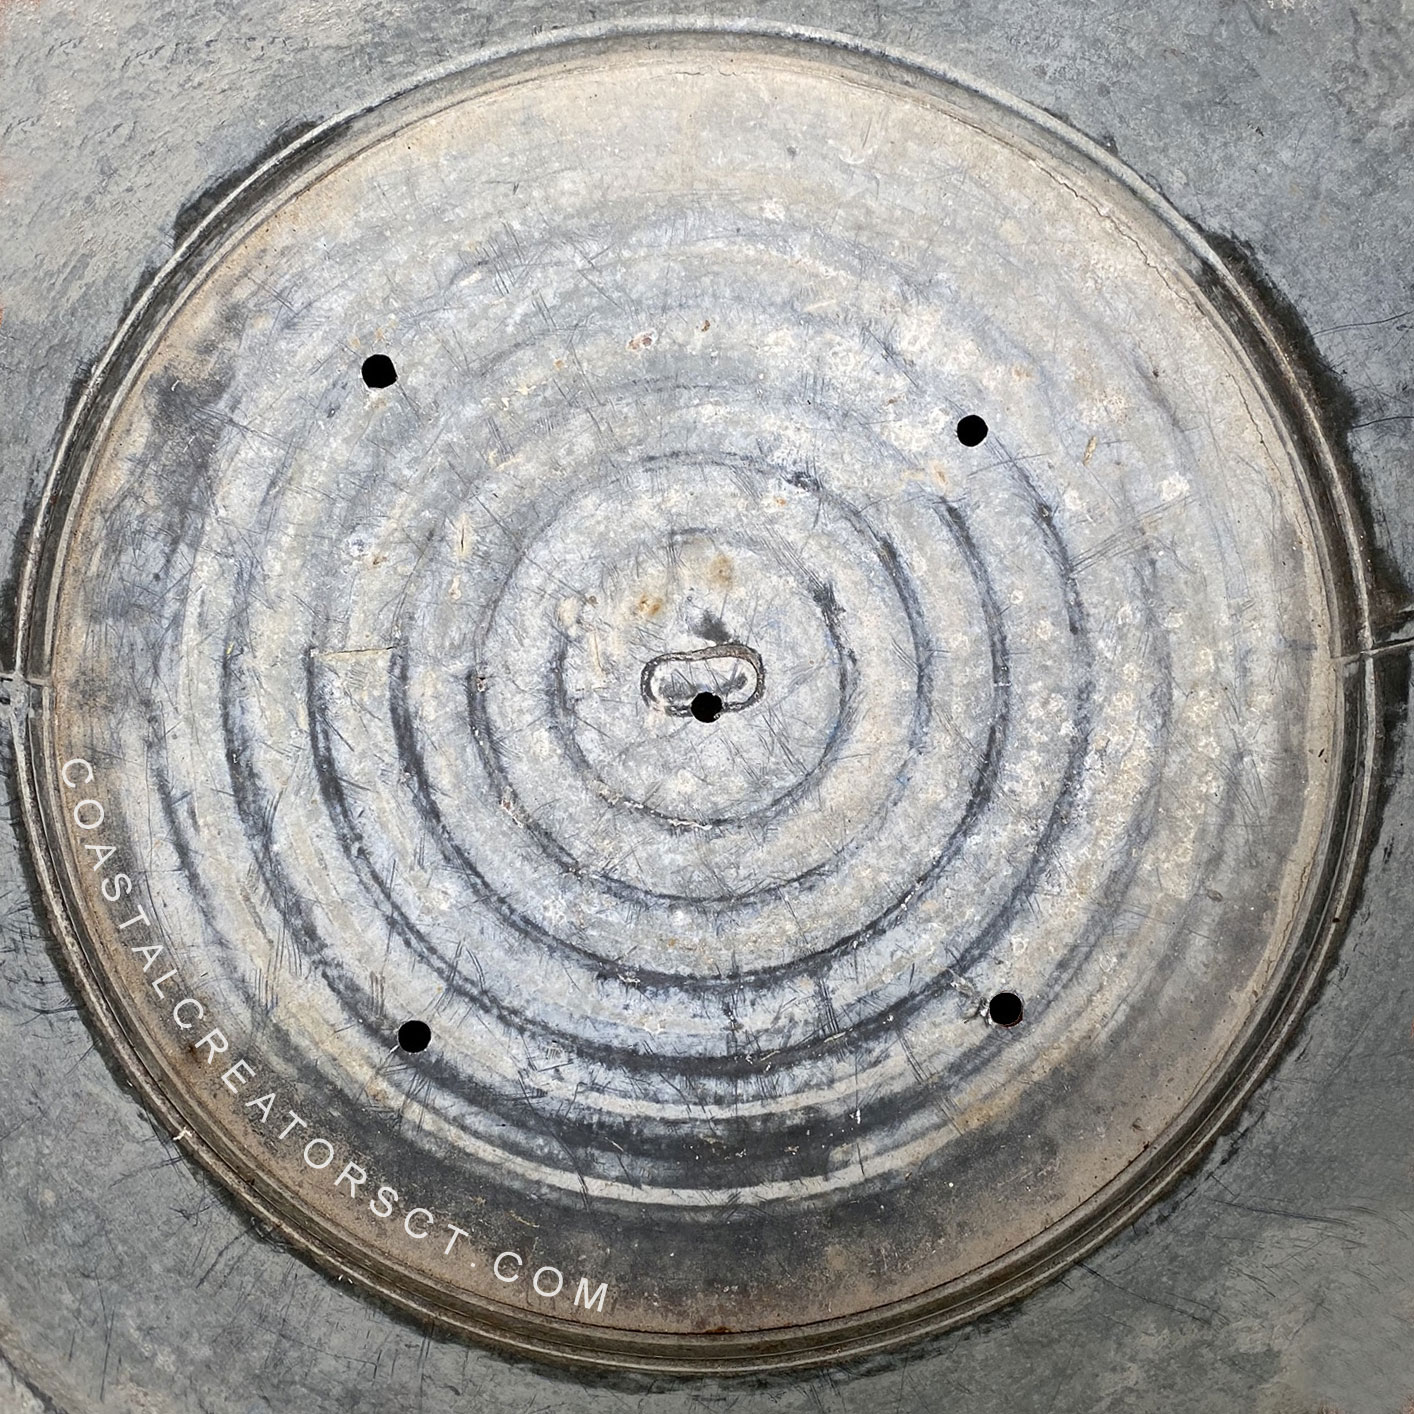
Fire Pit Drainage
It is a good idea to drill a few holes in the bottom of the galvanized tub for drainage. You don’t want rain water collecting in the bottom of your fire pit without any place to go.
Assembling the Fire Pit
After obtaining the number of landscaping blocks needed, it is time to assemble the fire pit.
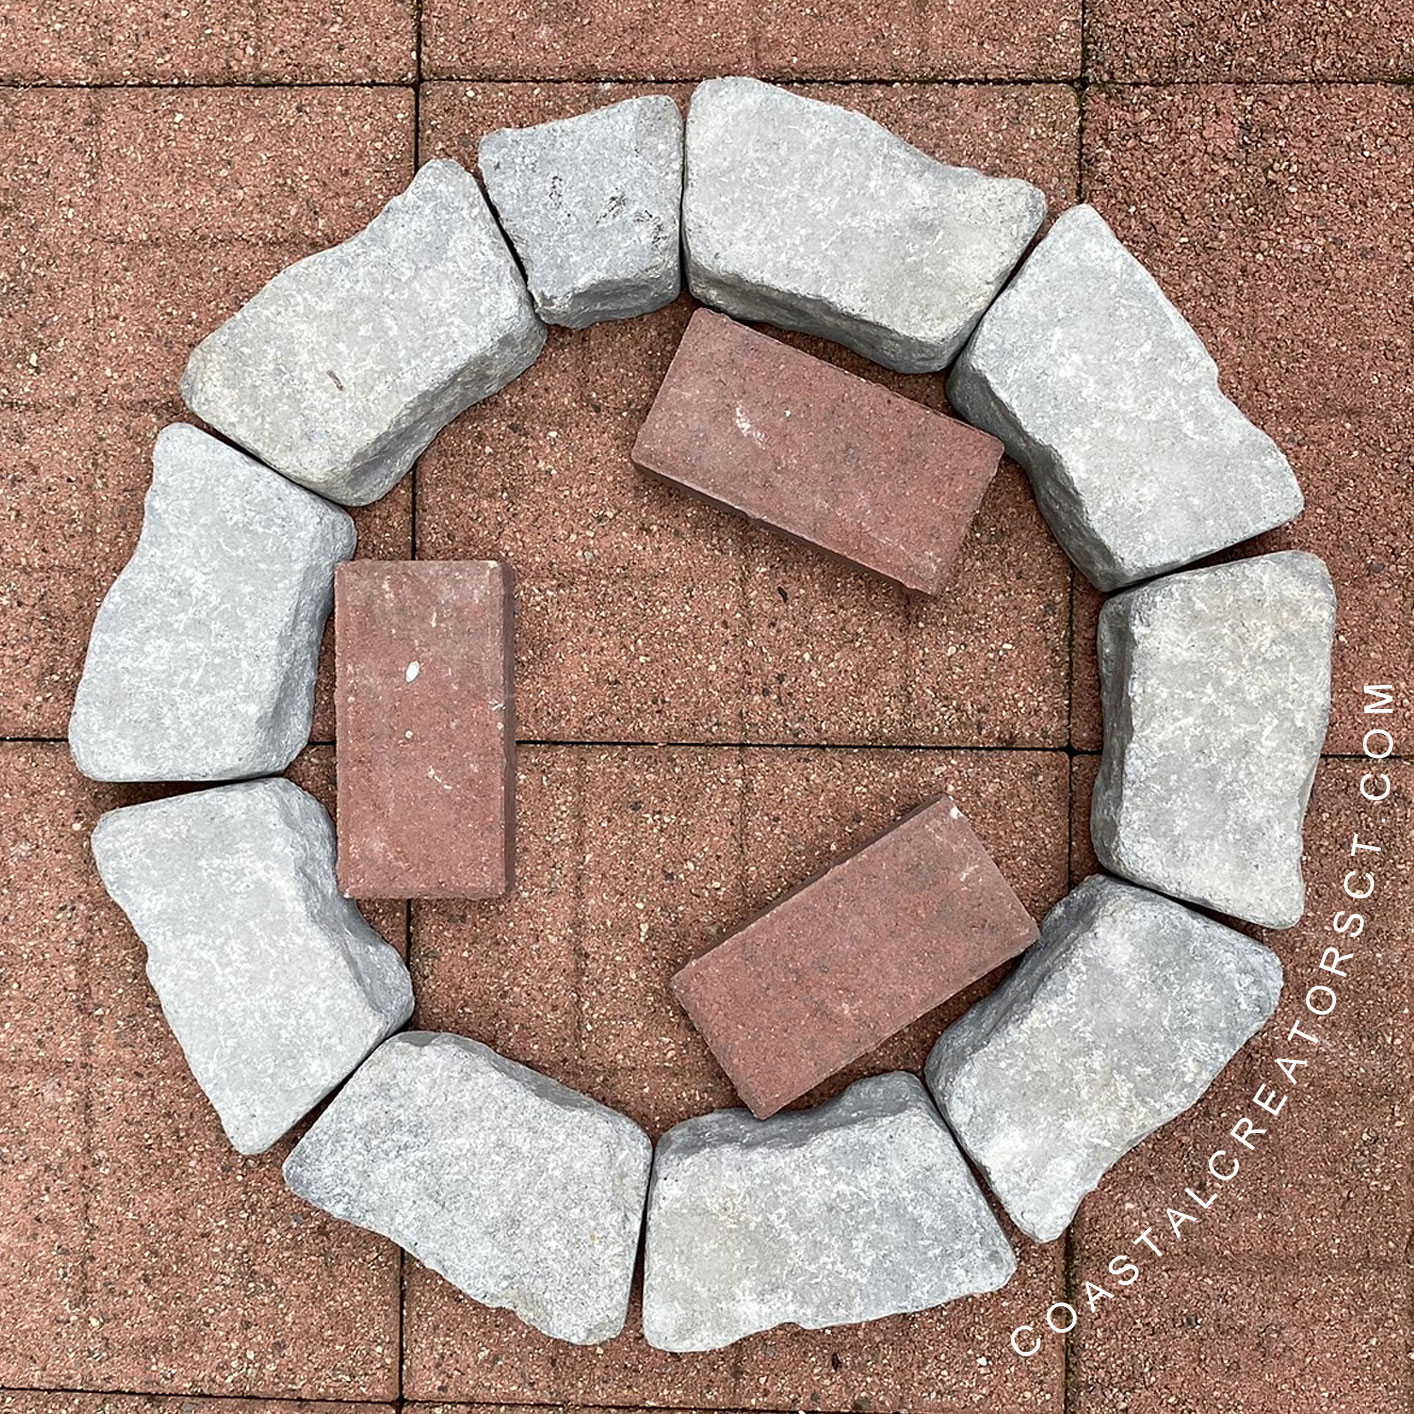
Place three concrete pavers (bricks) in the center of the area where you will construct the fire pit. The galvanized tub will sit on these pavers for support and ventilation once the fire pit is complete.
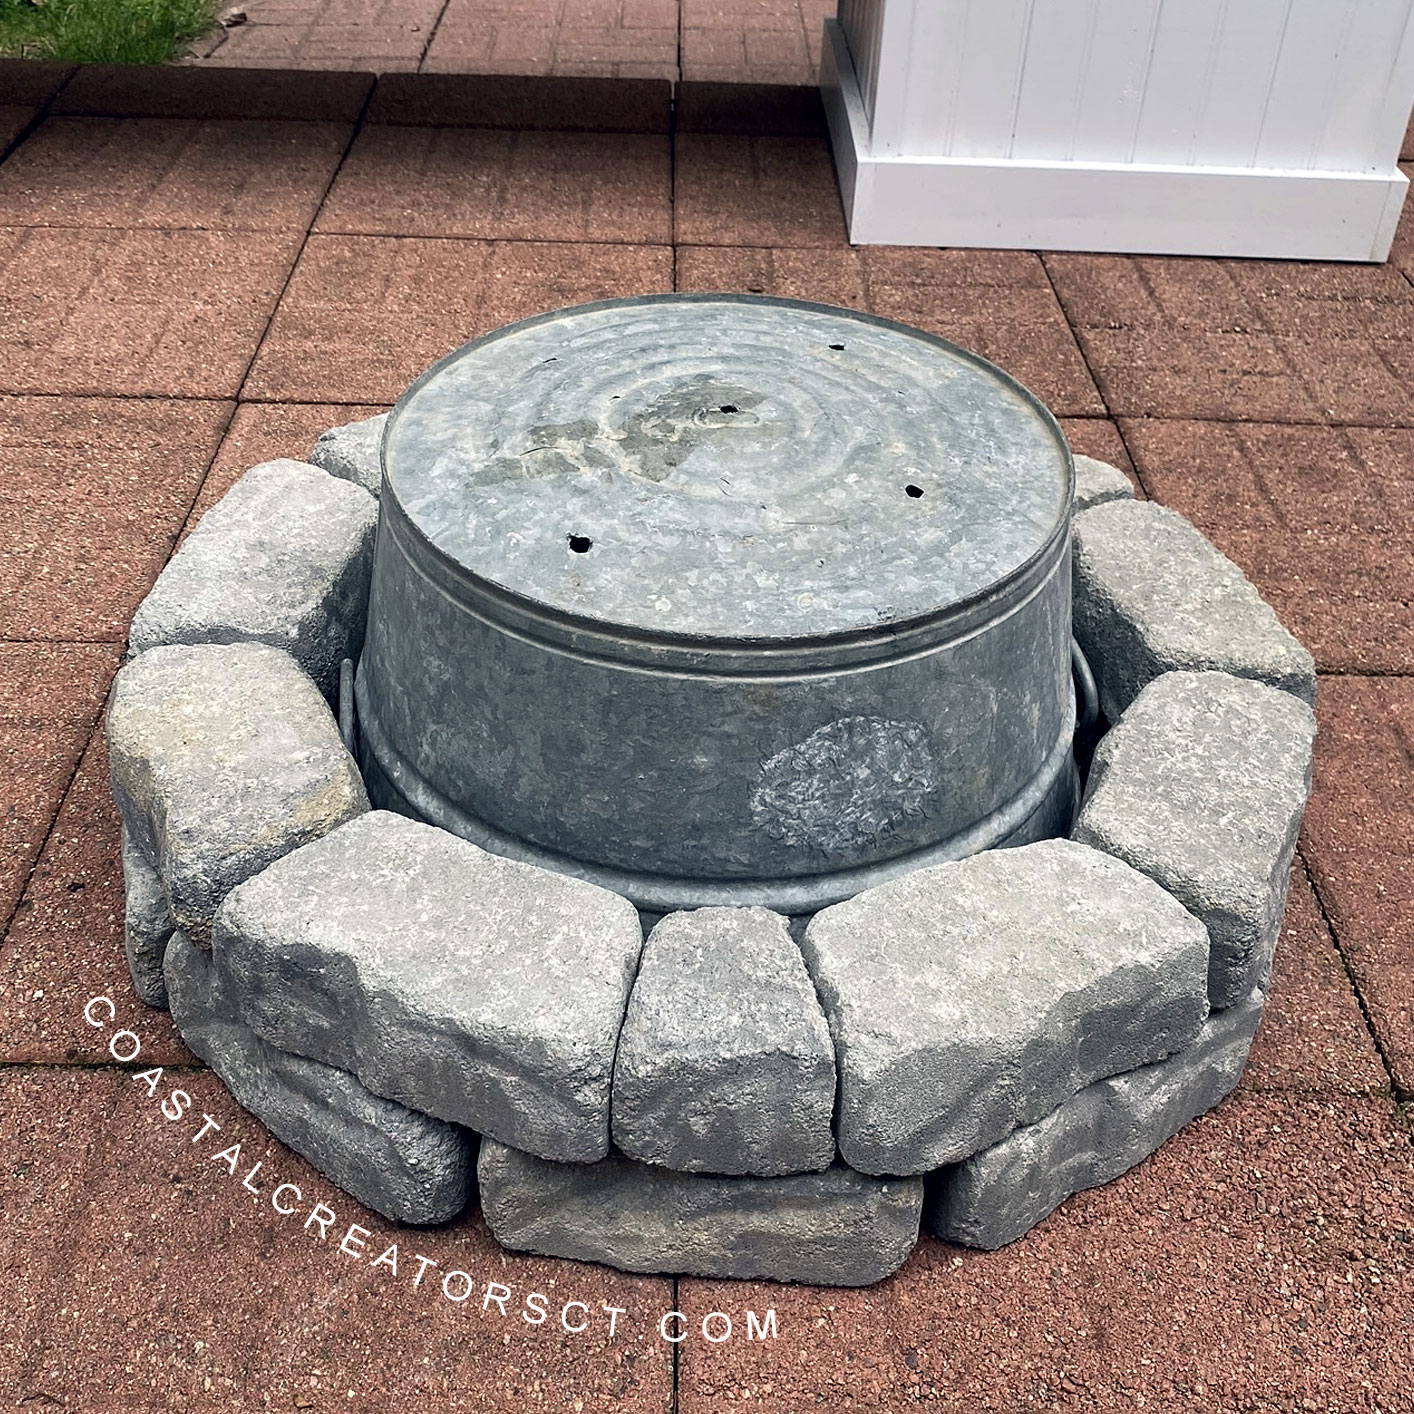
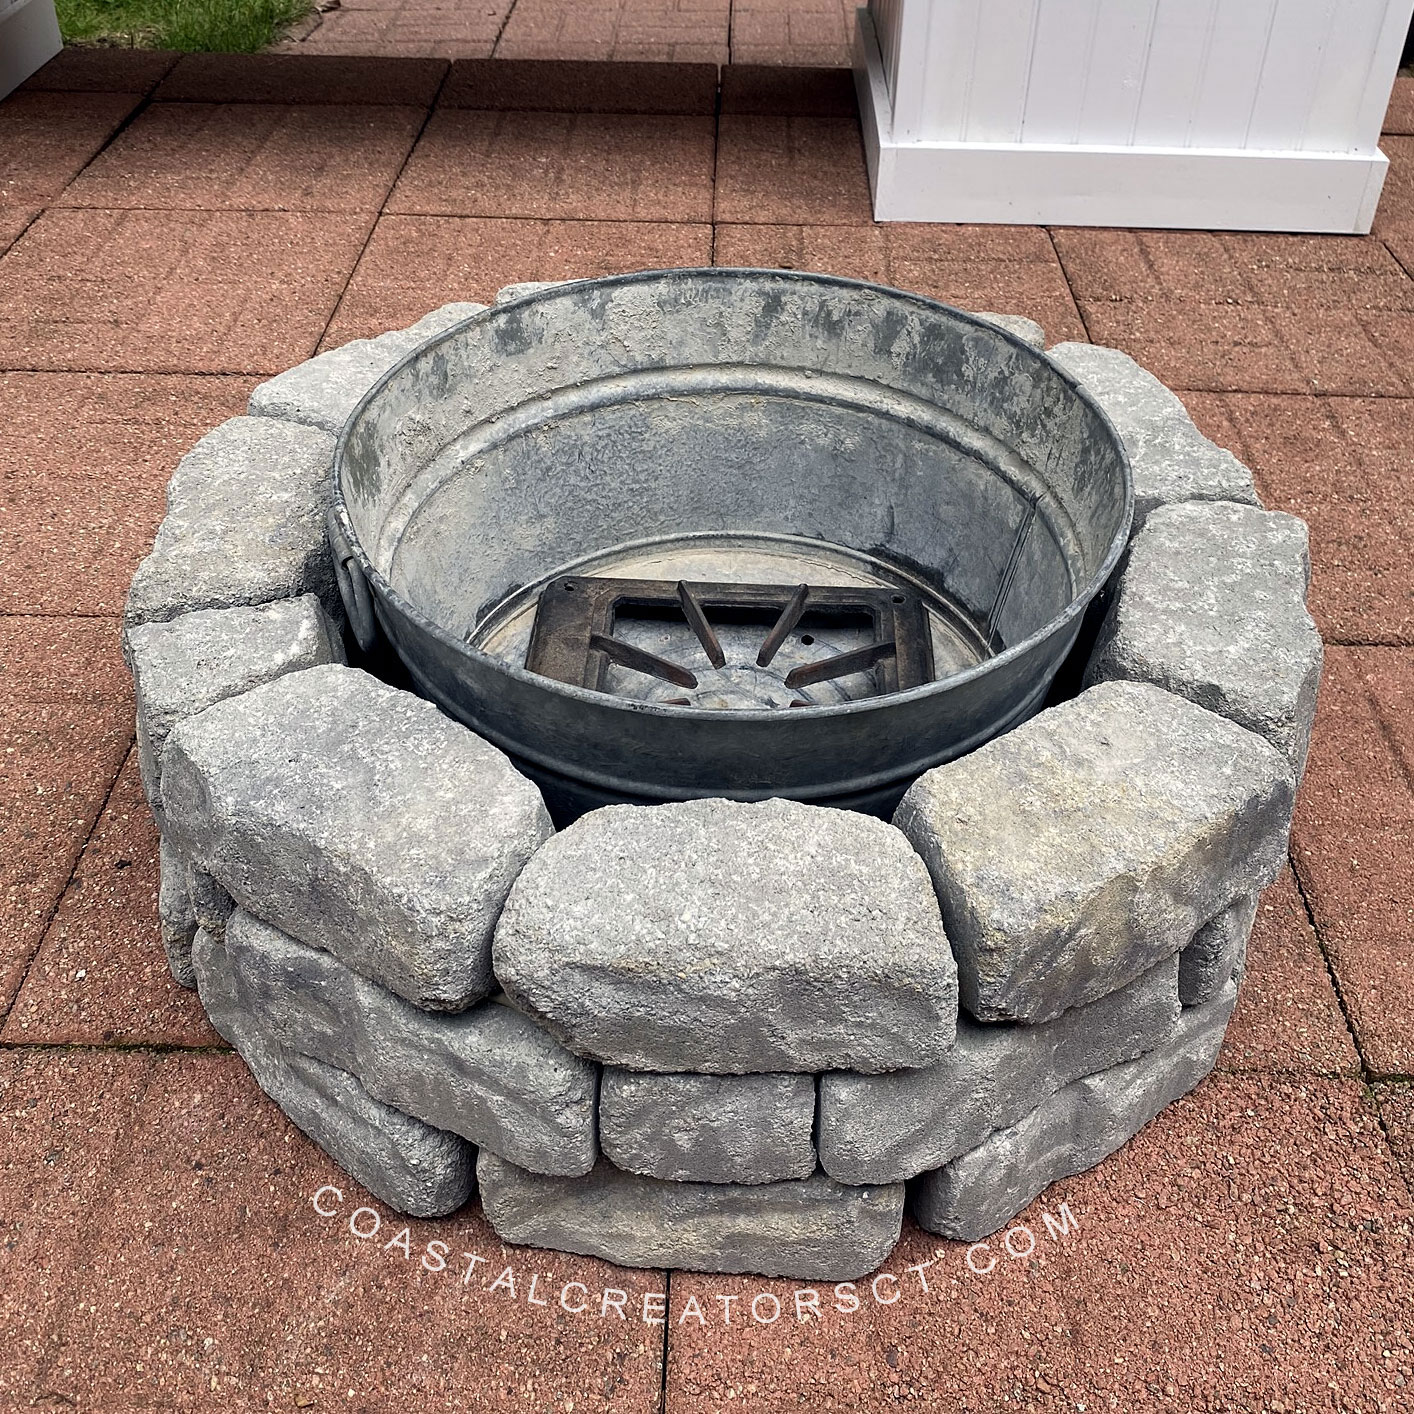
Place the galvanized tub upside down over-top of the pavers (bricks). By placing the tub upside down, you ensure that the first layer is the widest and will accommodate the largest widest of the tub when it is turned upright.
Lay the first row of blocks in the desired pattern.
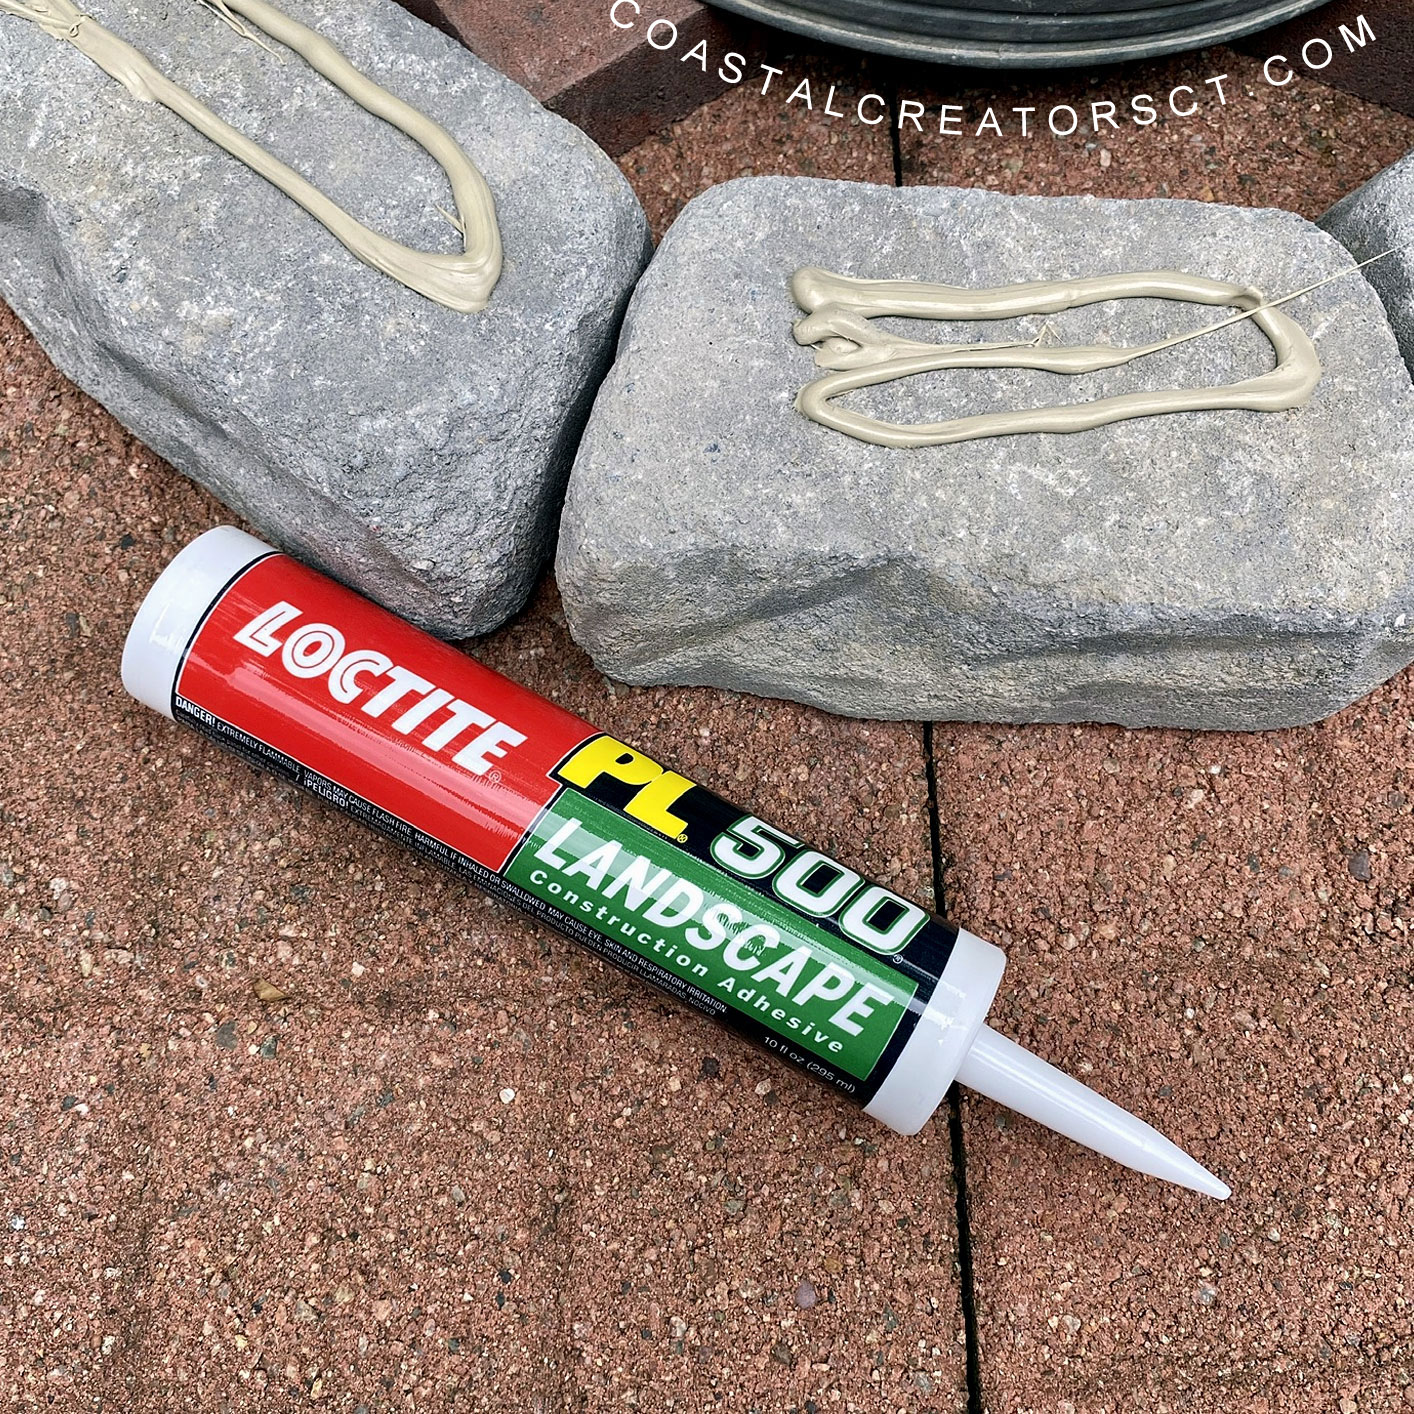
Apply Landscape Construction Adhesive to the top of each block and then add the second layer of blocks. Continue these steps until the desire height is reached.
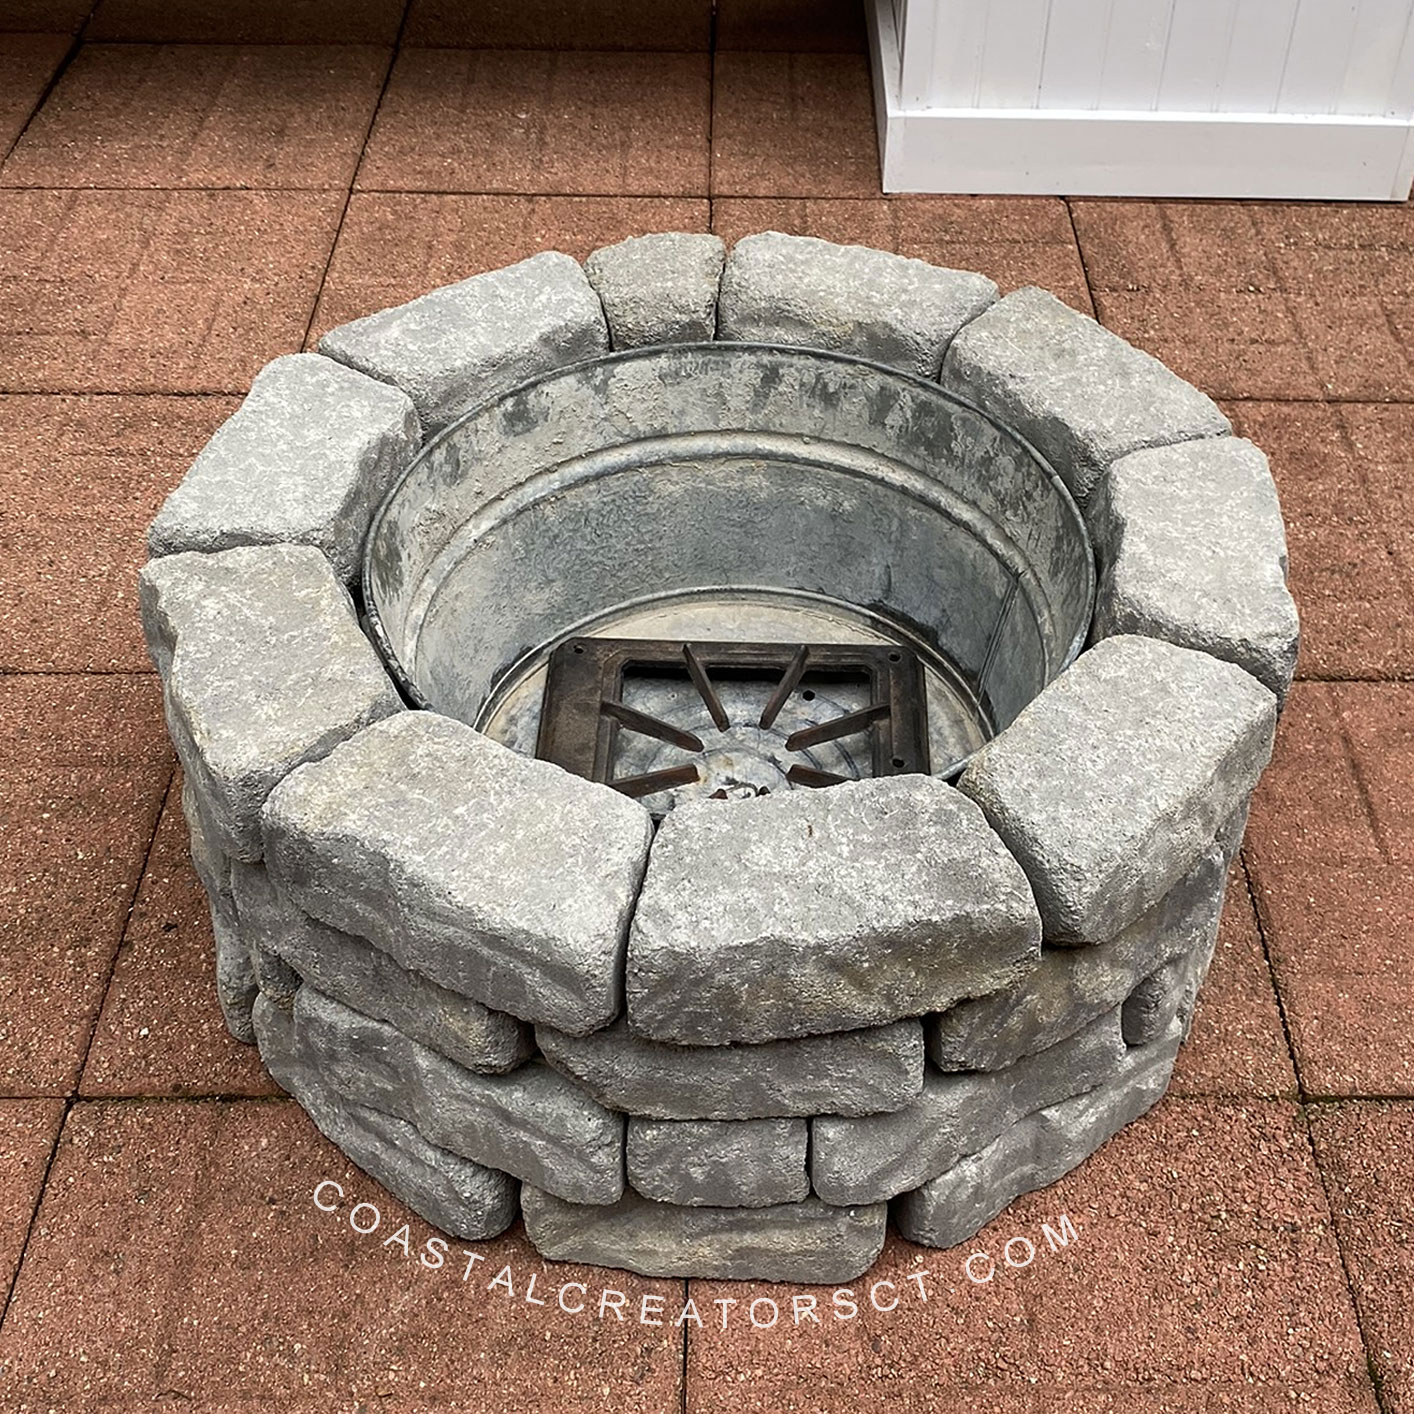
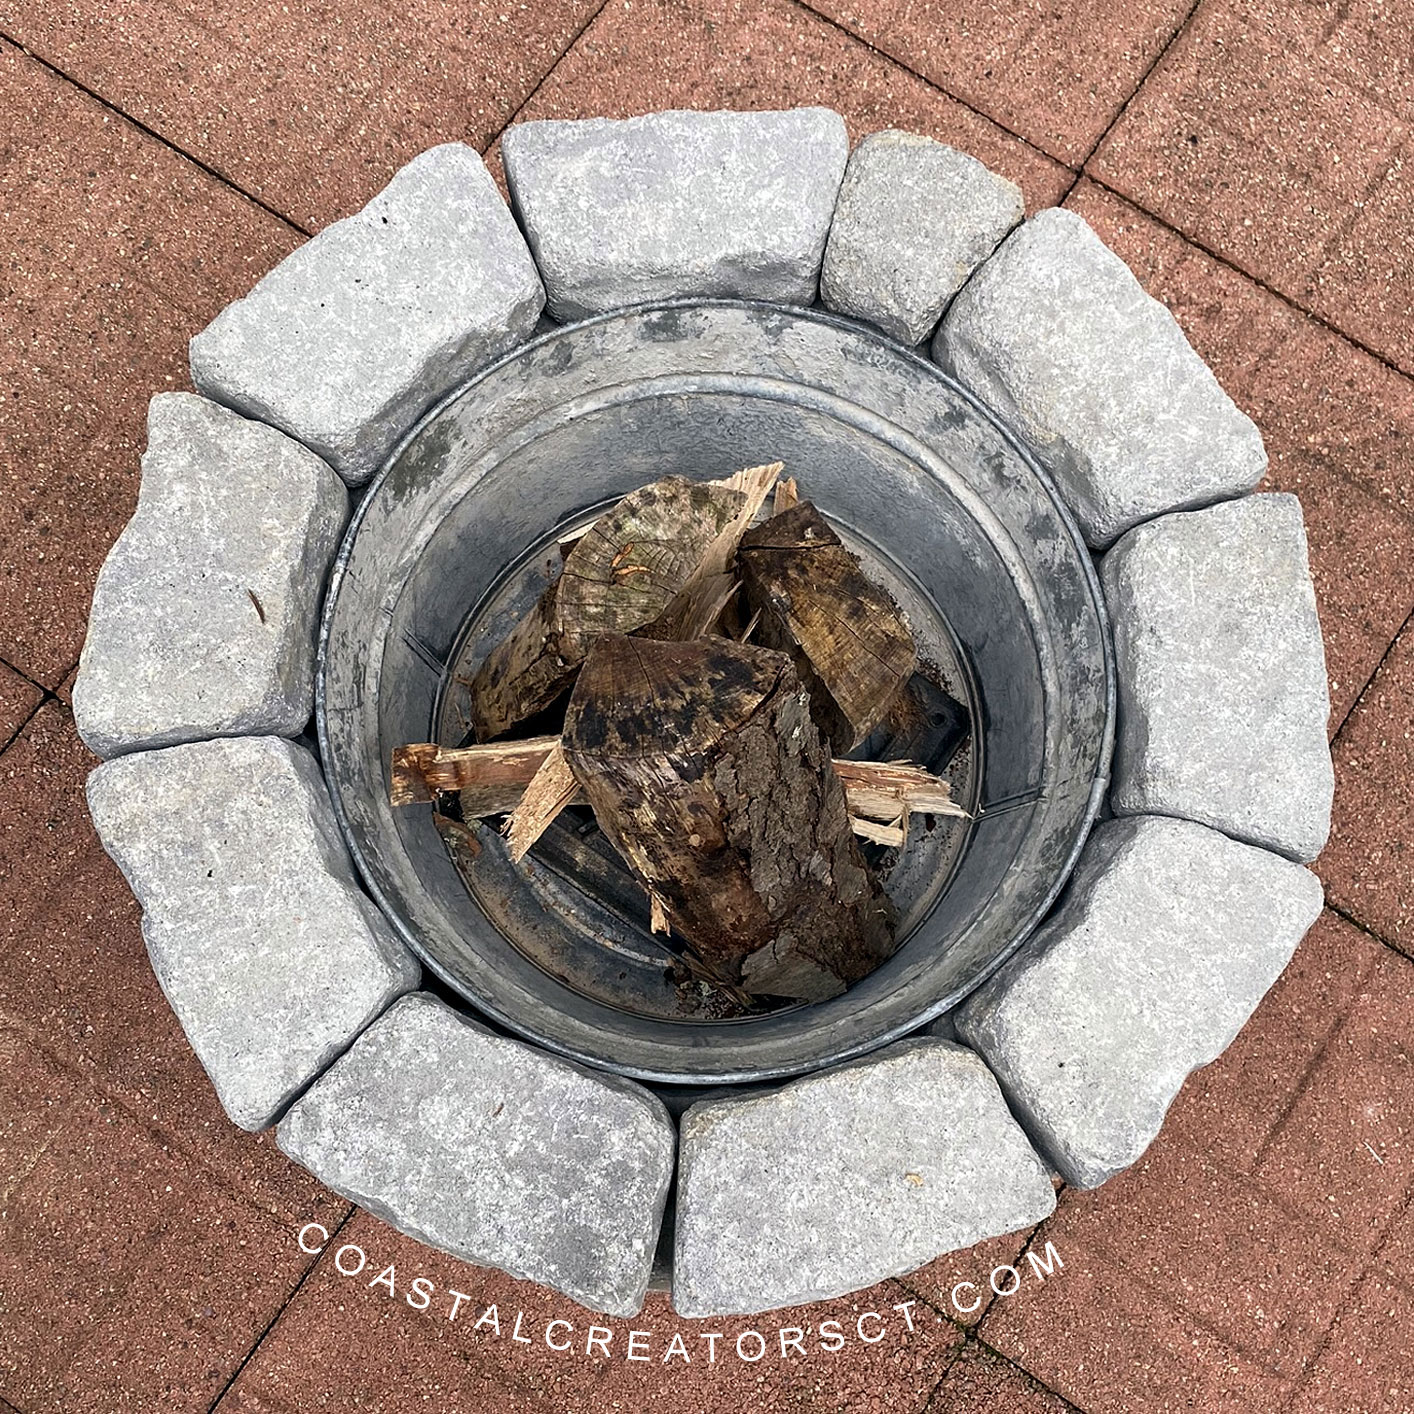
Place the metal grate inside, stack the wood and your fire pit is almost ready for use. We do suggest at that you give the Landscape Construction Adhesive 24 hours to completely dry.
Who will you share your fire pit with?
Leave a Reply