Coastal Creators of Connecticut

Coastal Creators of Connecticut coastalcreatorsct.com

  • HOME
  • BLOG
  • YOU TUBE
  • CONTACT
    • Our Policies

Build a Backyard Planter Bench (Free Plans)

We have a patio outside our kitchen and have been wanting to put a planter bench there for a long time but didn’t want to spend the money to buy a good quality planter. Good quality planter benches can run upwards of $1,000. Yes, you can get a planter bench for $100 that is made out of plastic but we wanted a solid wood planter bench. And yes, you can buy wood planter benches that might cost around $400 to $500 but we wanted a triple planters with 2 benches and weren’t ready to shell out $1,000! So when this happens, what is there to do about it? Make it yourself of course!

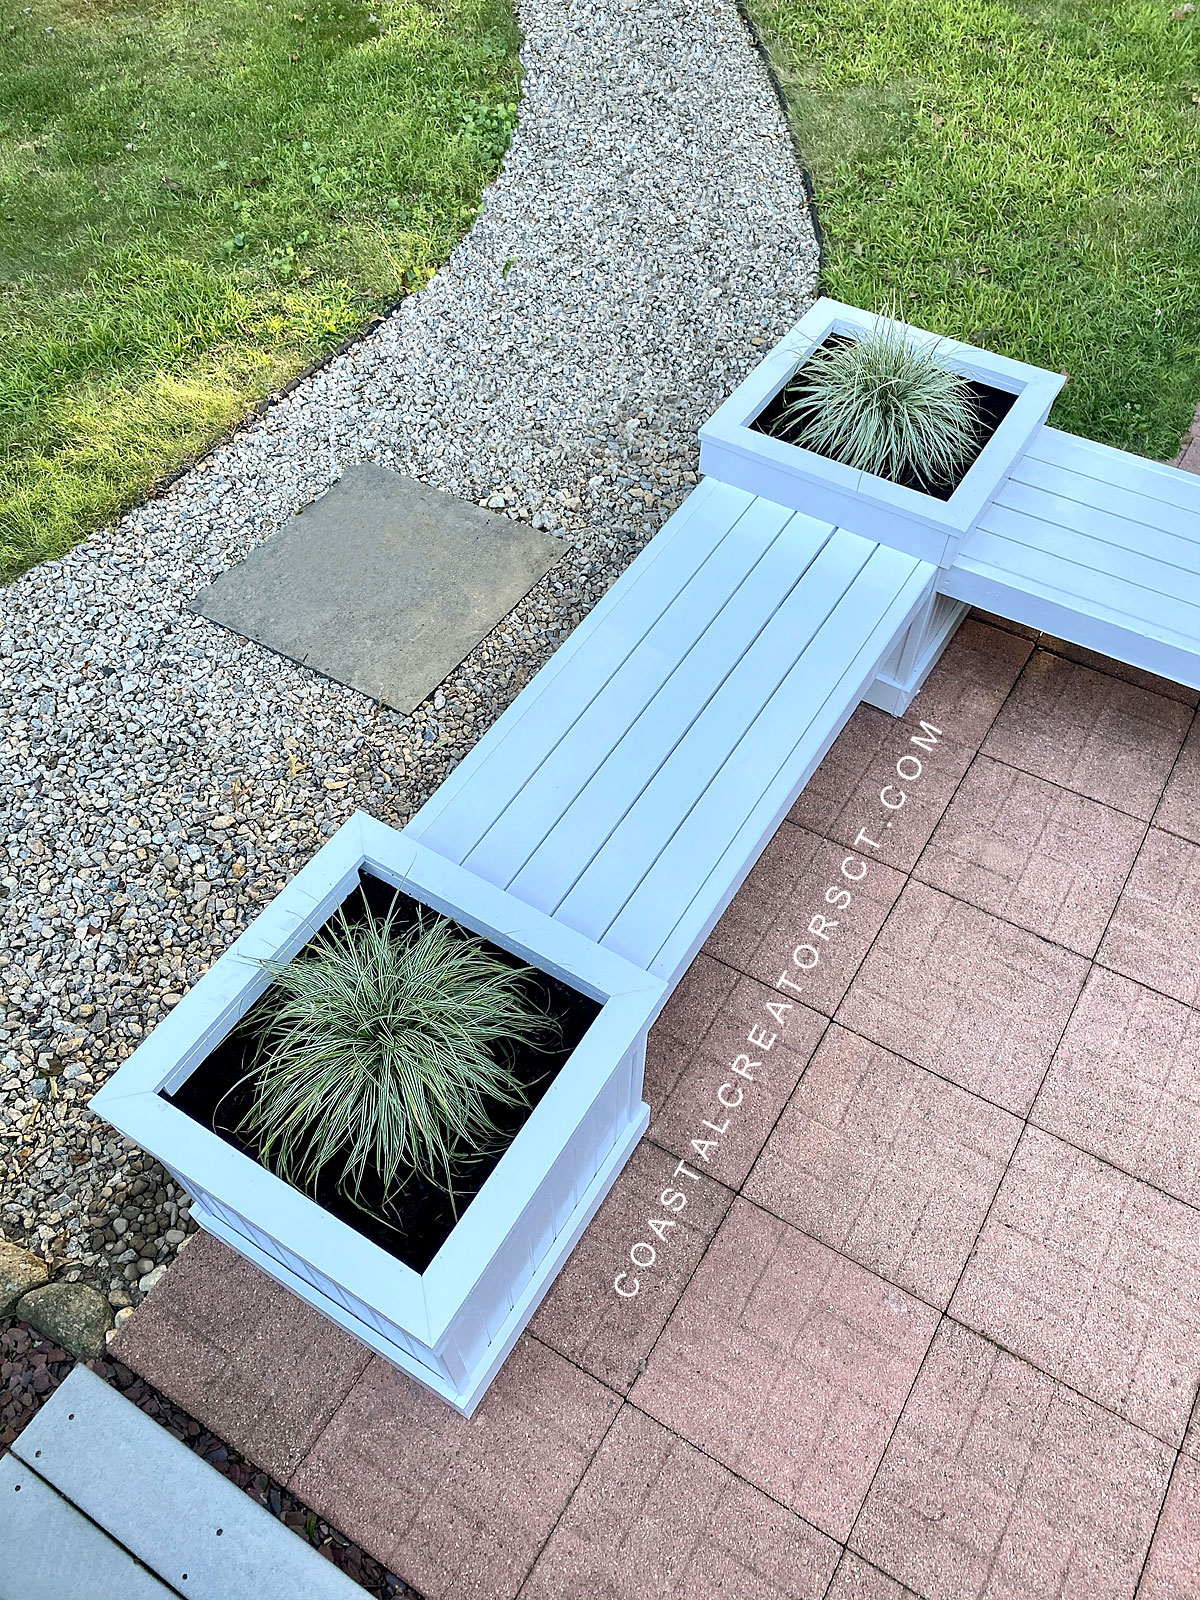
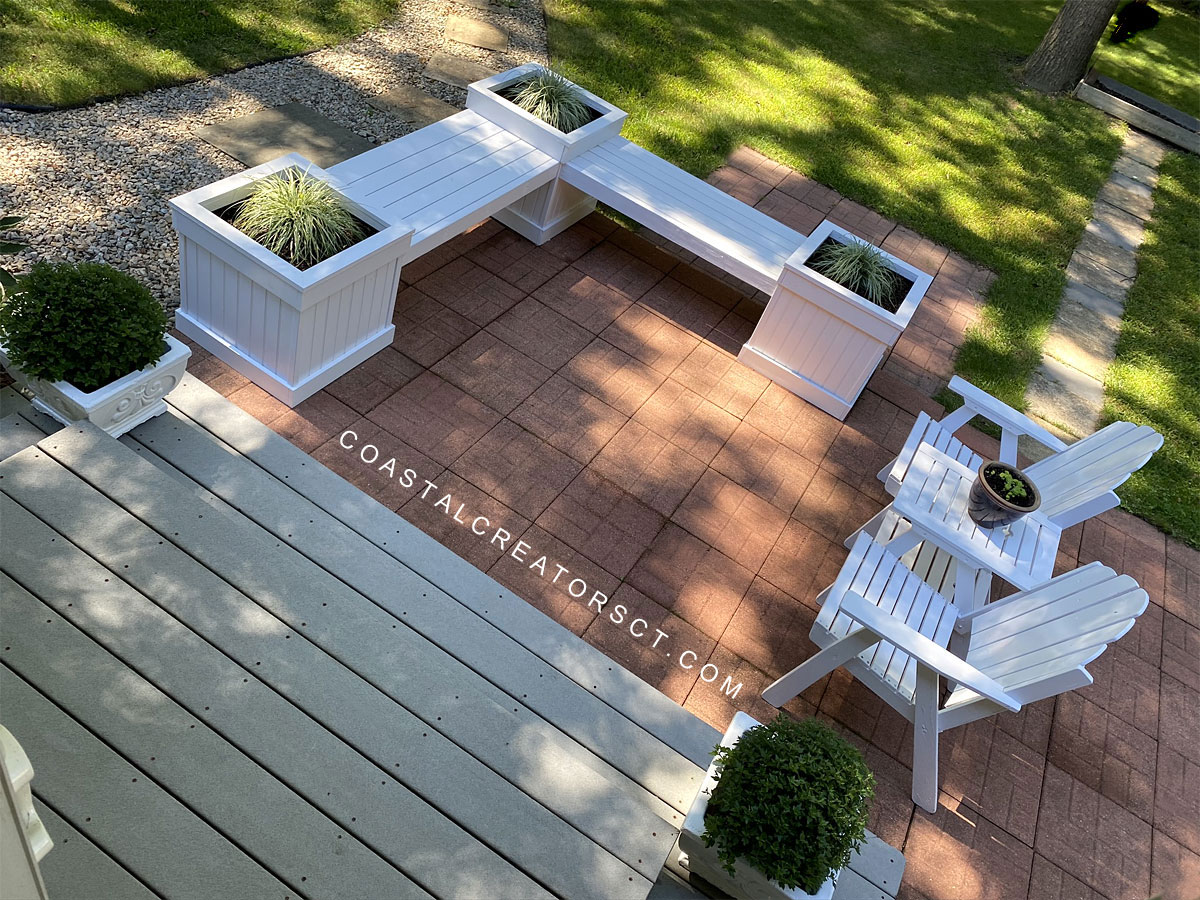
You can build this solid wood, triple planter with 2 benches for just around $200! It’s exquisite and you will be the envy of the neighborhood. Create a gathering place in your backyard. Good quality planter benches can run upwards of $1,000 of this size but you will own a solid piece of outdoor furniture for a fraction of the cost.

Build an Exquisite Triple Planter Bench

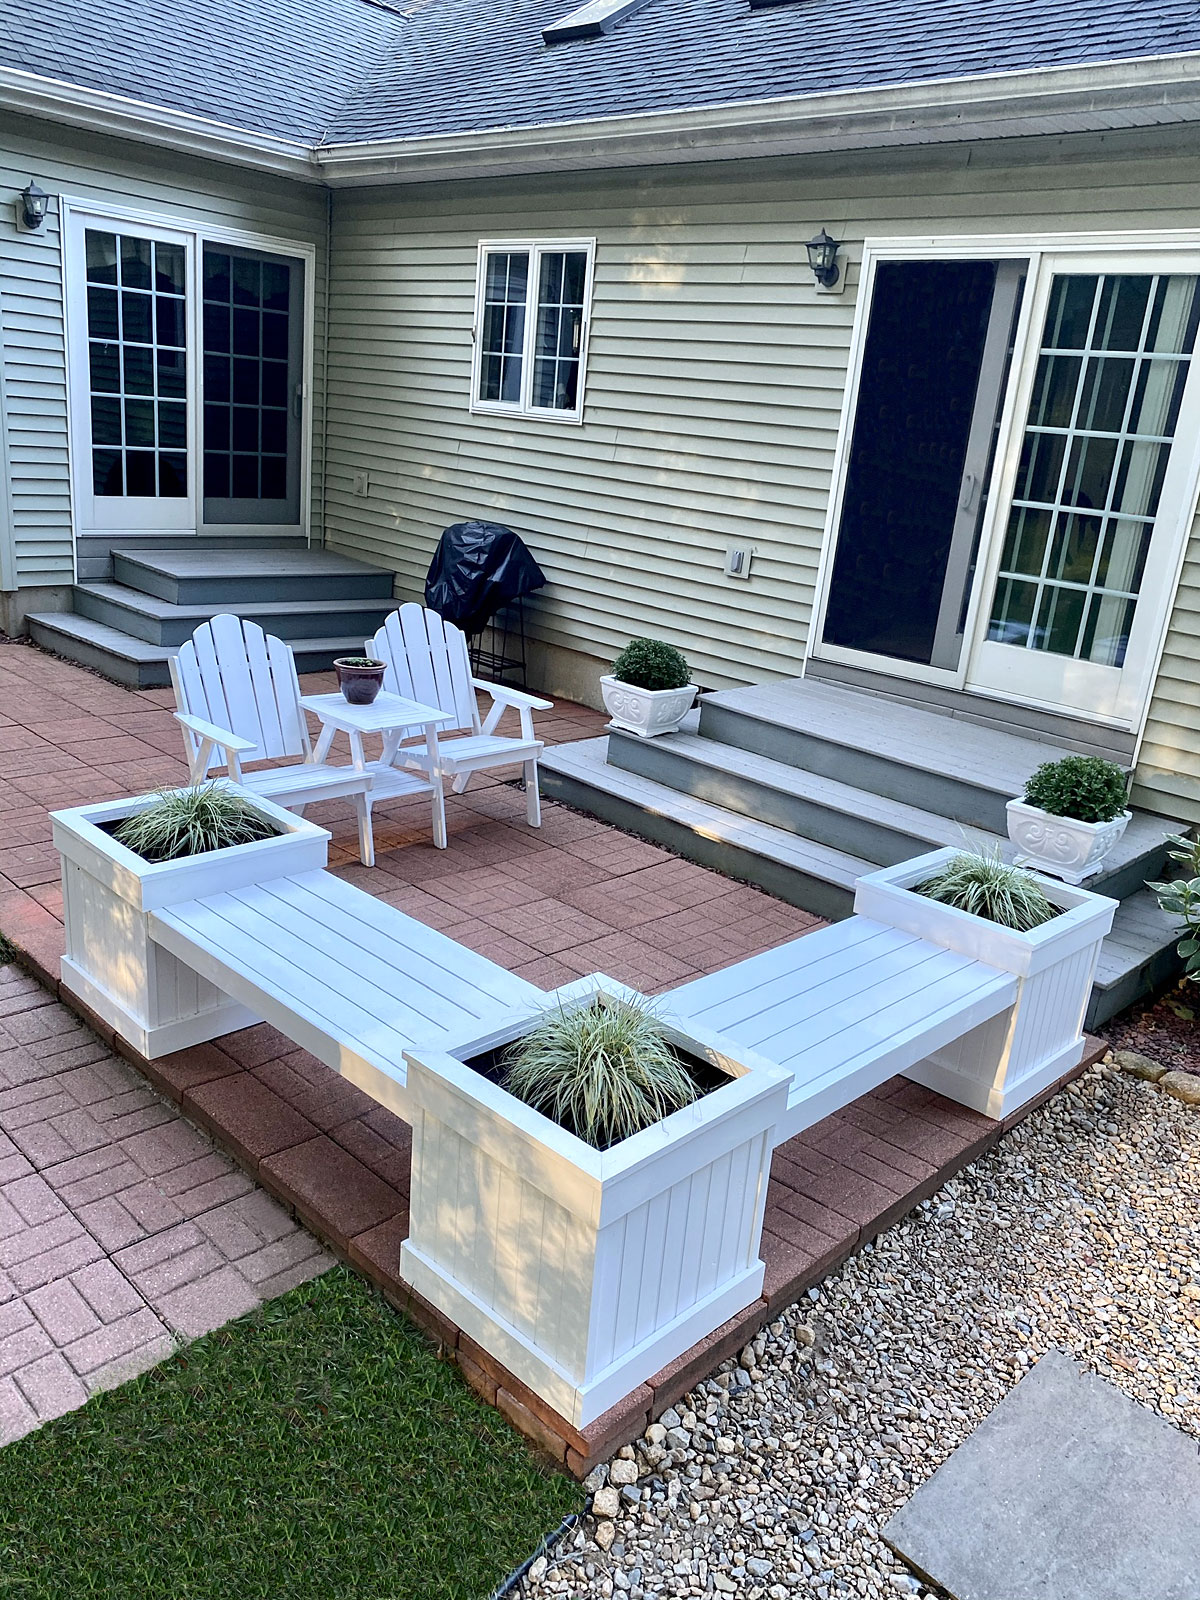
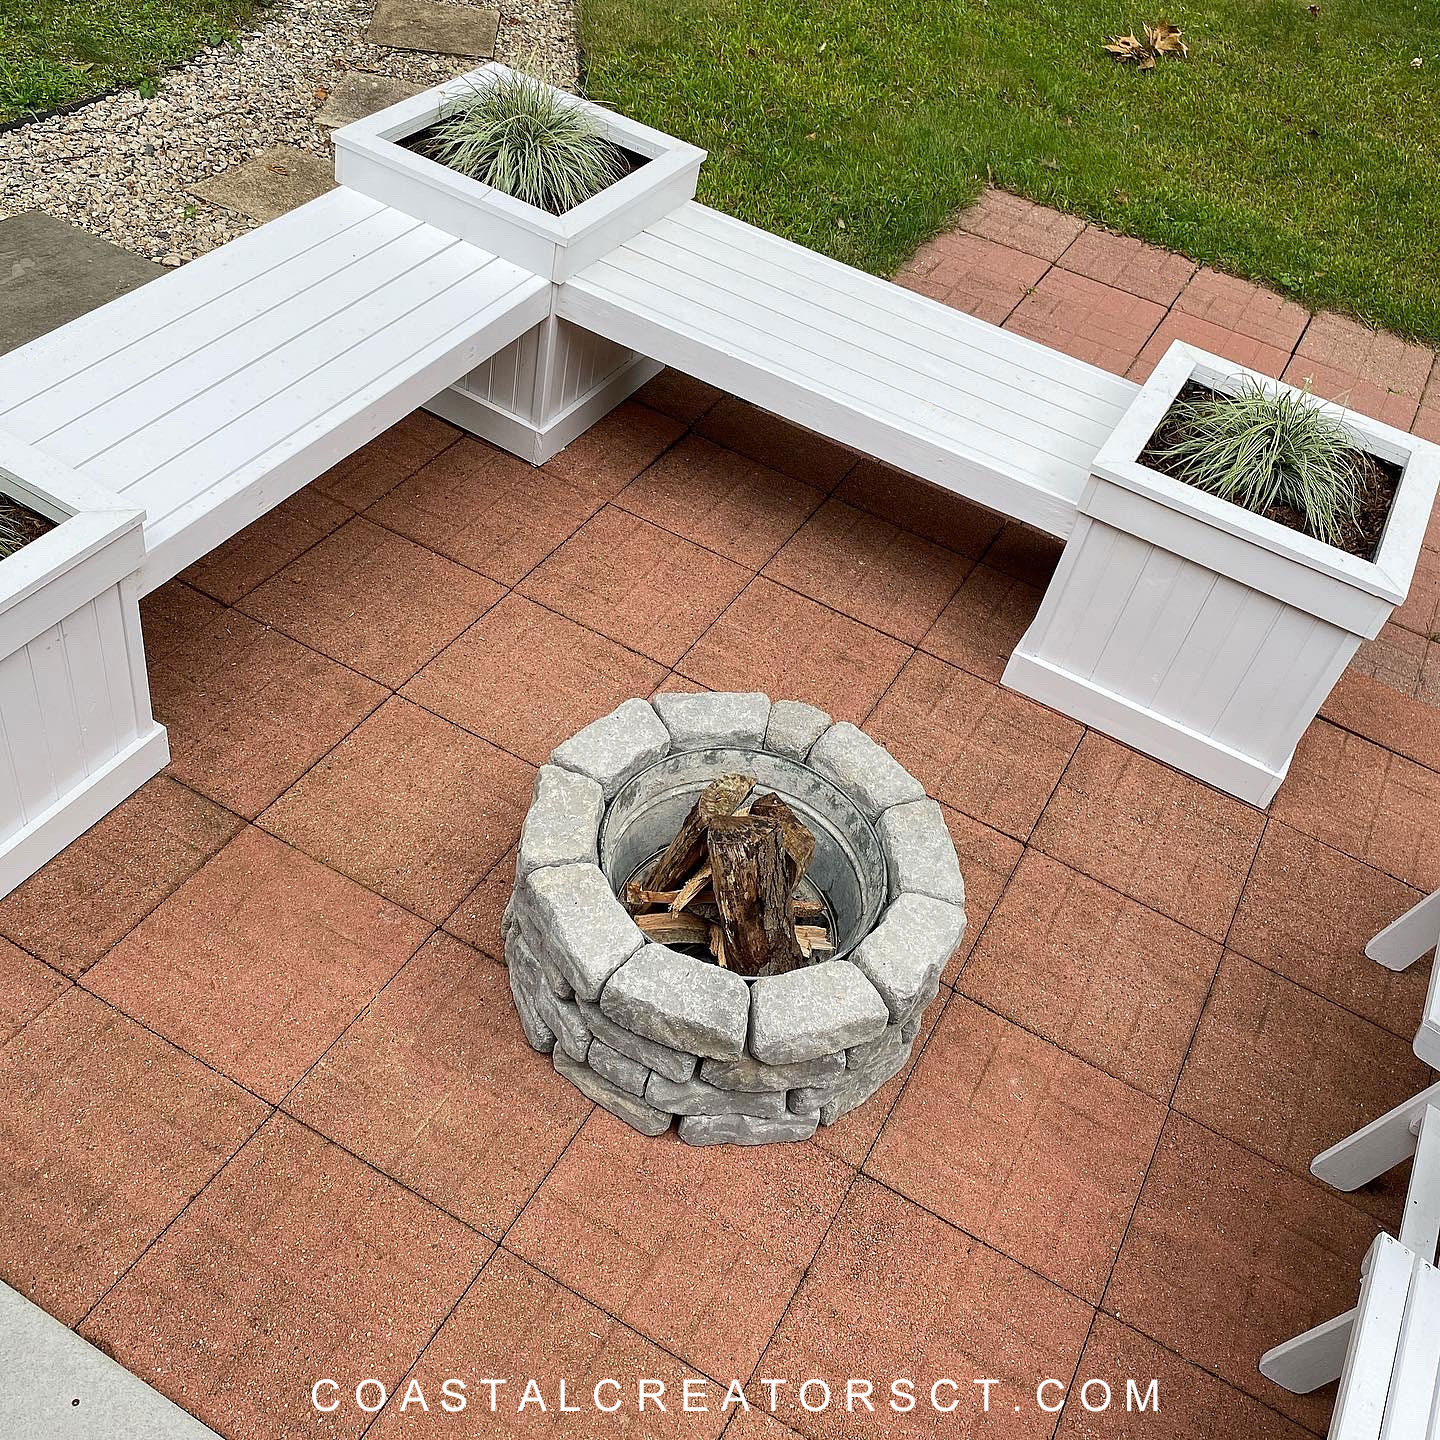
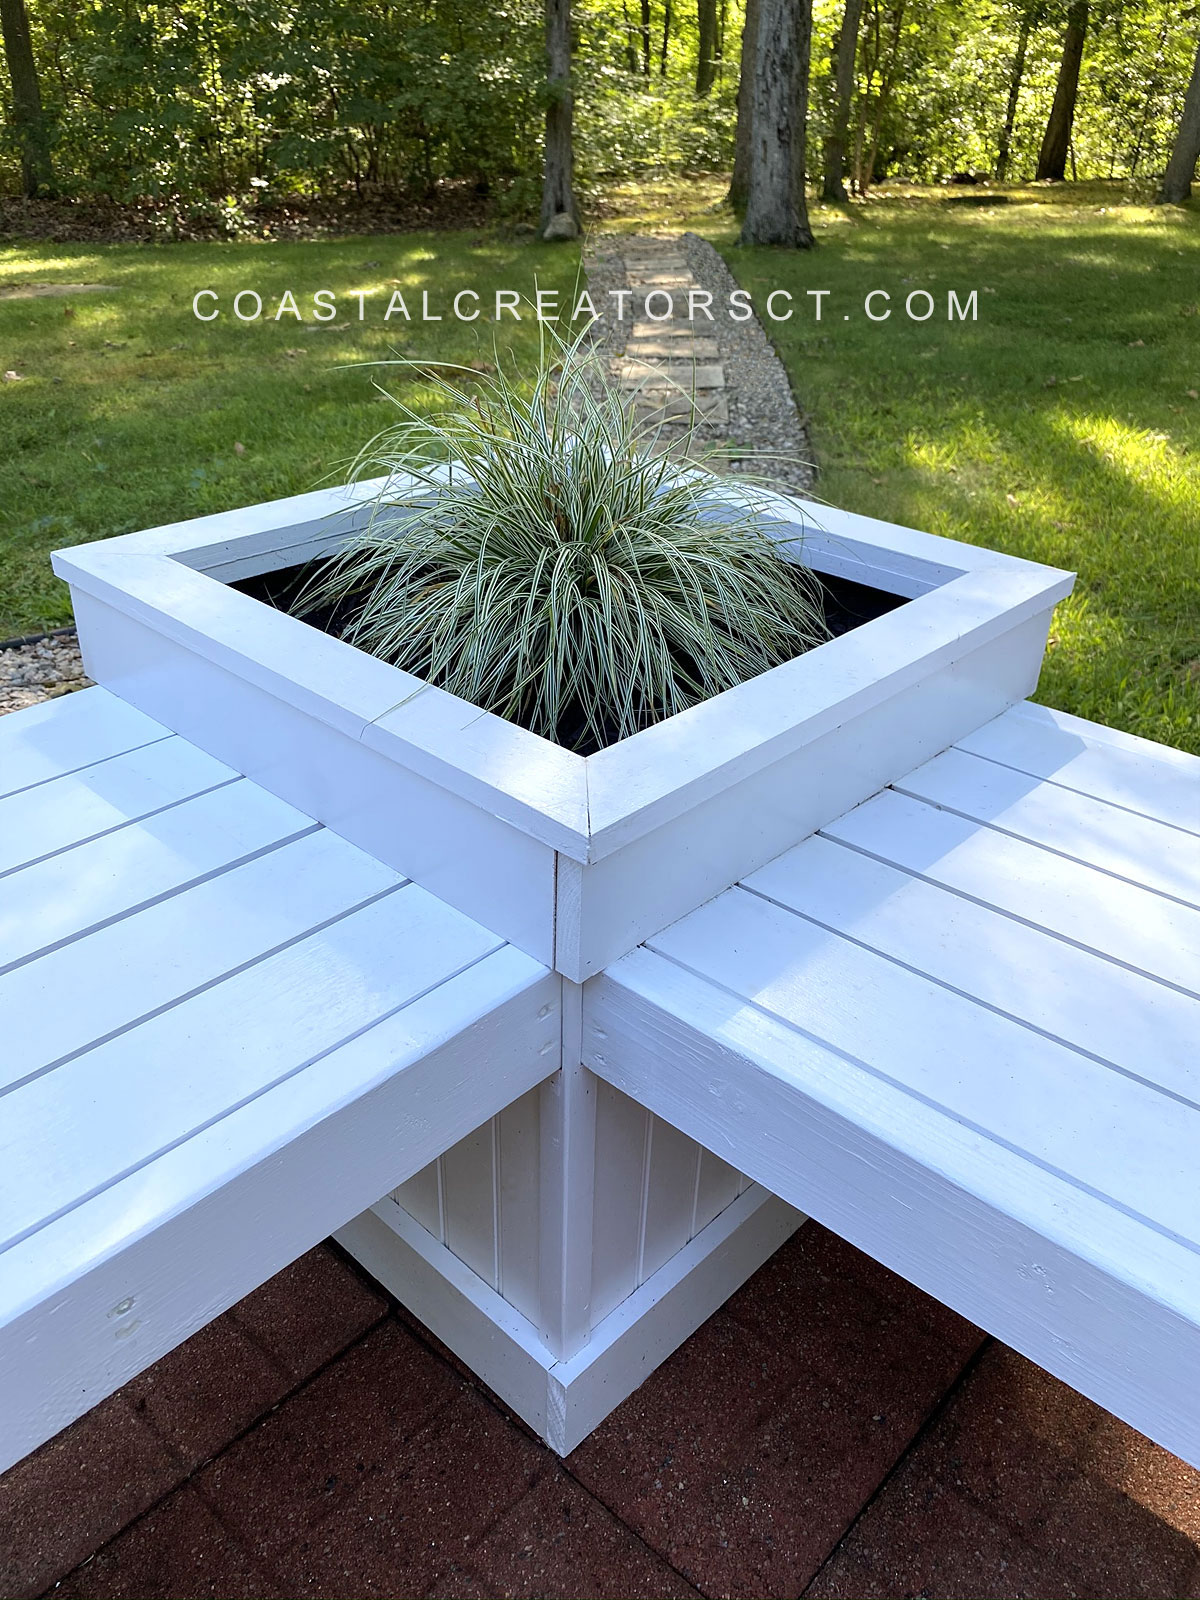
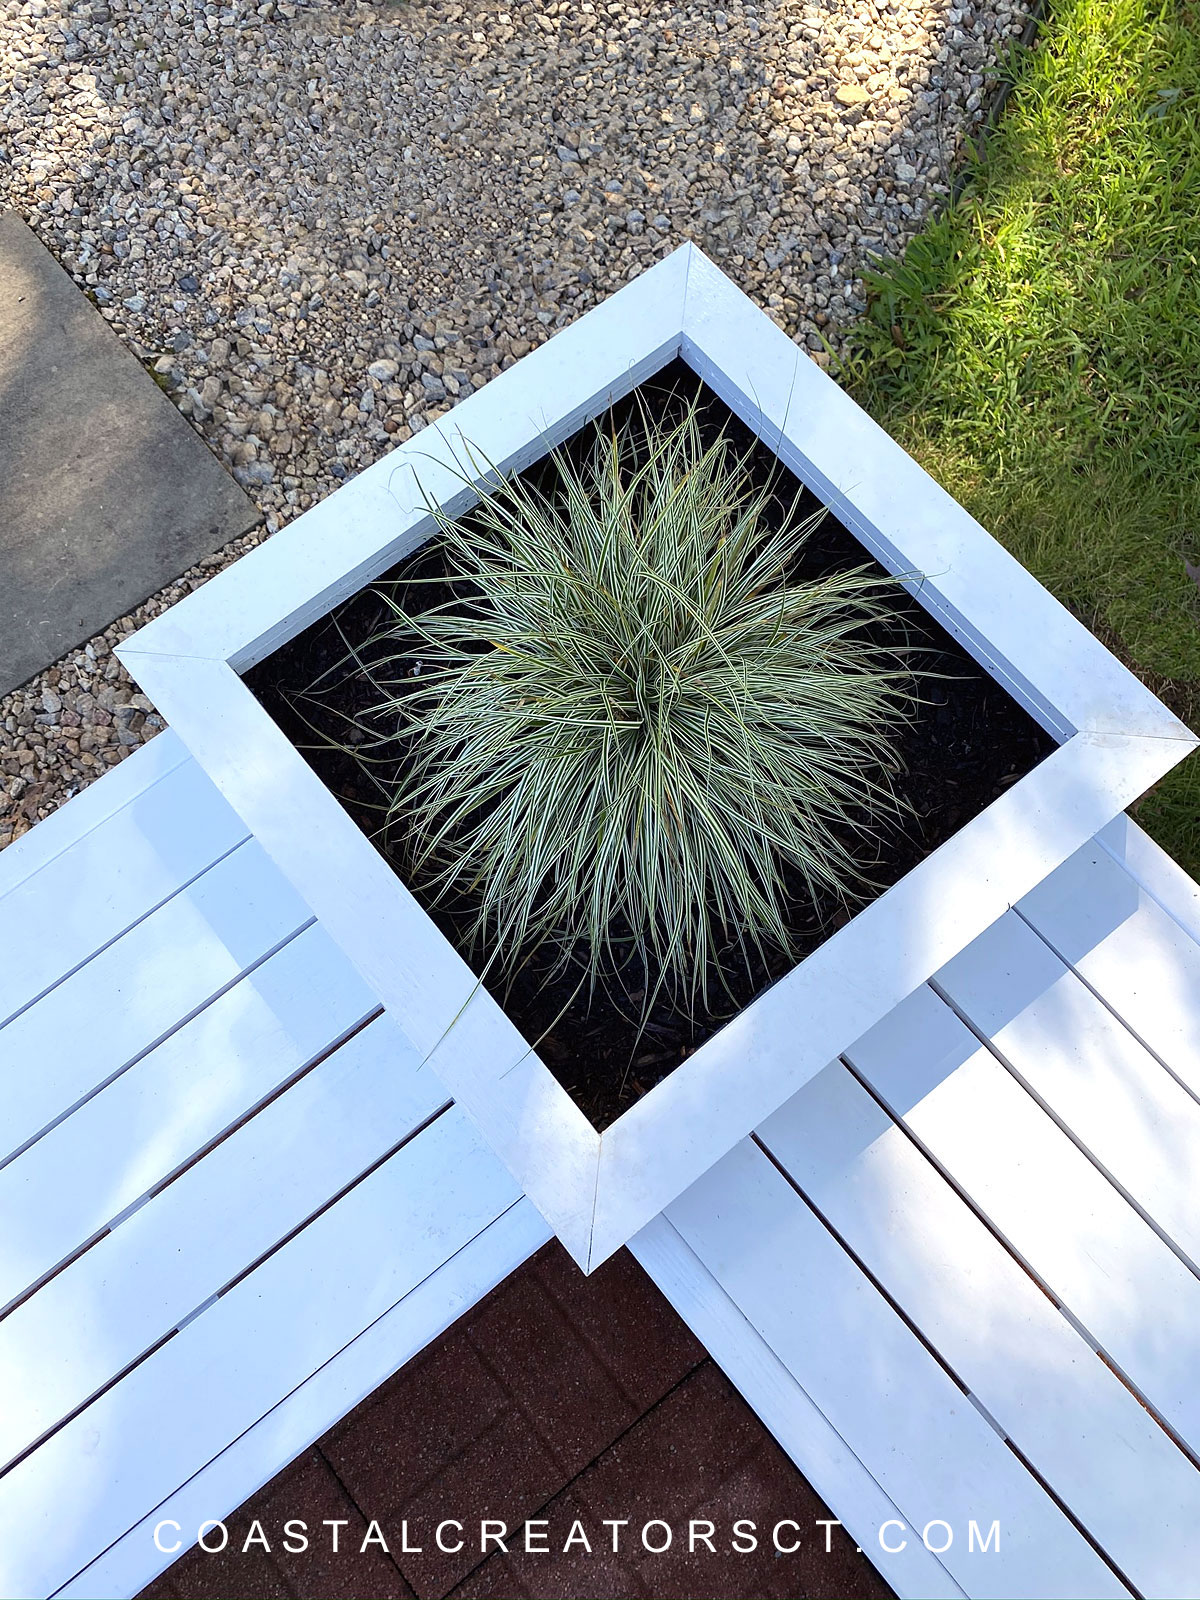
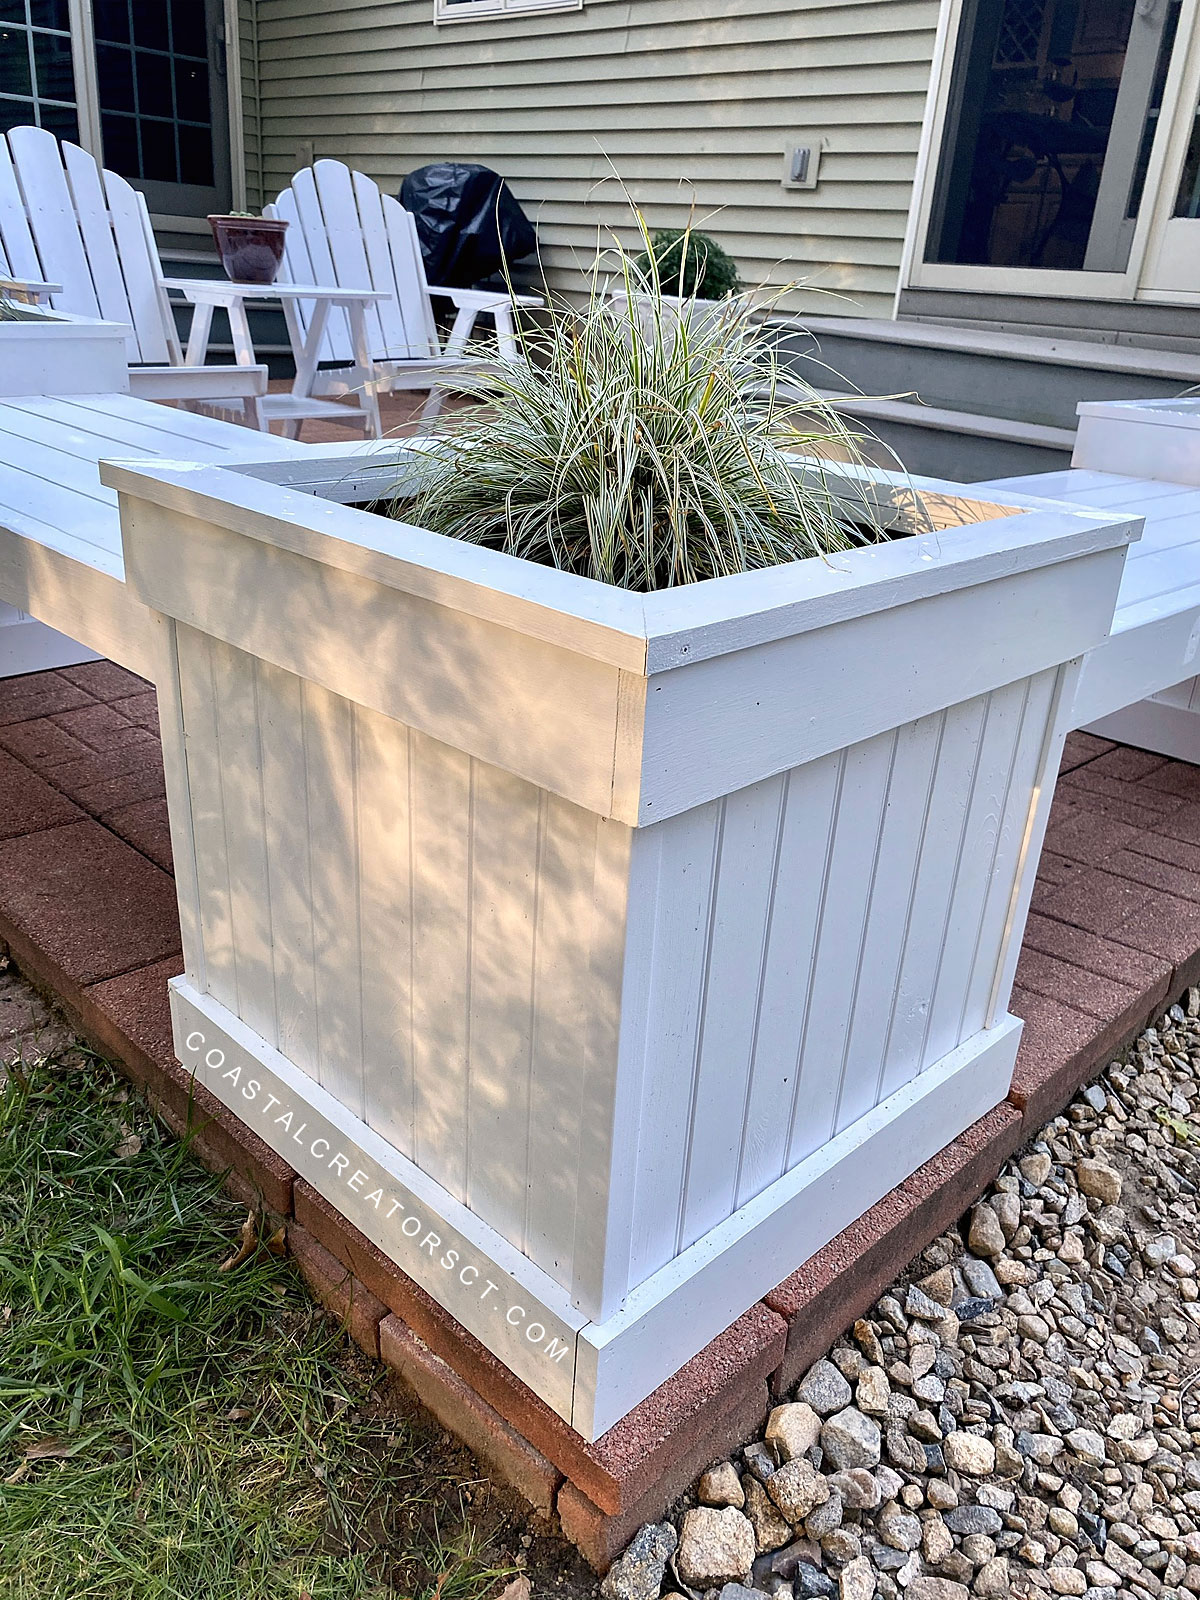
Following the MyOutdoorPlans.com Planter Bench Plans, we built this planter with two benches and 3 planters. We painted everything white to make it stand out on the red brick patio. We also have a two-seat bench that is white and two small white concrete planters that are white so the white paint brings the whole space together nicely.

"Everest" Sedge Grass

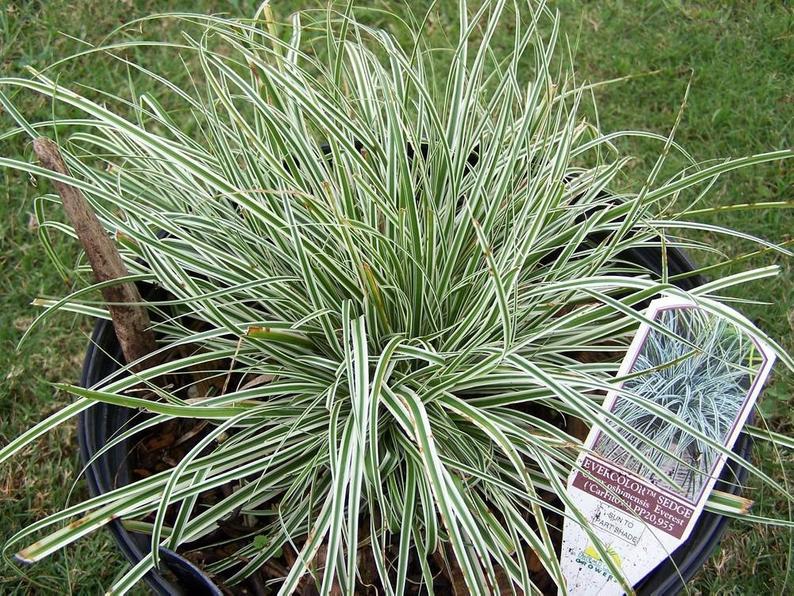
We purchased “Everest” Sedge Grass to put in each of the planters. The variegated green and white leaves look fantastic against the white planters.

Planter Bench Plans

You can follow the bench-making plans at MyOutDoorPlans.com to create these outdoor planter benches.

Materials We Used

  • (12) 8’ tongue and grove pine boards
  • (3) 20 inch square pieces of 5/8 inch plywood
  • (11) 1”x4”x8’ pine boards
  • (4) 2”x4”x8’ boards
  • (3) 1”x3”x8’ pine boards
  • (3) solid wood corner guards
  • 1-1/4” wood screws
  • 2-1/2” wood screws
  • 2-3/4” wood screws
  • Zinsser BIN cover stain
  • KILZ White primer/sealer paint
  • Rust-Oleum Marine Coatings Topside paint, semi-gloss


We used Zinsser BIN cover stain because we used knotty pine. Zinsser’s covers the knots and doesn’t allow them to bleed through the paint. The painting process is probably the longest process in this whole project because we used three paints – primer, Zinsser layer and 2 coats of Rust-Oleum.

Build an Exquisite Triple Planter Bench

Build an Exquisite Triple Planter Bench

Build an Exquisite Triple Planter Bench

Build an Exquisite Triple Planter Bench

Build an Exquisite Triple Planter Bench

It took just about one week working part-time to create one bench and two planters.

DIY Fire Pit in an Hour Project

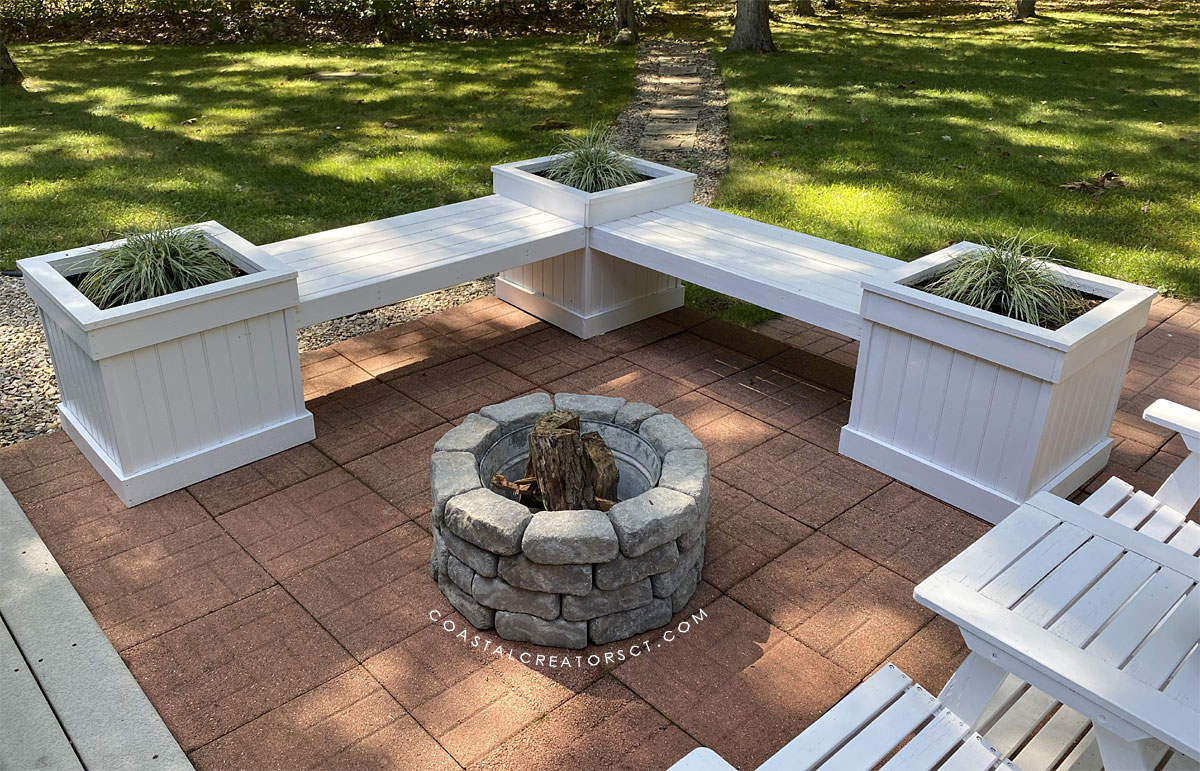
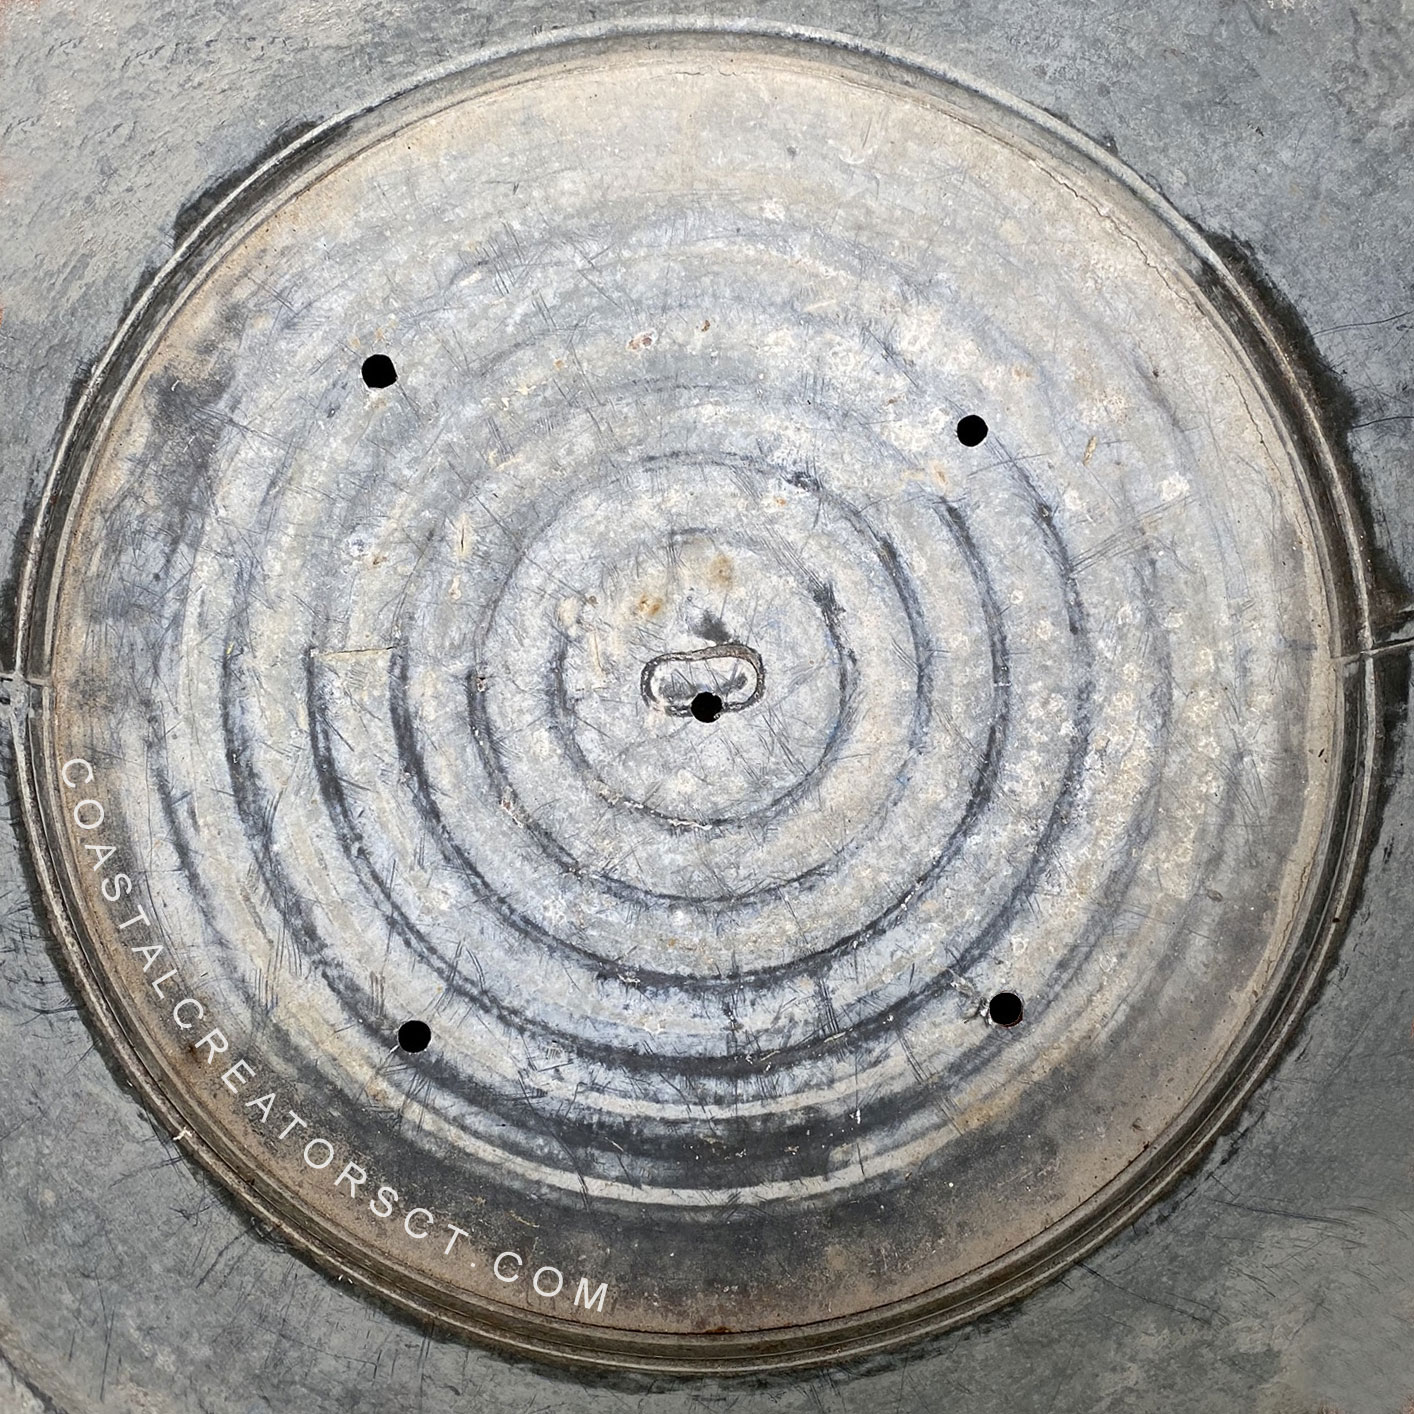
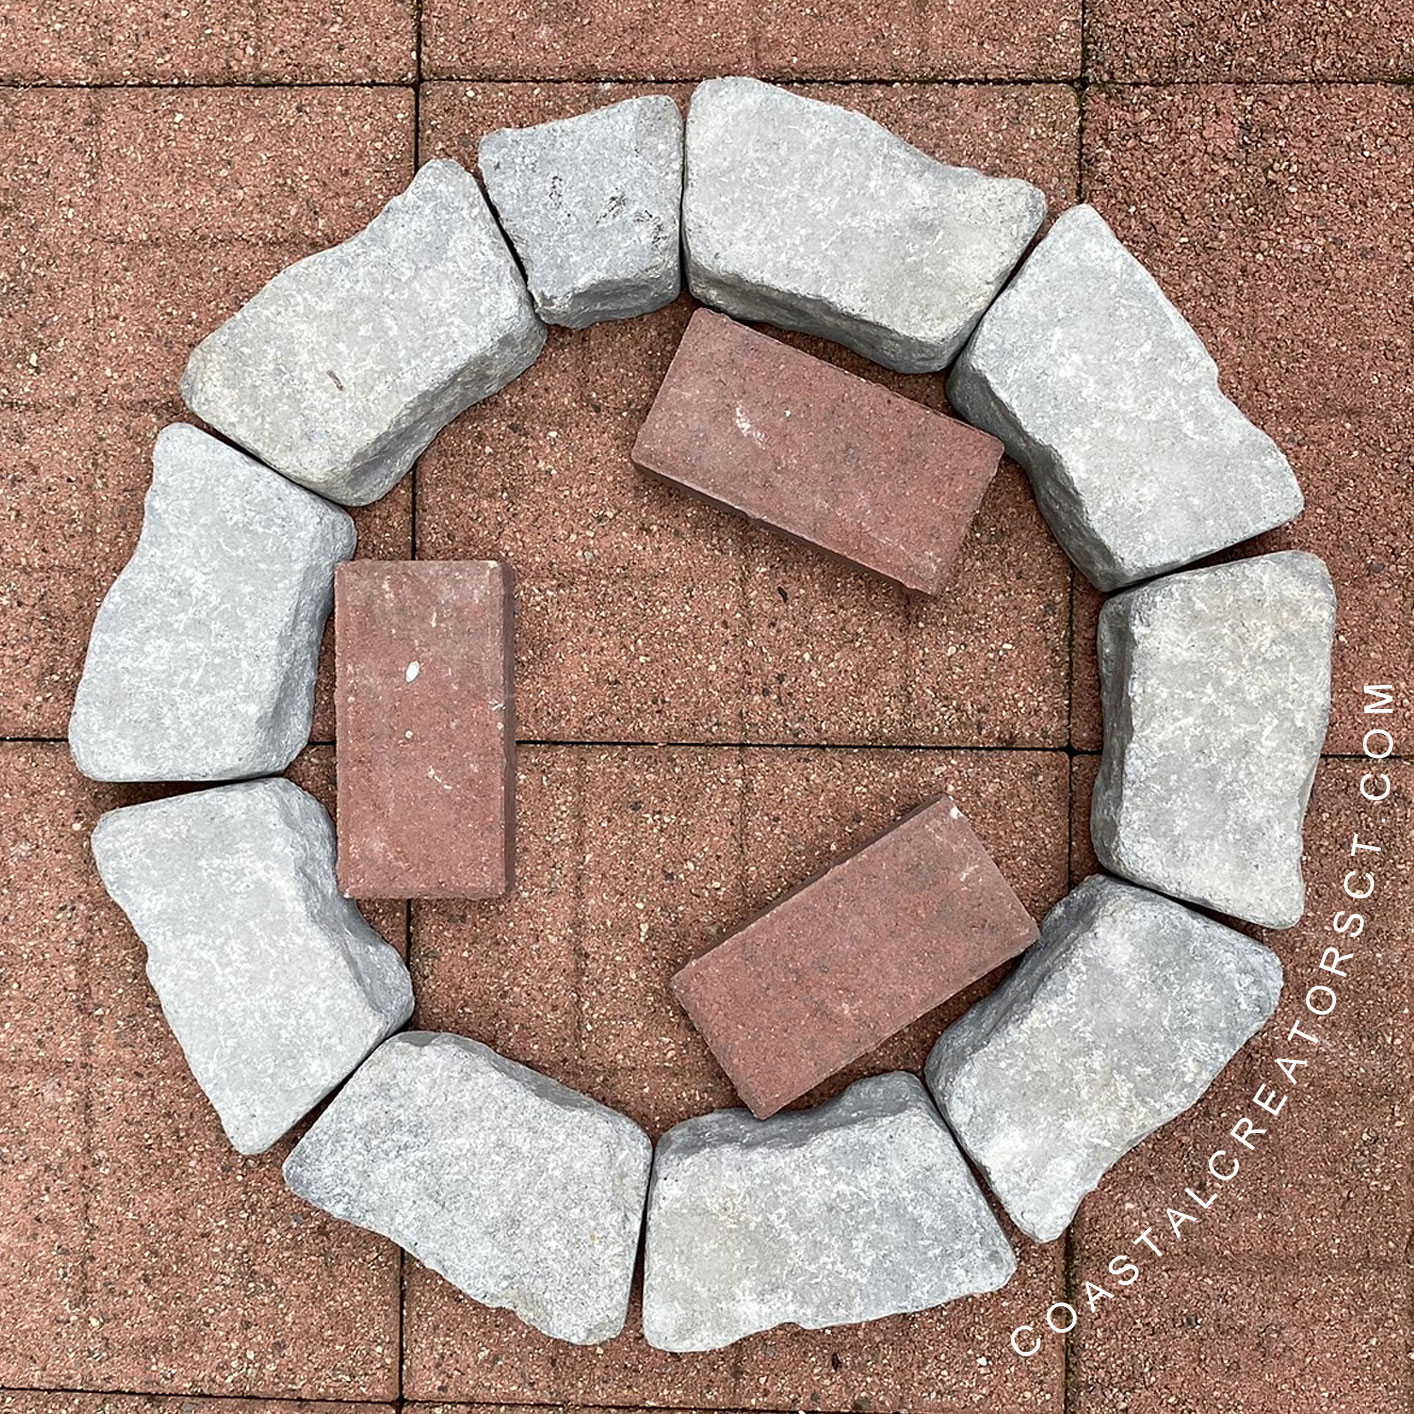
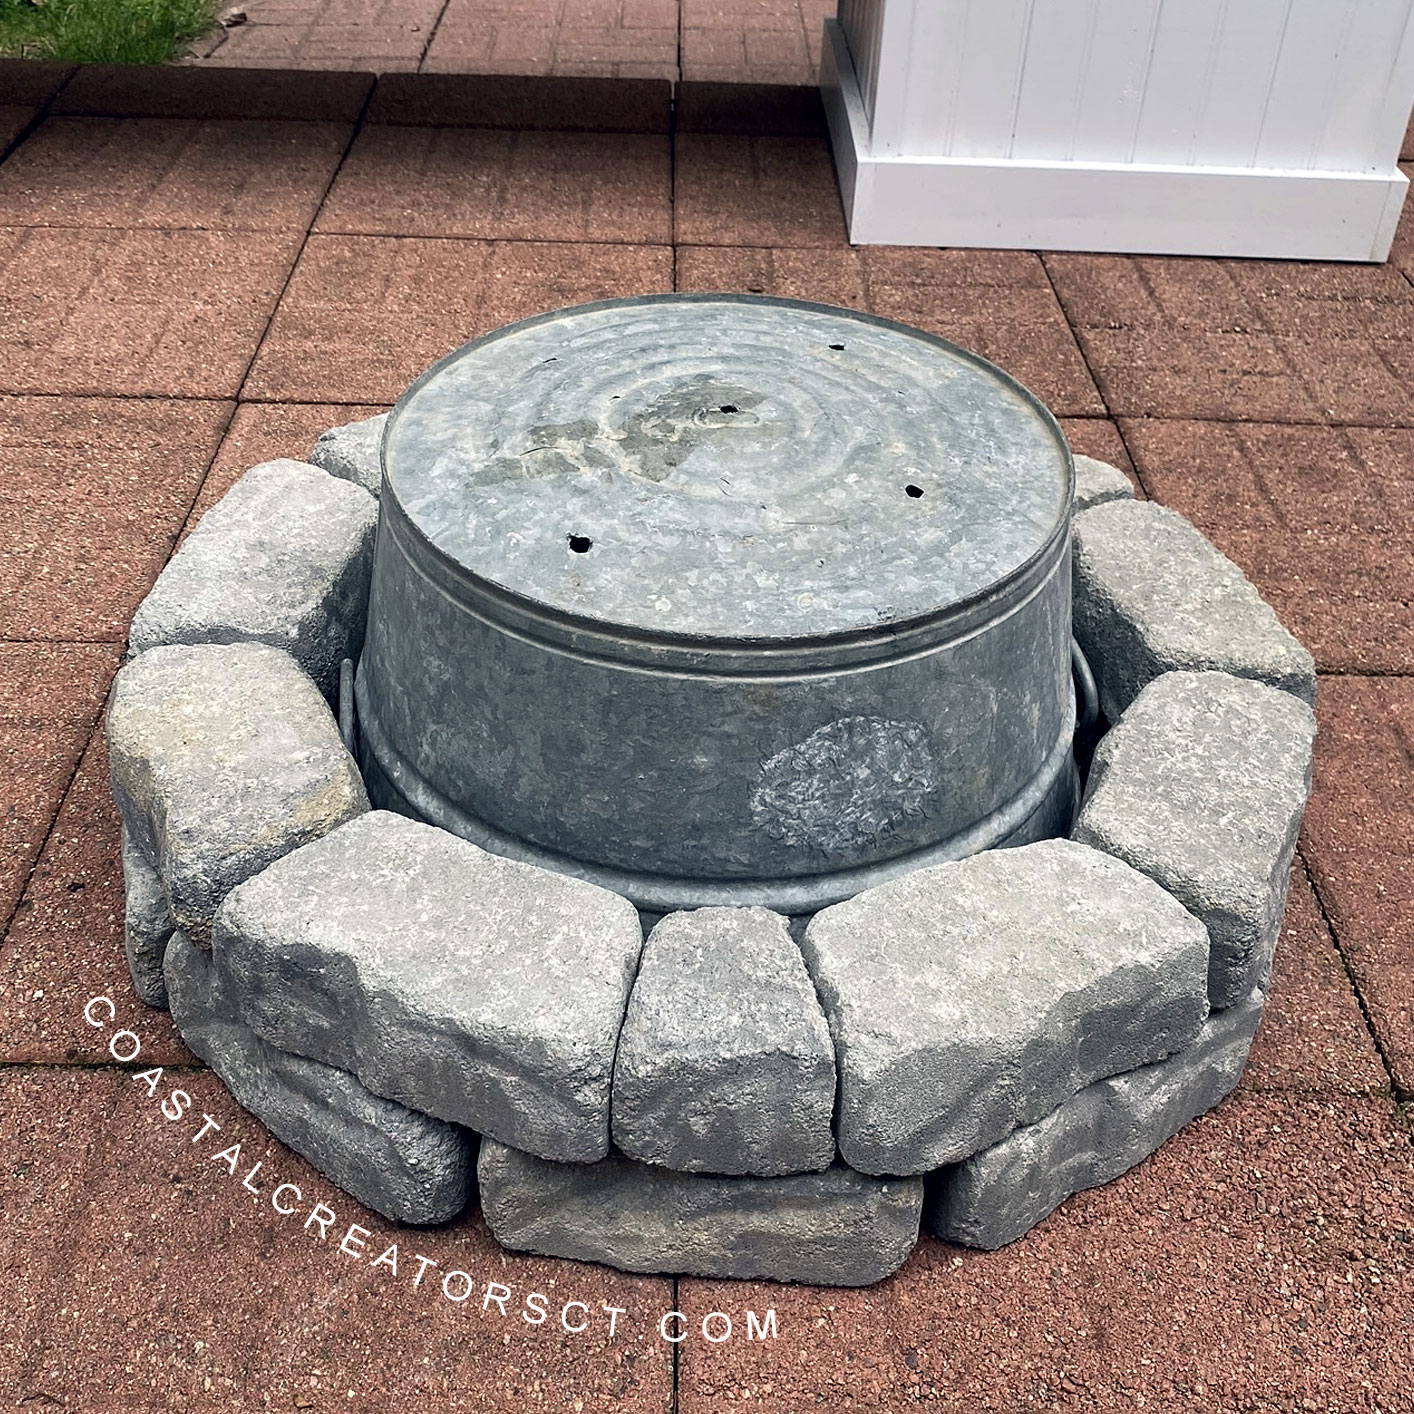
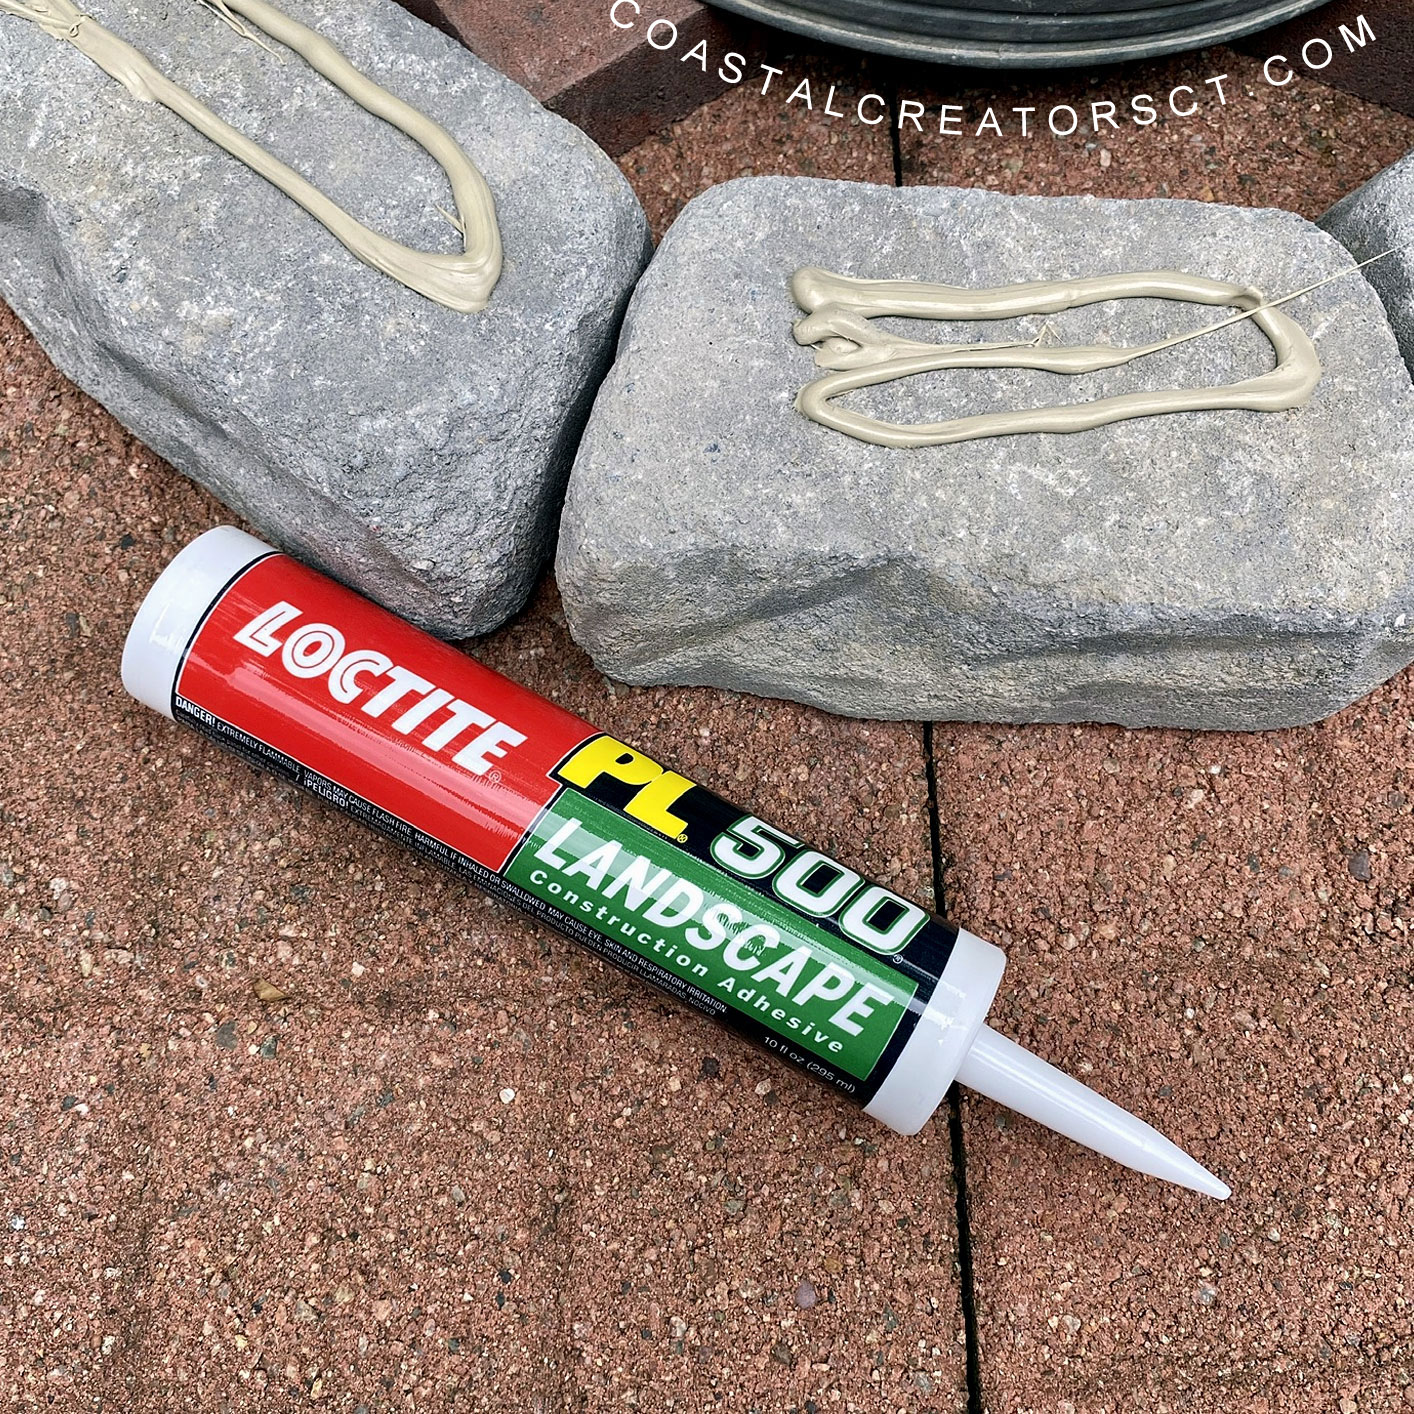
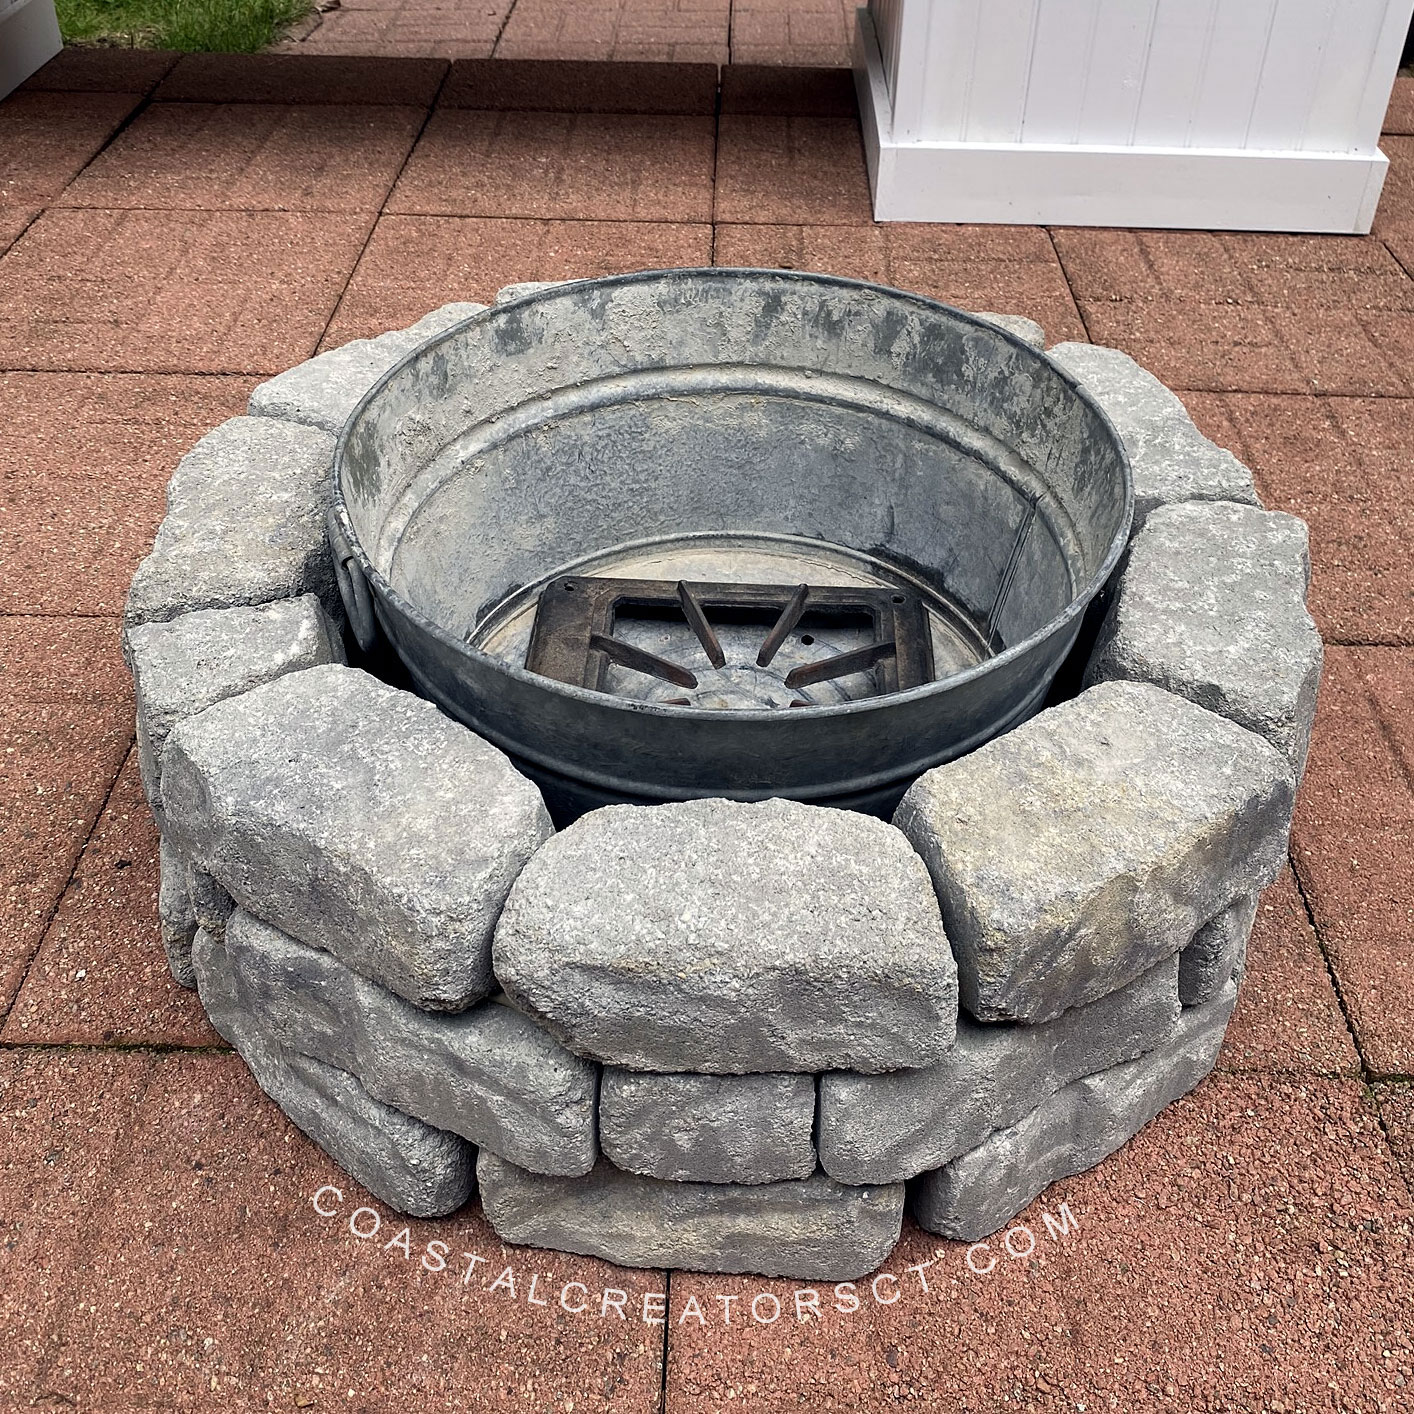
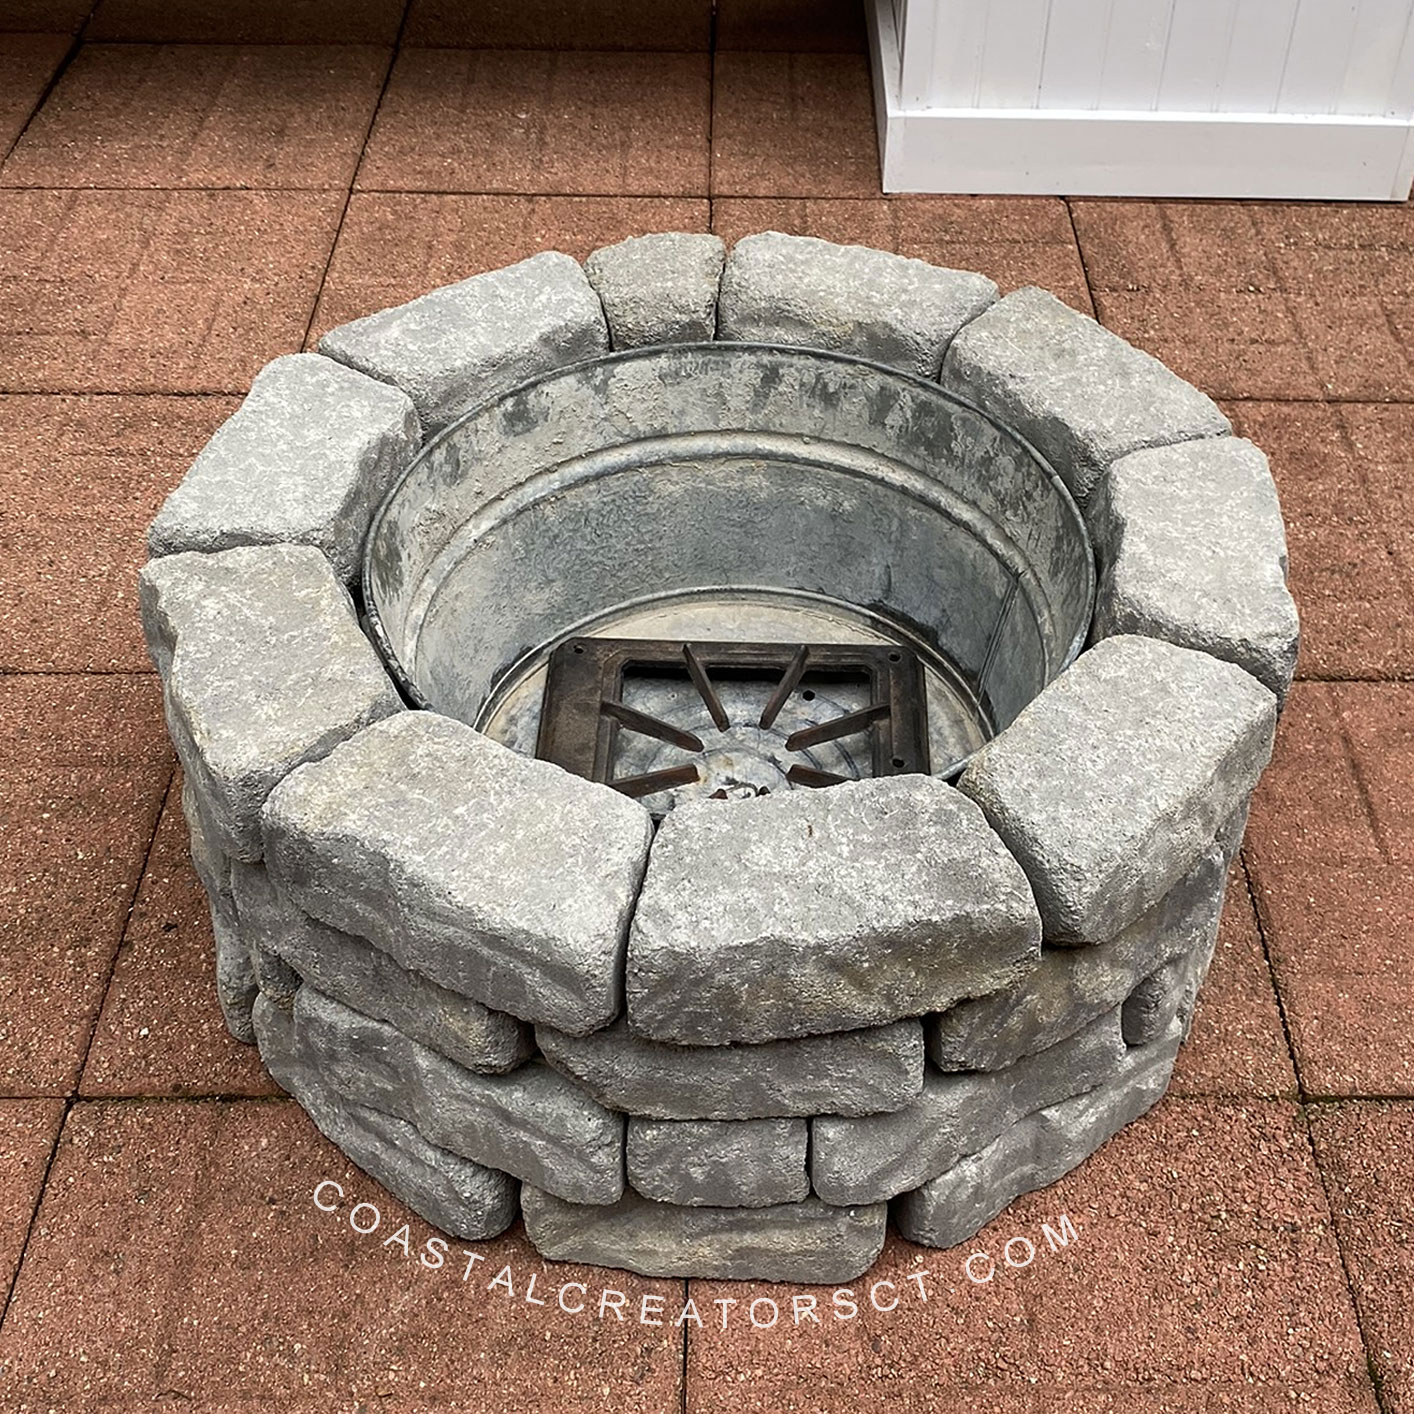
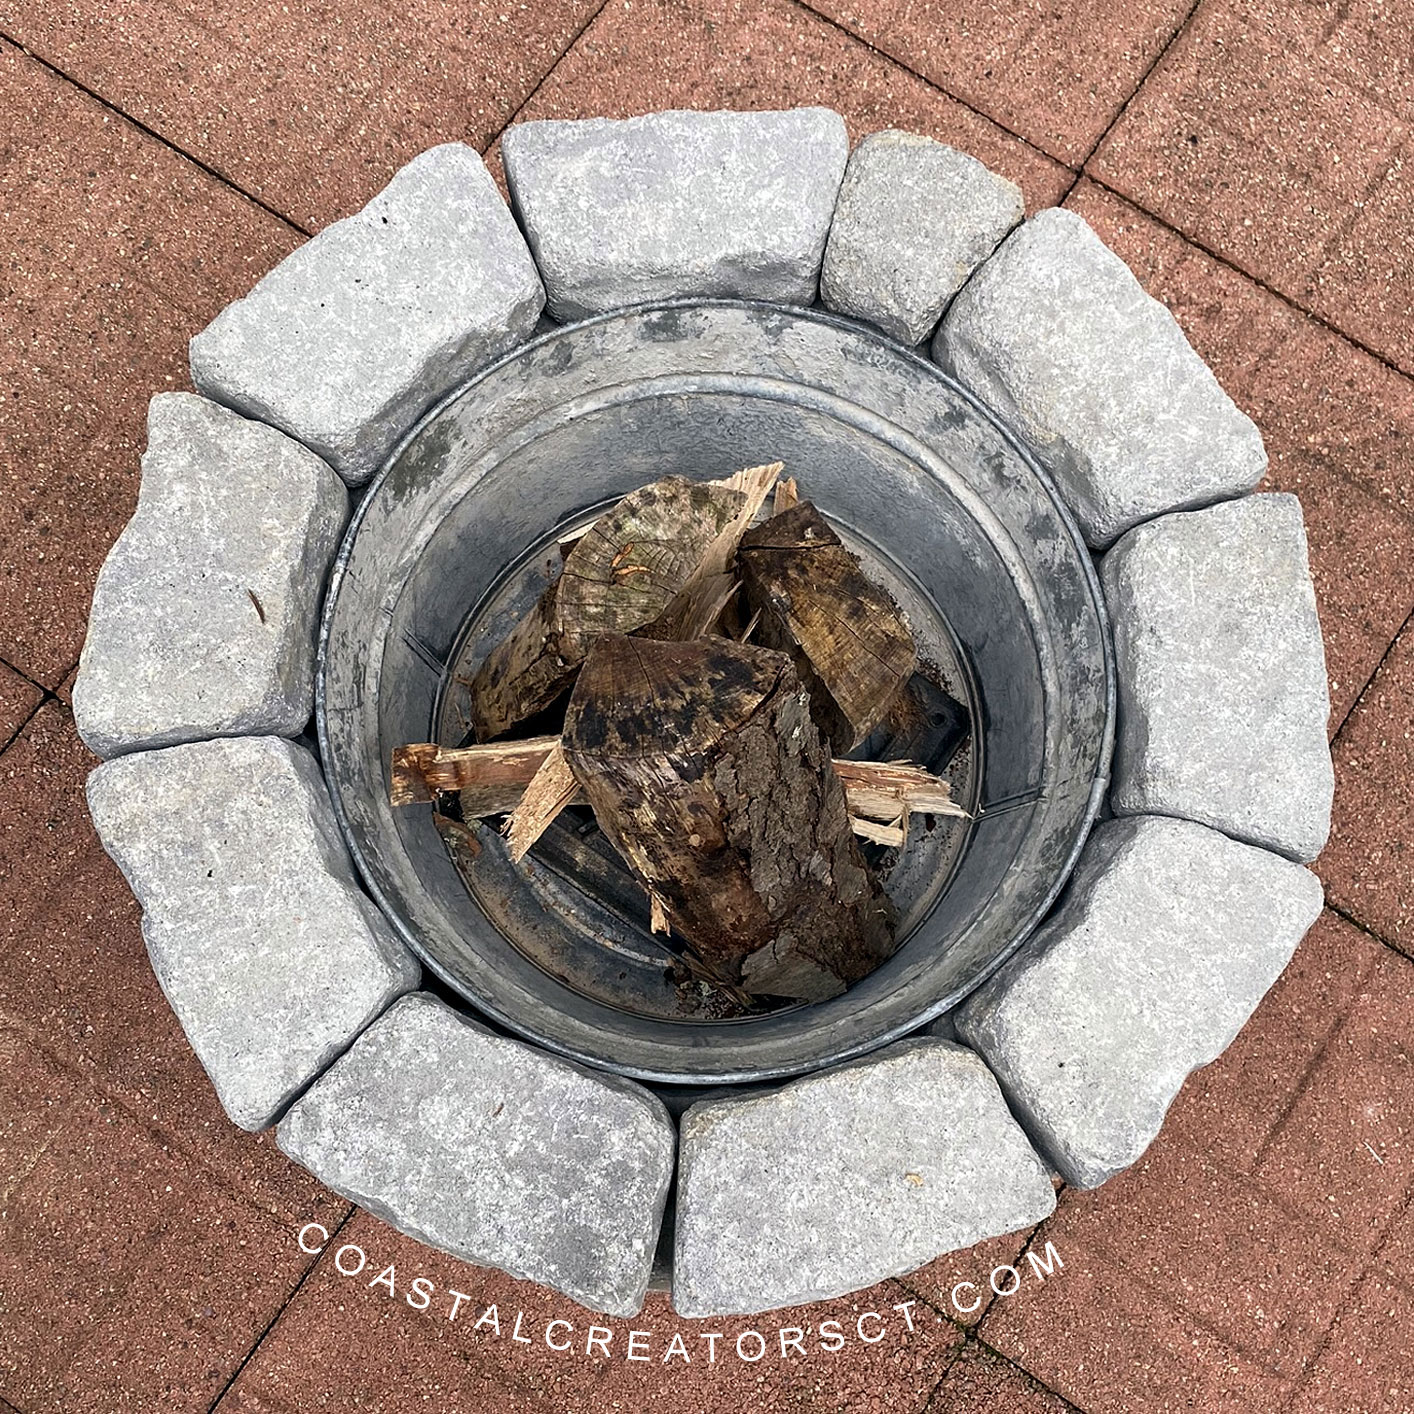
After we finished this project, we built a fire pit to put in the center of the patio. This fire pit only took about one hour to create. We have full written instructions to build your own fire pit on a companion video on our YouTube channel.

Build a Backyard Fire Pit in One Hour

It’s easy to build a backyard fire pit for fun Fall nights and hours of Smore’s enjoyment. We built our patio fire pit in just about a hour. You can buy most of the supplies you need at your local hardware store (Ace, Lowe’s, Home Depot). The supplies list is minimal and you won’t need many tools. Building a fire pit should only take you about an hour (or maybe two) to complete so it’s a quick project even beginner DIYers can complete.

How to Build a Backyard Fire Pit in One Hour

Safety First! You will want to make sure your fire pit is not going to be located under any low-hanging trees. Safety is always key when setting up your fire pit.

Your first step is to decide the best spot to place your fire pit. Because you will be using Flagstone wall blocks that are heavy, you won’t be moving your fire pit anytime soon. You will want to find a permanent area to build your fire pit. Will you build in the ground or above ground? We constructed our fire pit on our patio.

Fire Pit Supplies List

If you want to build our exact fire pit, here are the supplies we used. Our fire pit measures 18 inches in diameter by 12 inches in height.

  • (39) Mini Flagstone Allegheny Retaining Wall Landscaping Blocks
  • LOCTITE Pl500 Landscape Block Adhesive Off-White Landscape Construction Adhesive
  • (3) Holland Red/Charcoal Concrete Pavers (bricks)
  • Galvanized Metal Tub
  • Metal Grate
  • Heavy duty steel file
  • Hammer
  • Concrete/Brick Chisel


About the Galvanized Tub: You can buy a galvanized metal tub from Tractor Supply, Amazon, Lowes, or even Target stores. You can substitute a galvanized tub for an actual fire ring that has been specifically designed for DIY fire pits. Fire rings are often quite large though and since we wanted to keep our fire pit smaller, we went with the galvanized metal tub.

About the Metal Grate: We had on hand an old single burner from a propane stove that we used for our metal grate. You will probably want a raised metal grate of some sort to stack the wood on to keep it from the bottom of the tub. You could use an grate from an old grill, a portable camp fire grill, or a raised fire grate. Check out the free section on Craigslist, Facebook Marketplace or even your local Goodwill store and you may find something that can be used and it will save you money.


About the Retaining Wall Blocks: we used mini Flagstone Allegheny Retaining Wall Blocks to put around the galvanized tub. This created the wall for our fire pit. The common size of these blocks is 3-in x 8-in and the actual size is 3-in x 8.2-in.

Determine the Number of Landscaping Blocks Needed

To determine the number of landscaping blocks you will need to make a circular fire pit, just multiple the desired diameter by 3.14 then divide by the shortest length of the block.  For the fire pit pictured, the greatest diameter was 18 inches at the top of the galvanized tub. So, 18 times 3.14 equal 56.52; 56.52 divided by 6 (which was the shortest length for the trapezoid block used) equal 9.42. If one does not have a predetermined diameter, just buy the number of blocks needed to make a circle close to the size fire pit desired without having to cut any blocks.

If you aren’t good with math equations, you can also “eye” it. You may not buy the exact number of block needed but you can always return or purchase more as needed. We purchased 39 landscaping blocks and had to cut three in half to make them fit.

Adjusting the Landscaping Blocks to Fit Properly

You may have to cut a few of your landscaping blocks to fit properly. In our fire pit we had to cut several blocks as shown in the photos. To cut a landscaping block, draw a line where it needs to be cut and then score that line using either a concrete/brick chisel; a heavy duty file; or, for more accurate cuts, a circular saw with a concrete blade. Once the block is scored, place the chisel on the score line and strike it with a hammer until the block splits.


Fire Pit Drainage

It is a good idea to drill a few holes in the bottom of the galvanized tub for drainage. You don’t want rain water collecting in the bottom of your fire pit without any place to go.

How to Build a Backyard Fire Pit in One Hour

Assembling the Fire Pit

After obtaining the number of landscaping blocks needed, it is time to assemble the fire pit.

How to Build a Backyard Fire Pit in One Hour

Place three concrete pavers (bricks) in the center of the area where you will construct the fire pit. The galvanized tub will sit on these pavers for support and ventilation once the fire pit is complete.

How to Build a Backyard Fire Pit in One Hour

Place the galvanized tub upside down over-top of the pavers (bricks). By placing the tub upside down, you ensure that the first layer is the widest and will accommodate the largest widest of the tub when it is turned upright.

Lay the first row of blocks in the desired pattern.

How to Build a Backyard Fire Pit in One Hour

Apply Landscape Construction Adhesive to the top of each block and then add the second layer of blocks.  Continue these steps until the desire height is reached.

Place the metal grate inside, stack the wood and your fire pit is almost ready for use. We do suggest at that you give the Landscape Construction Adhesive 24 hours to completely dry.


How to Build a Backyard Fire Pit in One Hour

Who will you share your fire pit with?

Build a Backyard Fire Pit in One Hour

Build a Pallet Wood Swimming Pool Deck

If you own an above-ground swimming pool or plan on adding one to your yard, you are going to love this DIY project. The supplies are basically free. All you need to do is supply the labor. Who knew that wood pallet could be so versatile but keep reading because you will find out just how to build a swimming pool deck out of free wooden pallets.

Wooden pallets are easy to come by. You can find them at local businesses who want to give them away. If you don’t spot some in your area, just go on Craigslist or Facebook Marketplace because someone is always giving away free wood pallet s.

We didn’t come up with this idea to use pallets to create a swimming pool deck. This idea came from José Adimilson Franco who lives in Brazil. We loved his ideas and thought our readers could benefit from his ingenuity. You can check out other wood projects he has created by visiting his Facebook page.

This swimming pool deck made out of pallet wood is built around an approximately 12′ x 30″ above-ground swimming pool.

Step One: Prepare the Pallets

The first step is to acquire free wooden pallets. Then you will need to take the pallets apart so you have the wooden slats to work with. Of course, this type of platform could also be built by purchasing brand new wood from a hardware store but we want to make this project as cheap as possible.

Not all pallet wood will be suitable for a swimming pool deck and platform. You need to pick the best wood that will weather well and have uniform sizes you can use. You may also want to preserve the wood by adding a coat or two of Rust-Oleum paint. Rust-Oleum paint weathers well in the elements. You could also stain the pallet wood if you prefer.

Step Two: Prepare the Area

You will want to prepare the ground around and under the swimming pool. A large tarp should be laid on the ground before the swimming pool is erected. With any type of above-ground swimming pool you add to your yard you will want to level the ground first, then add the tarp, and then the swimming pool. If you already have the swimming pool in place you can skip this step and move to the next step.

How to Build a Swimming Pool Deck out of Wooden Palettes

Step Three: Build the Base

The next phase of this swimming pool deck project is to create the foundation. While we are not providing the exact measurements because each swimming pool size will be different, you can use the photo to get a good idea of what you will need to create.

How to Build a Swimming Pool Deck out of Wooden Palettes


Step Four: Build the Platform

Once the swimming pool platform base has been erected, arrange the pallet wood on the deck until you have the design you will to create. Use 1-1/2″ finishing nails and a brad nailer to nail each board in place. You could use a regular hammer but a brad nailer will cut the time in half and save your tired hands. You will also need a saw to cut odd size pallet wood pieces. We suggest using a circular saw.

A set of 3 steps have been added to one corner. Pallet wood can be used to create the steps but in a pinch wood crates will also do the trick. You will want steps to make it easy to climb onto the swimming pool deck.

How to Build a Swimming Pool Deck out of Wooden Palettes

Now that you have seen what you can do with pallet wood and a swimming pool, you could keep building you deck up on the sides by adding lattice walls and even an outdoor shower.

  • « Previous Page
  • 1
  • 2
  • 3

Coastal Christmas Trees

DIY Coastal Home Decor Ideas

Sea Glass Crafts to Make and Sell

10 Beautiful Rustic Wood Centerpiece Boxes

Coastal Creators participate in the Amazon Services LLC Associates Program, an affiliate advertising program designed to provide a means for sites to earn advertising fees by advertising and linking to Amazon and other affiliate programs. Read more

  • HOME
  • BLOG
  • YOU TUBE
  • CONTACT

Copyright © 2025 · Coastal Creators · Our Policies