Coastal Creators of Connecticut

Wholesale vinyl car window decals, laptop stickers, and gift shop items

  • HOME
  • BLOG
  • YOU TUBE
  • CONTACT
    • Our Policies

DIY Coastal Home Decor Ideas

Give your home a coastal feel without spending a lot of money with these DIY coastal home style accents. From beach front art to coastal home accents, there is something for every room in the house.

You can easily find supplies like shells, rocks, and even driftwood for free depending on where you live. If you want to recreate some of these coastal accents, you will need to grab a variety of supplies to have on hand. Dollar Tree has many of the items you will need including shells, twine, glass vases and candle holders, burlap ribbon, and even sand. They even have glue guns and glue sticks, Mod Podge, paint and paint brushes, sand paper, tape and glue.


If you need wood, your local Lowe’s or Home Depot can supply that but you can also gather free pallets if you search Facebook Marketplace, your local “Buy Nothing” Facebook group and even Craigslist. Sometimes you will spot pallets on the side of the road and you can stop and ask the business owner if you can take them.

Many of these coastal home decor ideas also fit nicely into any Farmhouse style room you have in your home. It even has a name, “Coastal Farmhouse”!
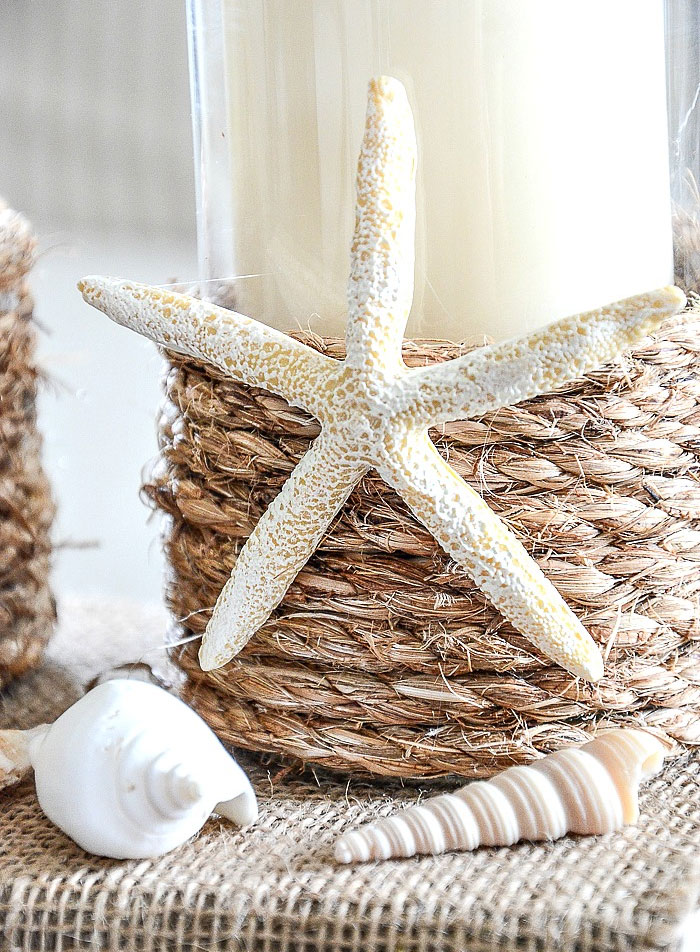
Pottery Barn Inspired Rope Wrapped Sand Dollar Candle holders

Pottery Barn Inspired Rope Wrapped Sand Dollar Candle holders from Stone Gable give you that high-end look for a lot less.
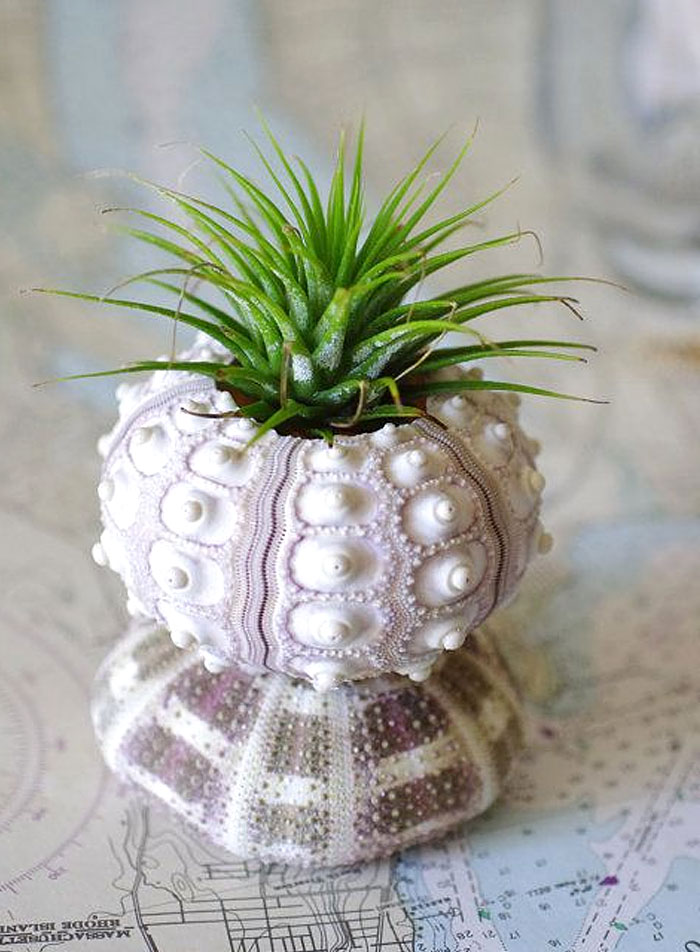
Shell Succulent Planter

Shell Succulent Planter (source unknown) can be made by taking multiple shells and hot gluing them together.
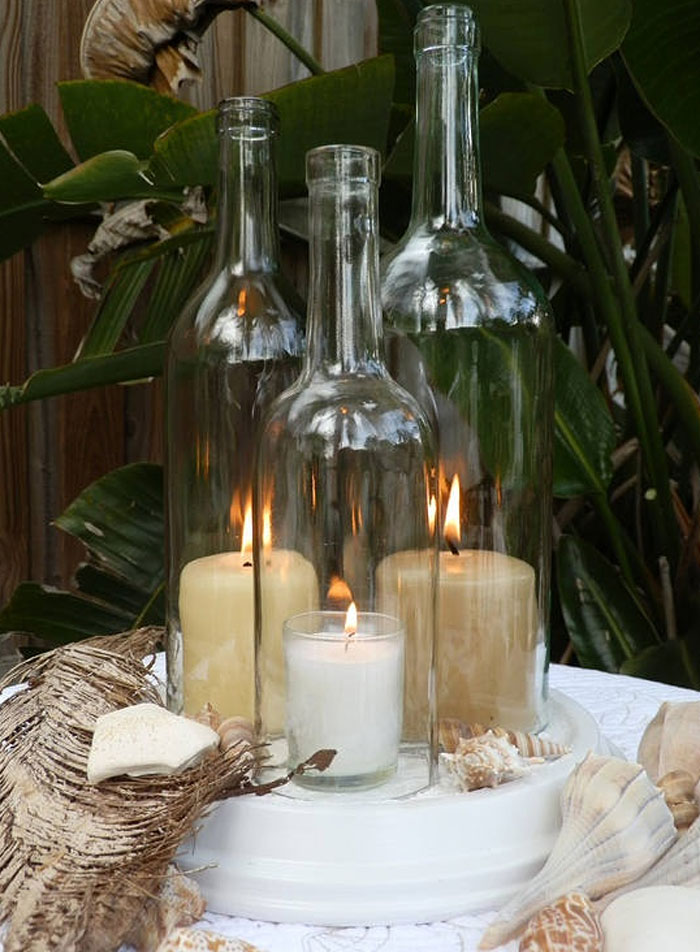
Wine Bottle Candle Centerpiece

Wine Bottle Candle Centerpiece (source unknown). Get a friend to cut the bottom out of 3 wine bottles of various sizes  and place them on top of candles. It looks so elegant and it didn’t cost much to put together.
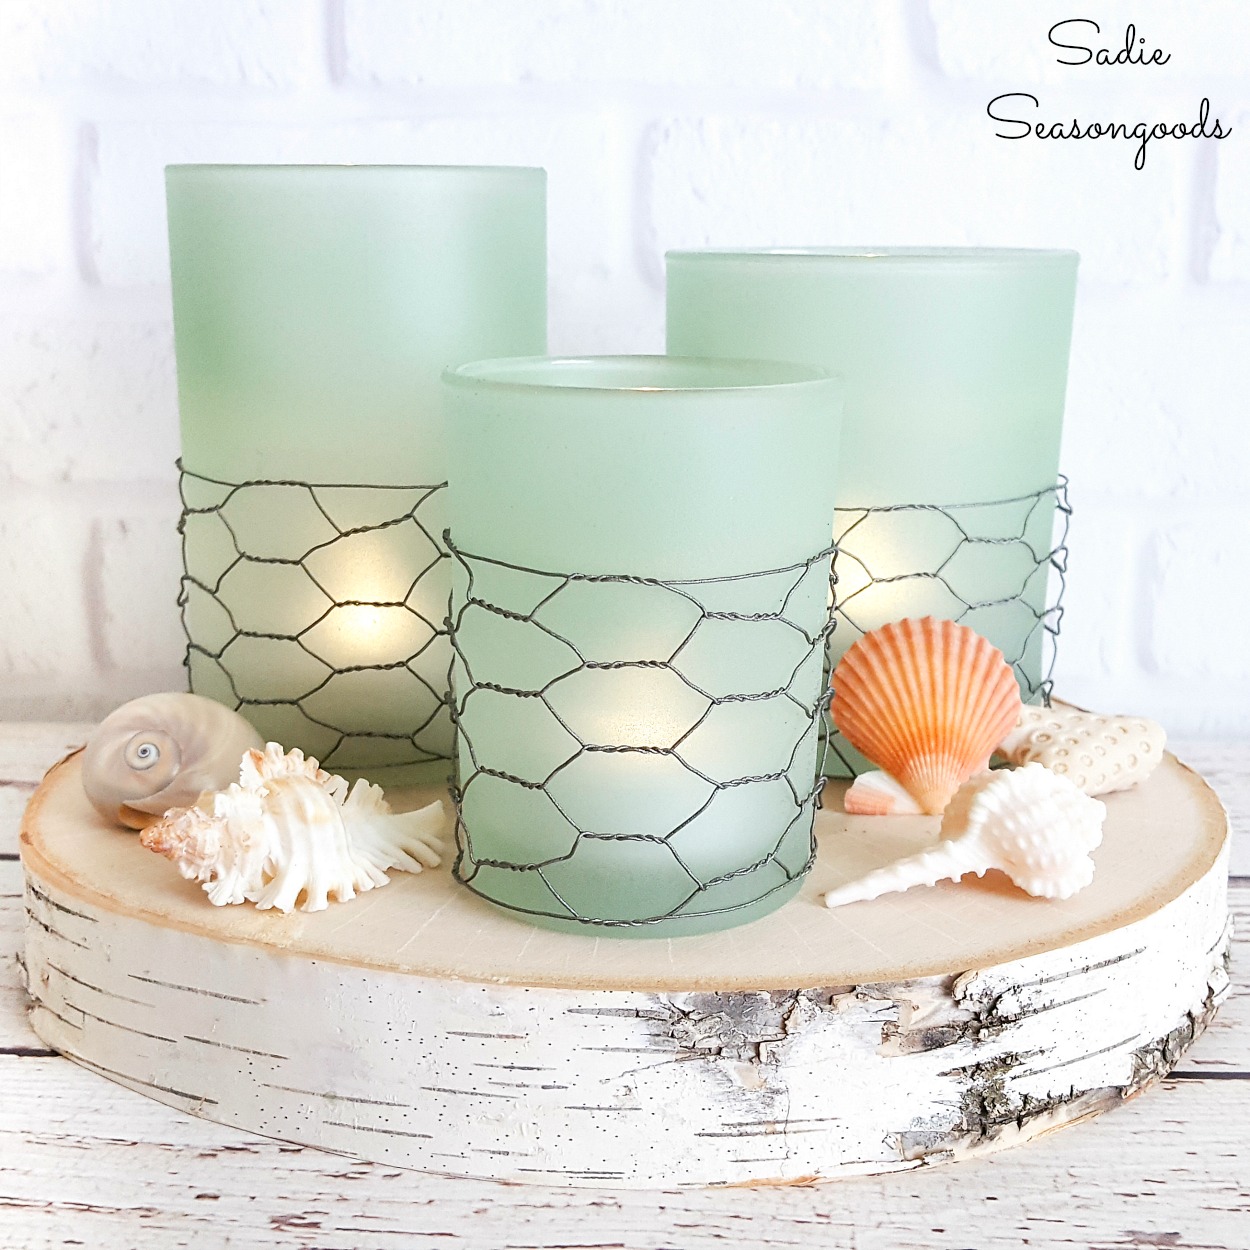
Coastal Farmhouse Decor from Glass Candle Holders

Coastal Sea Glass Farmhouse Candles from Sadie Season Goods combines the look of sea glass with the pattern of fishing net by substituting it for chicken wire.
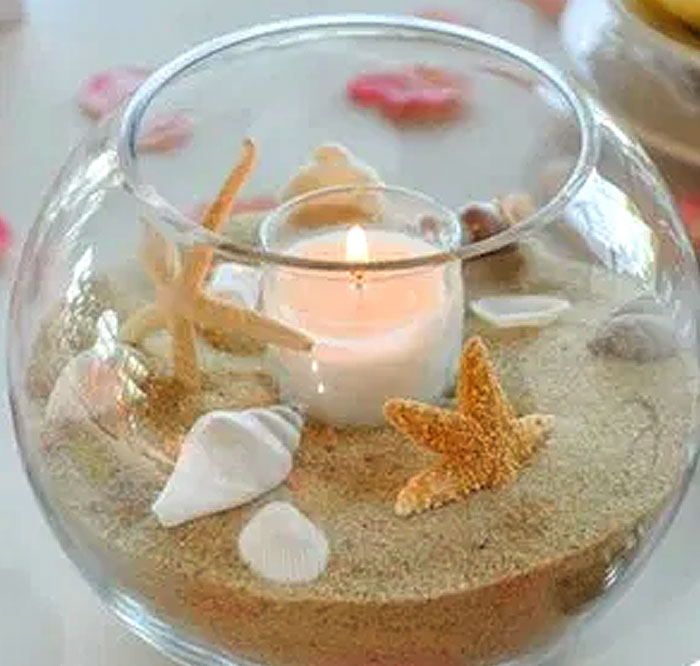
Round Beach Candle Fishbowl Centerpiece

Round Beach Candle Fishbowl Centerpiece (source unknown). Coastal home decor features a lot of blues and sandy color and LOTS of shell. Here’s another centerpiece that is shells, sand, a glass fishbowl and a candle.
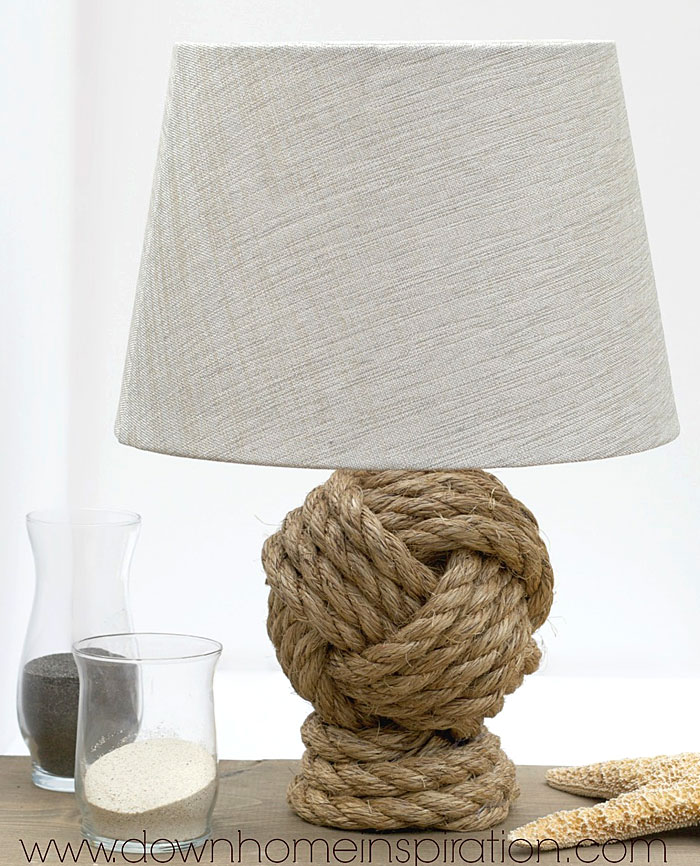
Pottery Barn Inspired "Monkey Fist" Rope Knot Lamp

Twine and rope are also a big part of coastal home decor. This Pottery Barn Inspired “Monkey Fist” Rope Knot Lamp made by Down Home Inspiration utilizes basic 3/4″ rope and a little bit of talent to make a monkey fist knot but you’ll have a coastal lamp that costs $25 to make instead of $225 to buy.
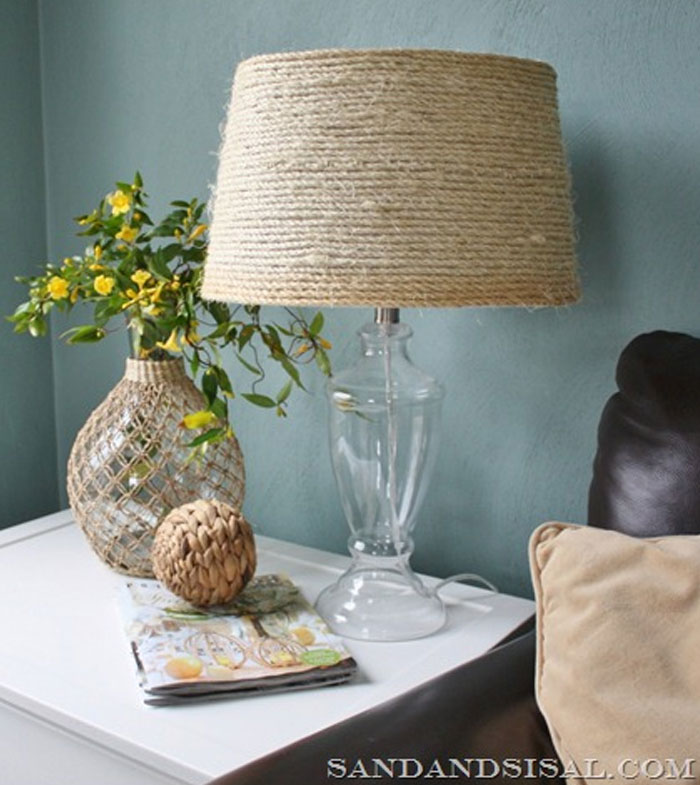
DIY Sisal Coastal Lamp Shade

If you have a plain shade you want to turn into a Coastal lampshade, try this DIY Sisal Coastal Lamp Shade idea from Sand and Sisal. All you need is some 1/4″ sisal rope and a glue gun and in an instant you have a natural fiber lampshade to add to your coastal home decor.
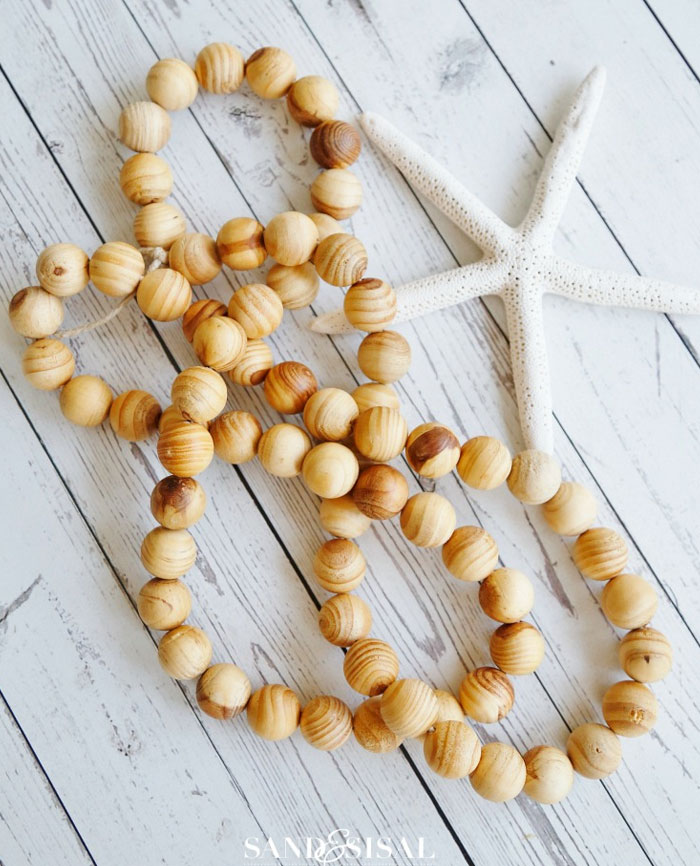
wood bead strands

You probably have seen these wood bead strands all over the Internet, Pinterest and in stores like Homegoods but now you can make a strand yourself and save a buck or two. Sand and Sisal also shows us how easy it is to make them with a box of round wood beads, a drill and hemp cord. In about an hour you’ll have a fantastic strand of beads you can use in your coastal home decor scheme.
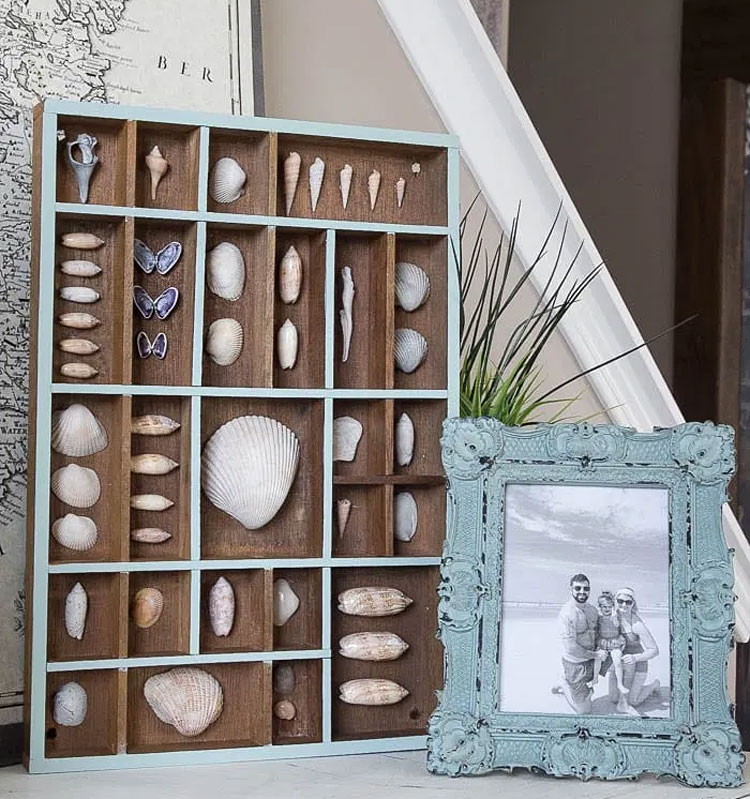
Printer's Box Shadow Box Shell Coastal Display

If you like to hunt for antiques and spot a printer’s tray or even purchase one on Etsy, you can use it as kind of a shadow box to display a variety of shells. Blesser House shows us how she did it. his is a great accent for your Coastal home.
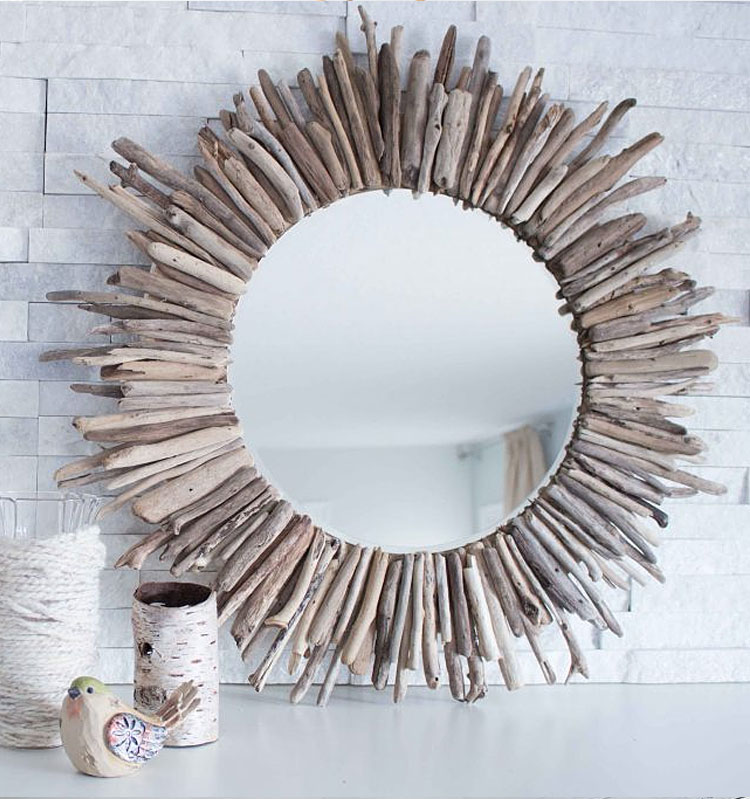

Coastal Driftwood Mirror

One of my favorite coastal pieces is this Coastal Driftwood Mirror made by Sustain My Craft Habit. It’s so versatile and can do in any room of the house. If you can’t find driftwood in your area you can buy it on Etsy and even Amazon. You’ll need a 14″ beleveled mirror to complete your project. This mirror is stunning.
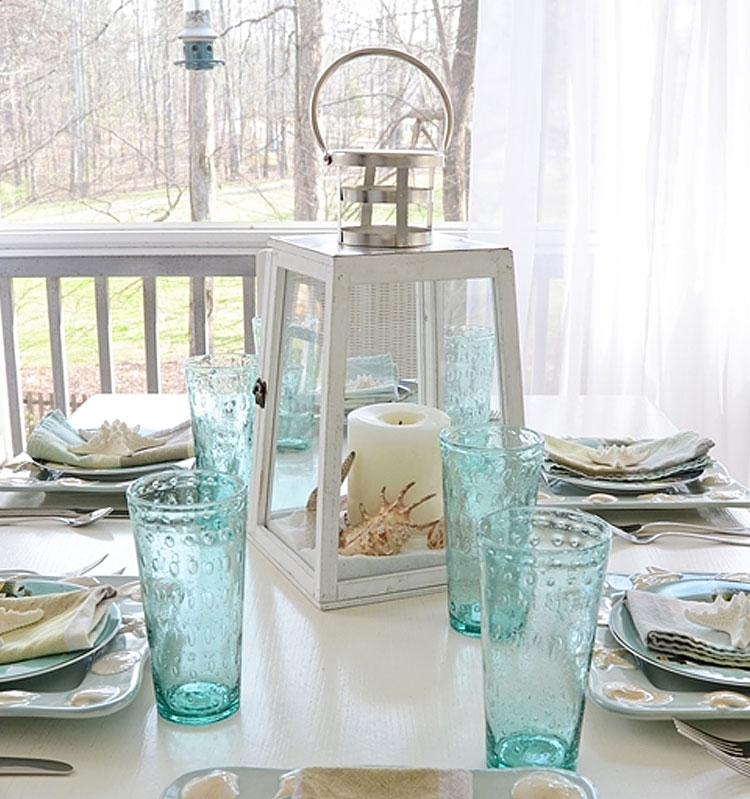
lighthouse lantern centerpiece

This is more of an idea than a coastal craft you make. Lanterns make great table centerpieces. They can also be placed just about anywhere you have a shelf. This lighthouse lantern makes a statement on the dining table. Between Naps on the Porch gives you ways to arrange the table.
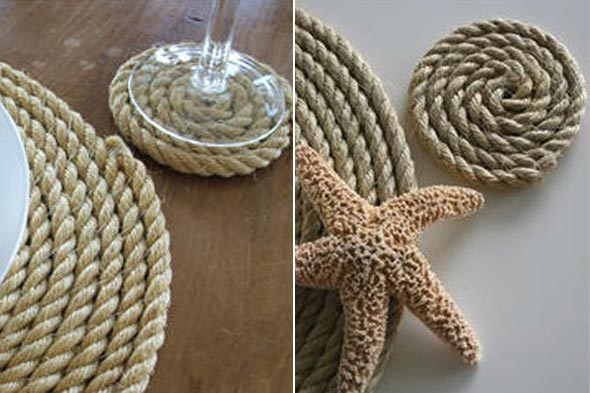
DIY Rope Coasters
source unknown

DIY Rope or Jute Coasters work up super quick. You just need sisal rope or thick twine and a glue gun.
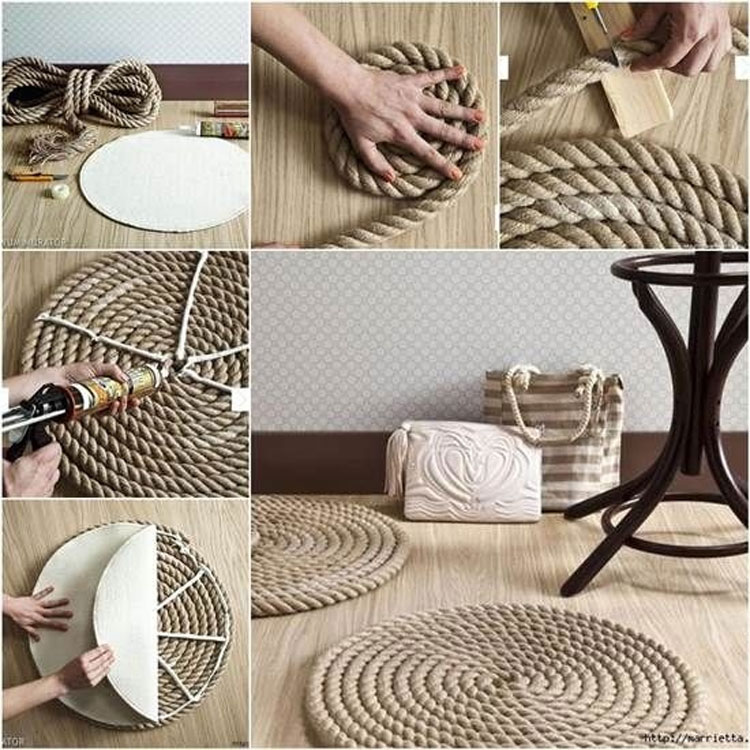
DIY Coastal Rope Rug

Source: Marrietta.ru

If you’re going to make rope coasters, why not use some of that rope and make a DIY rope rug that is super useful. You could also turn them into rope placements. Just don’t make the circle as large as you would for the rug.
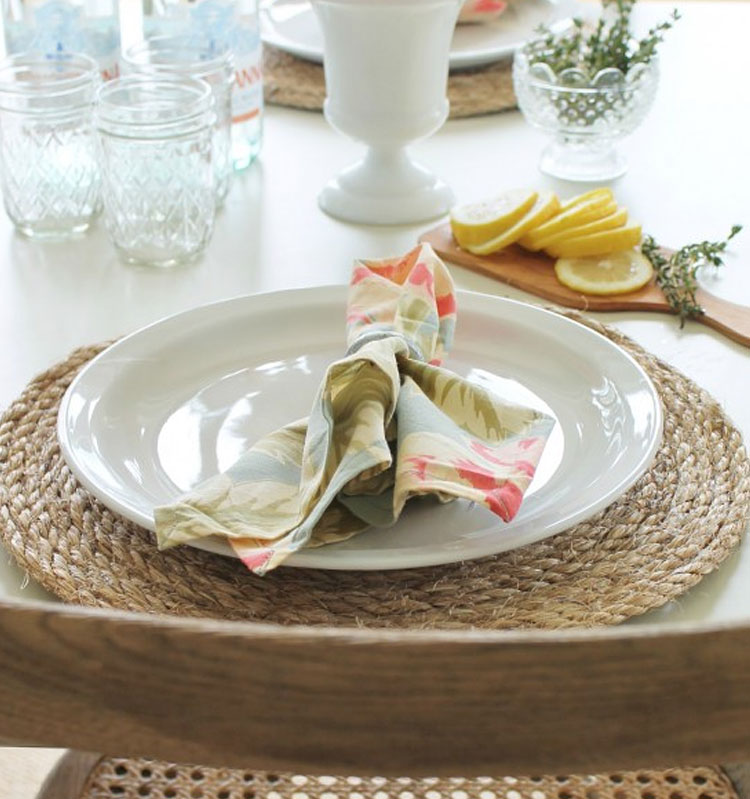
DIY Rope Placemats

Rope Placement from City Farmhouse

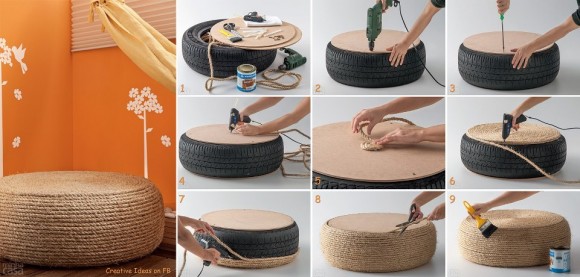
DIY Rope Cushion from an old tire
Source unknown

Or how about making a coastal rope cushion by covering an old tire with rope. This would look great on the porch or patio.
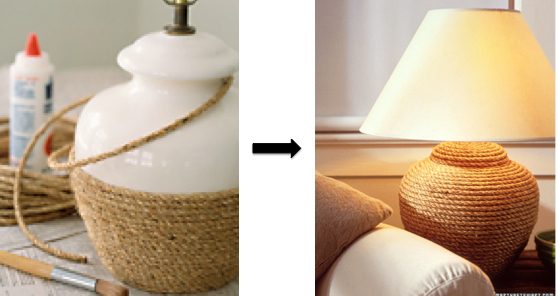
DIY Coastal Rope Lamp
source unknown

Continuing with sisal rope, let’s cover an old lamp and make a coastal rope lamp you can be proud of.
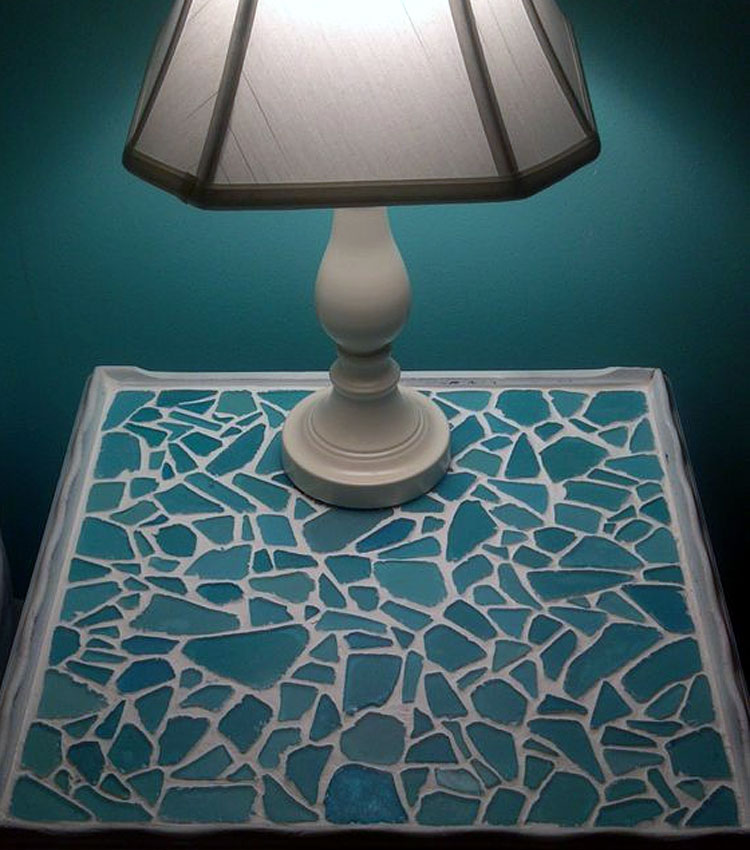
Sea Glass Mosaic Table

Switching gears to sea glass. This unique sea glass table accents any coastal home decor style.
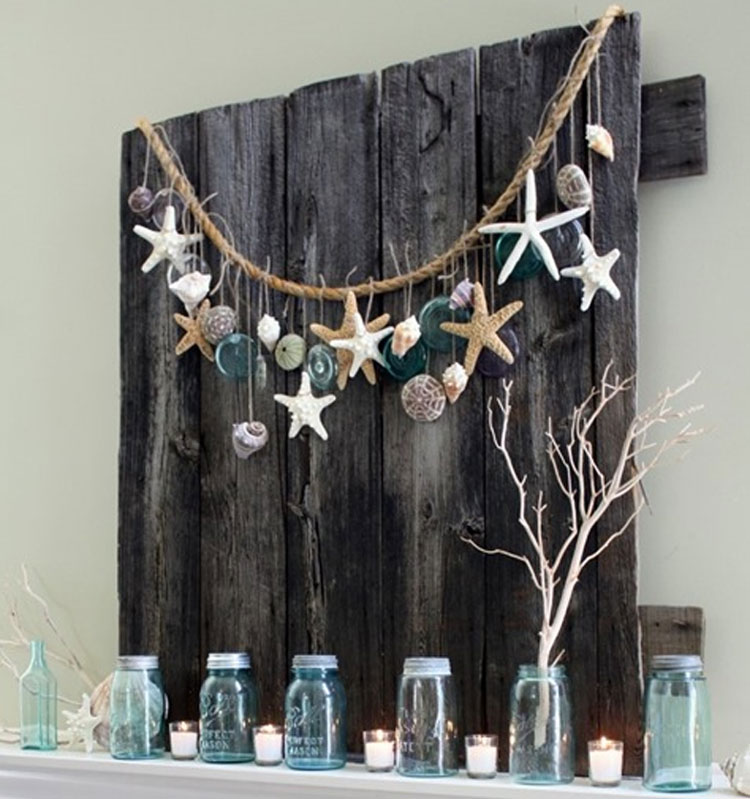
Pallet Beachy Coastal Garland

Pallet Beach Coastal Garland from Finding Home Farm is made using a hot glue gun to attach shells, starfish and old Mason jar lids to twine. The twine is then tied to a piece of rope. The wood backdrop is made from old pallets.
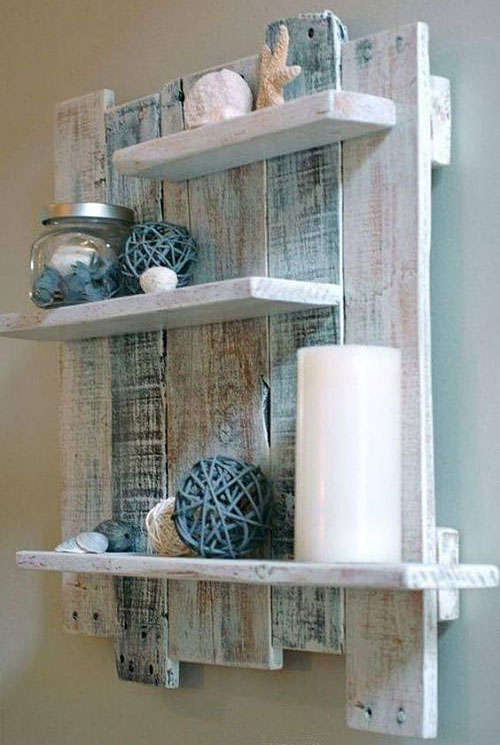
Coastal Wood Pallet Shelf

Coastal Wood Pallet Shelf can be made to hold all of your coastal goodies like candles and shells.
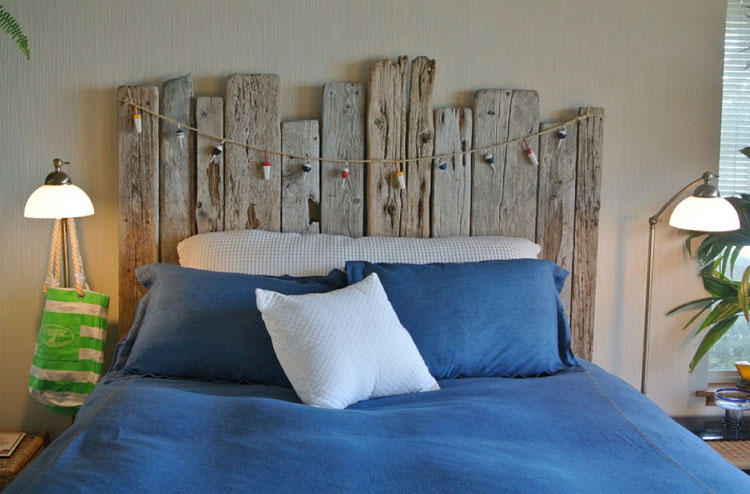
DIY Coastal Driftwood Headboard
Source: Houzz

After some time beach-combing and acquiring enough flat driftwood you too can create a coastal-style driftwood headboard.
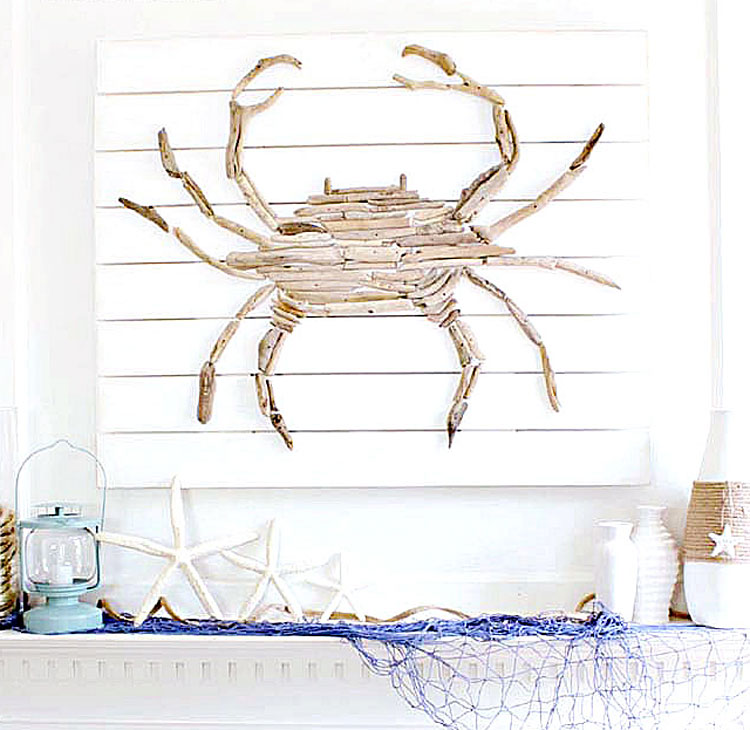
Driftwood Crab Art

Driftwood Crab Art from Remodelando La Casa is made by taking bits of driftwood and basically laying them out like a puzzle until the pieces fit.
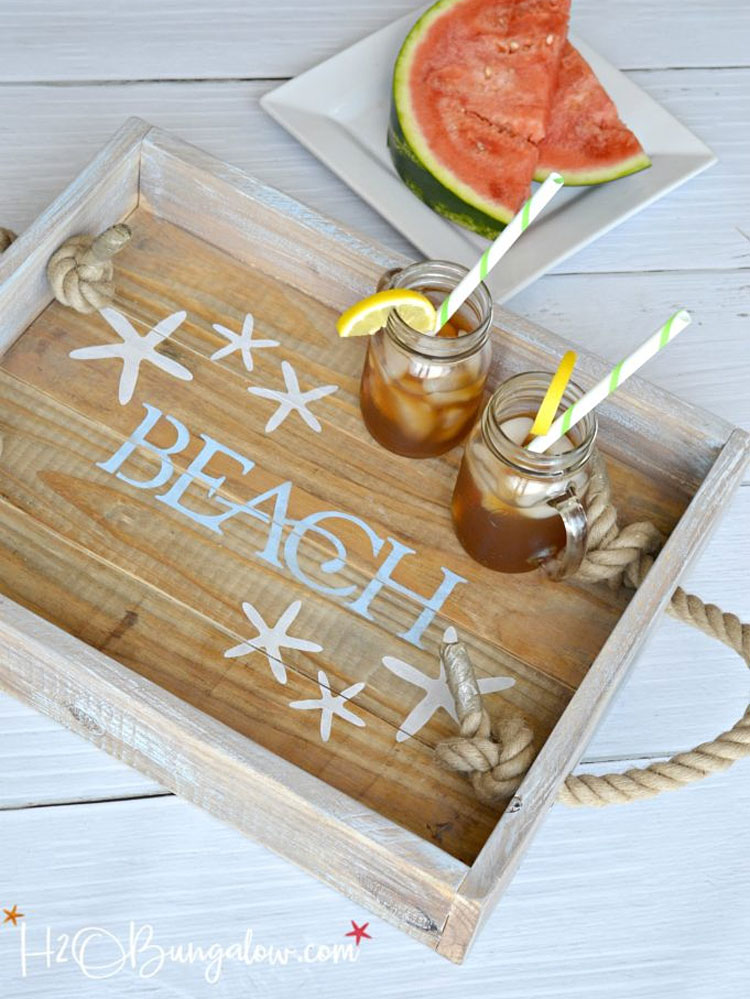
Coastal Rope Handle Wood Tray

This Coastal Rope Handle Wood Tray from H20 Bungalow can be made in a few hours from start to finish.
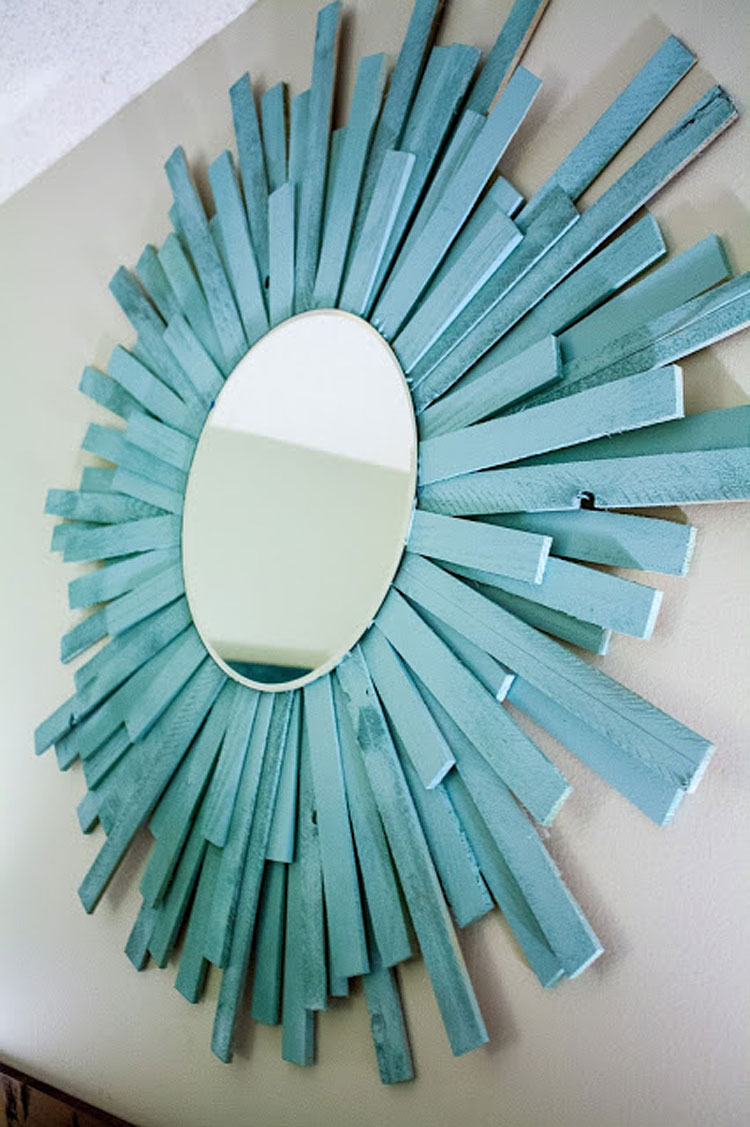
DIY Sea Blue Wood Starburst Mirror

This DIY Sea Blue Wood Starburst Mirror from Sgt. Pepper’s Kitchen isn’t made with driftwood but it is made using wood shims. You can purchase them for cheap at your local hardware store and the finished mirror looking stunning once it is painted a sea blue color.
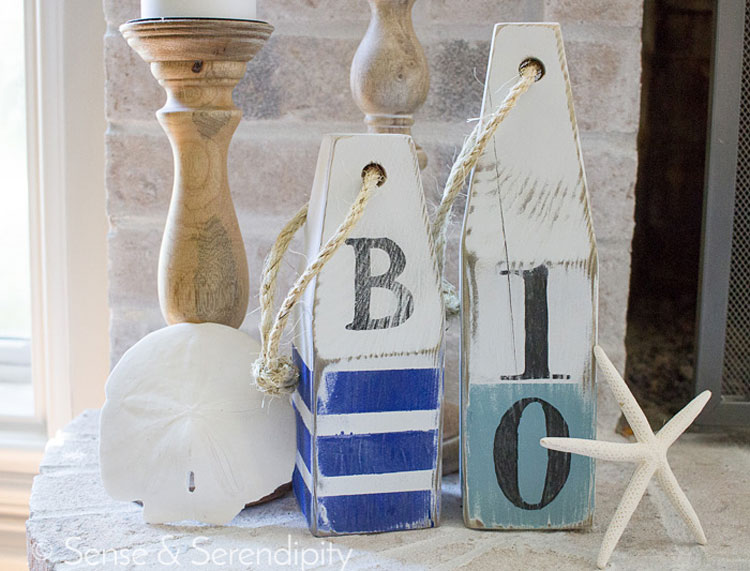
DIY Wood Buoys

People have been decorating their coastal homes for years with wood buoys. Now you can make your own for cheap. Sense & Serendipity shows us that with a 4×4, a saw, a drill, sandpaper, rope and some paint you can whip some up in no time.
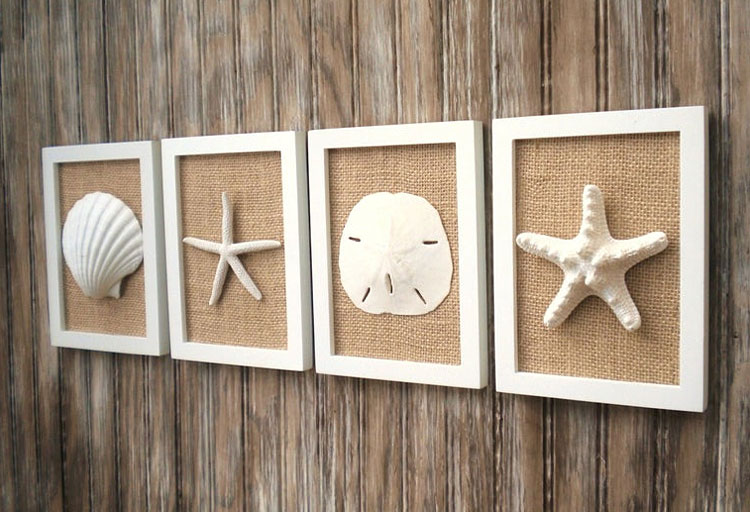
Beach wall art
Purchase on Etsy

Beach wall art is easy to create. Go to the Dollar Store and get a simple picture frame and a canvas. Paint the canvas a beige or blue color, inset it in the frame, remove the glass and glue a large shell in the center. Or you can purchase it on Etsy.
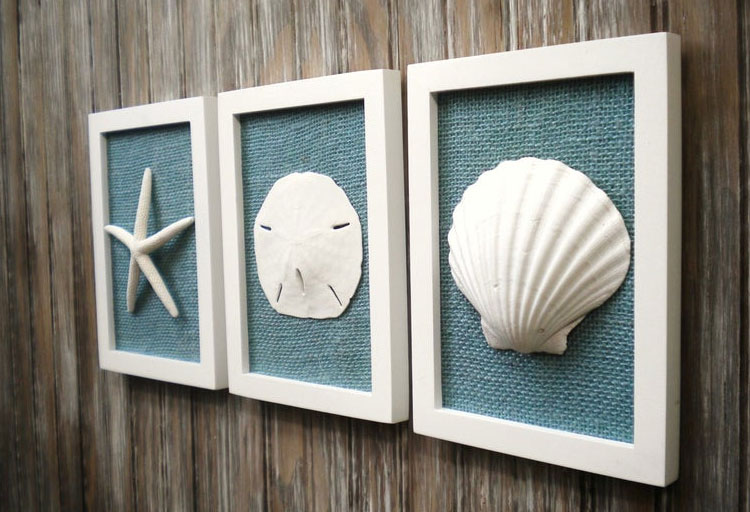
Dollar Tree Beach Wall Art
Purchase on Etsy

Sea Glass Crafts to Make and Sell

Sea glass crafts are in high demand in shops, online, Etsy and at craft fairs. We will give you sea glass craft ideas that you can make and sell for a profit. Sea glass is an exciting hobby that can also turn into a side business to make extra income. Some fantastic crafts you can make with sea glass include stepping stones for the garden, sea glass wall art, coasters, sea glass jewelry, picture frames and more.

Sea Glass is so beautiful that you will want to craft an item or beauty like a sea glass coaster, window frame, mosaic table, and sea glass stepping stones that you can make and sell for profit online and at craft fairs.

Where to Find Sea Glass

Almost all of us remember going to the beach as kids and gathering seashells with our parents. We would also search for colorful bits of sea glass and if we found any it was like finding gold because it is hard to find on many beaches. You can still scour the beach today for sea glass but it will take quite awhile to find enough to make a successful craft project. And, if you want to sell multiple sea glass crafts you will need to have a lot of sea glass on hand.

Sea Glass is readily available for purchase online at Amazon. They sell both small quantities and larger, bulk quantities of sea glass. If you are going to be making a lot of sea glass crafts you may want to consider purchasing sea glass in bulk. When buying in bulk you will get a reduced price too. You need to keep your supplies costs down if you are planning on reselling your sea glass crafts so buying in bulk will help.


What is the Best Glue for Sea Glass Crafts

The type of glue to use for sea glass crafts depends on the type of projects you are working on.

Clear Drying Glues If you want light to reflect through the sea glass you should use an adhesive that dries clear such as Vigor Jewelers Epoxy or E6000 Jewelry Epoxy.

Strong Bond Glues If you are working on a piece that has a lot of sea glass attached, you will want to use ceramic cement to bond sea glass to the surface. You need to make sure the sea glass stays firmly attached and has no chance of coming off your piece. Gorilla Glue works well to attach sea glass to any surface. You can also get it with a clear finish.


Sea Glass Coasters
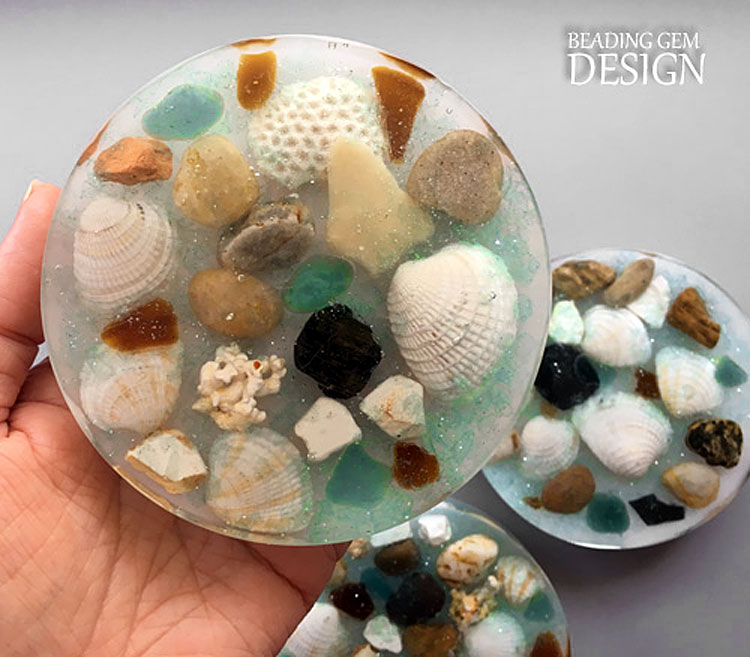
Source: The Beading Gem

Sea Glass Resin Coasters

You can make sea glass resin coasters using Little Windows’ Brilliant Resin, a bit of white resin pigment and sea glass. You will also need some type of mold to create the round shape. A silicone mousse pan works well. It would be best if you had some measuring cups and paper towels as well. The Resin proportion you need to use is 2:1 of part A, and part B. Start with layers where the first layer is white, which gives you an opaque bottom so you can’t see through it. Add the sea glass pieces, and with a toothpick, you can adjust the elements. This specific sea glass craft also includes some glitter gravel to add sparkle. Pour the clear Resin on top and let everything set overnight.


Source: Sand and Sisal

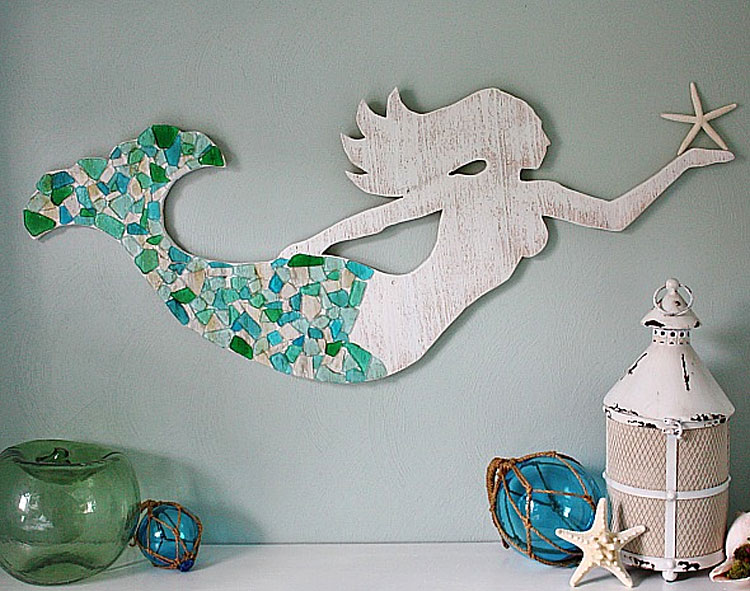
Sea Glass Mermaid Wood Wall Art

To create a Sea Glass Mermaid wall art piece you will first need to draw a mermaid design on a piece of wood and then cut it out using a saw. You could use plywood or cedar. You may want to paint the wood with chalk paint and sand it to give it a weathered look. Flat pieces of sea glass are preferred for this project because you are not covering the whole piece of wood and you don’t want the glass to be raised up that much.

Arrange the sea glass pieces to create the Mermaid tail and glue the pieces to the board using a strong glue such as Gorilla Glue. You need to ensure that you let it dry for at least for an hour but overnight is preferred.


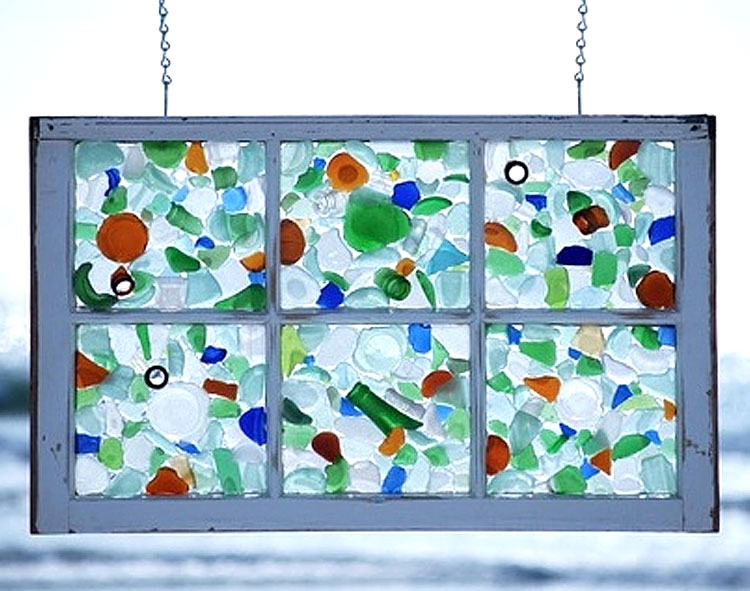
Sea Glass Hanging Window Frame

Sea Glass Hanging Window Frame

If you want to make a fantastic hanging sea glass window frame, you need to fill each window pane with sea glass pieces. You could add bits of broken glass and other embellishments as well. Ensure you use enough glue and let it dry for a sufficient amount of time. You can find old window frames at antique shops and try looking on Craigs List and also Facebook Marketplace as someone is always getting rid of old window frames. You can turn an old window frame into a fantastic sea glass art that you can keep to enjoy or sell for a profit. You will need chain for this project and probably eye hooks to screw into the window pane to hook the chain onto.


Source: Lovely Greens

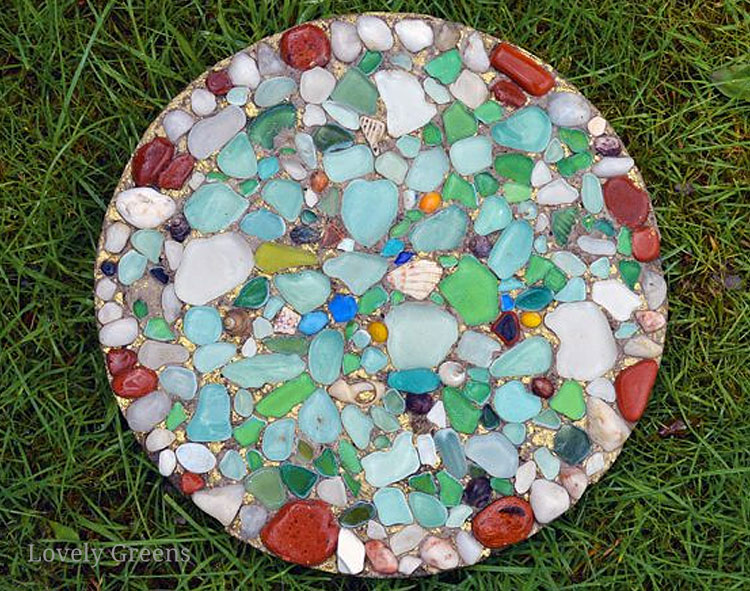
Sea Glass Garden Stepping Stone

After collecting or purchasing your sea glass, you will need to find a mold such as a cake pan or plastic tub to get this project started. Some other supplies you will need are cement, gold spray paint (I like to use DecoArt Metallic paint and brush it on), matte white paint, and clear spray paint. If you prefer you don’t have to use spray paint. You can use other water-based paints you have on hand. You will also need a bit of chicken wire or metal fencing that you can fit inside of your mold.


Sea Glass Mosaic Table
Source: Lisa Hansen on Pinterest

Sea Glass Mosaic Table

If you have an old table that is in need of a face-lift, you can cover the top with sea glass and then use grout to fill in the gaps. You could paint the table white first to give it a more nautical look. As with any sea glass craft project, you will need a strong glue to adhere the sea glass to the wood table. Once it is dry, use a plastic spatula and spread the grout over the sea glass and around the gaps. Let it dry overnight. You may want to give it a protective finish by adding a layer of Miracle Sealants Grout Sealer on top.


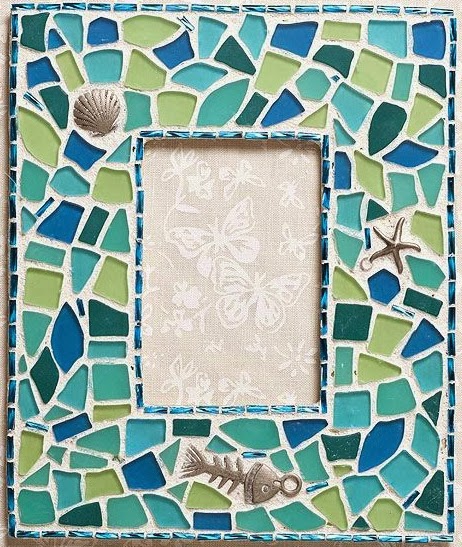
Sea Glass Picture Frame

Here is a unique way to hold a photo, a sea glass picture frame. Take an ordinary picture frame and turn it into a masterpiece that you can keep or sell. You will need flat, clear sea glass pieces for this project. You will also need pre-mixed grout, strong glue and sealant. Some embellishments like starfish and shell jewelry findings will give it a nautical touch.


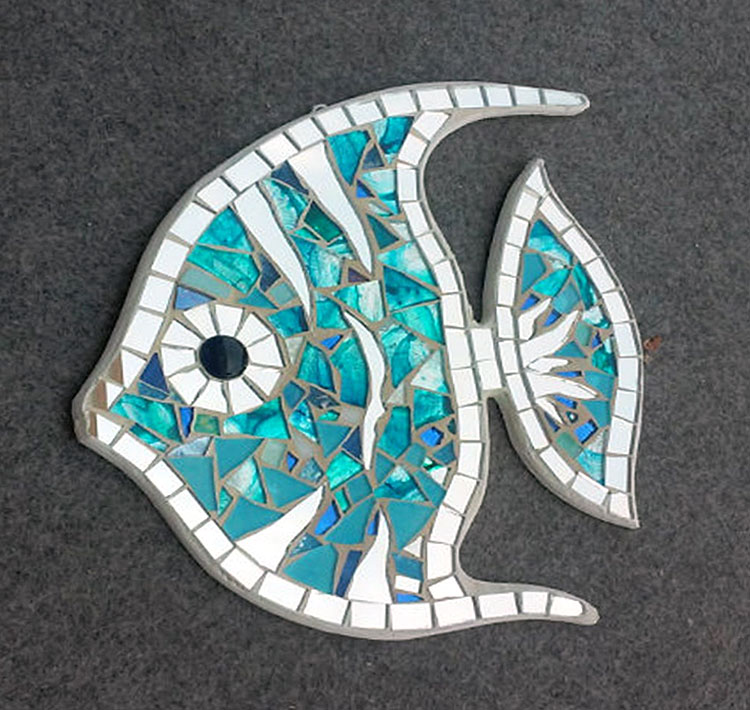
Sea Glass Angelfish Wall Hangings
Source: Etsy

Sea Glass Angelfish Wall Hanging

This stunning sea glass Angelfish wall hanging is made of mosaic pieces of mirror and colorful and iridescent glass. The mirror reflects every glow of light giving freshness and vitality to every environment.


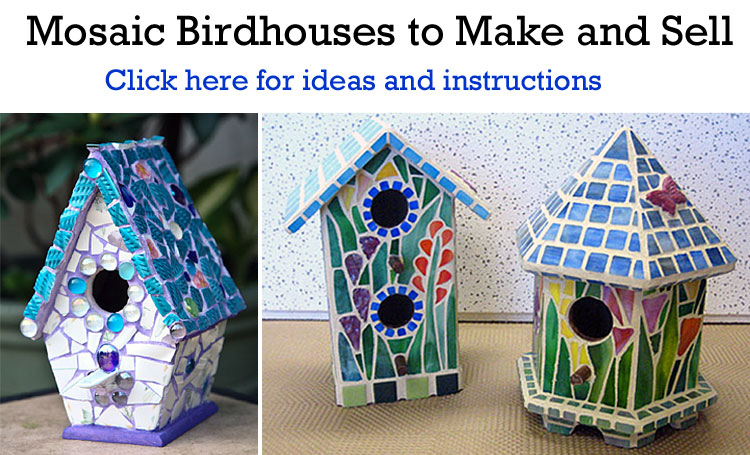
Mosaic Birdhouses to Make and Sell

How to Build a Rustic Wood Centerpiece Box

Learn how to build your own DIY Rustic Wooden Centerpiece box with our step-by-step instructions. You don’t need a lot of wood and there are minimal supplies required. In no time you will have your own wood centerpiece box. We will also give you some tips for decorating your box to make it a focal point in your home.

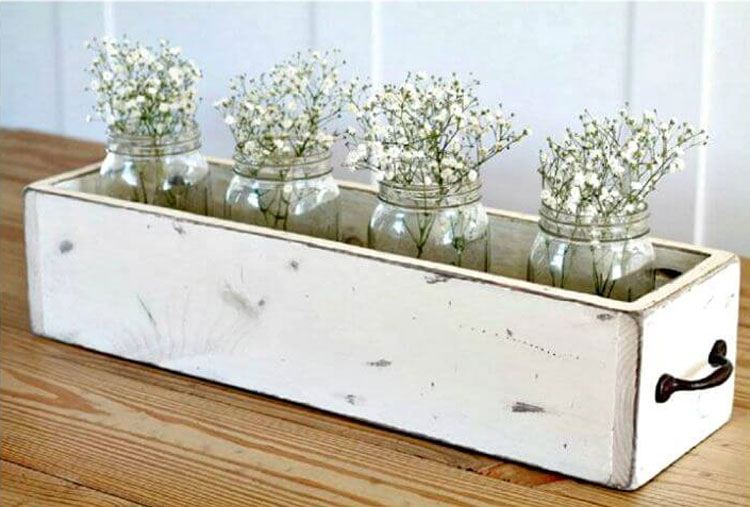
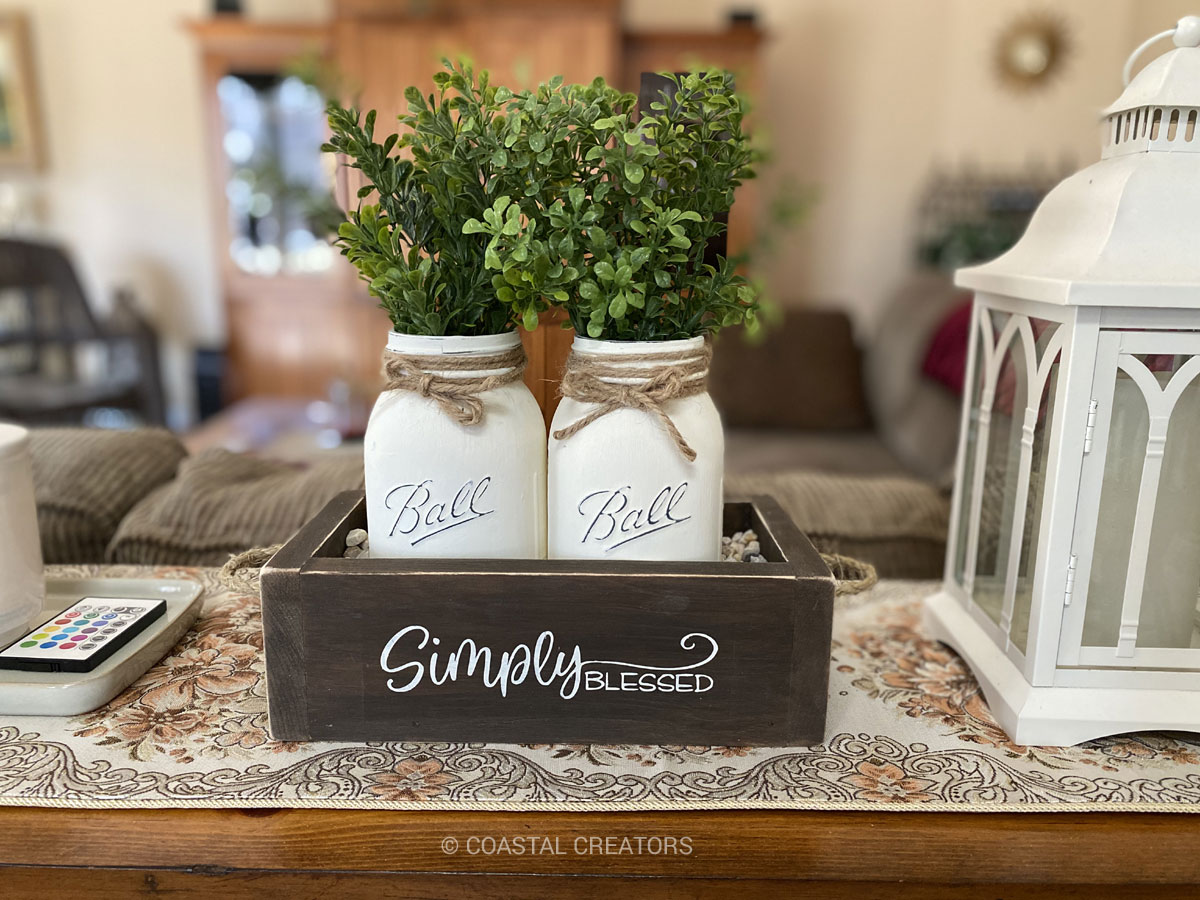
Here is an example of a rustic wood centerpiece box that has been given a whitewashed look.

Rustic Wedding Wood Centerpiece Box
Love Grows Wild

Disclaimer: this article contains affiliate links. Please read our affiliate policies.

Rustic Wood Centerpiece Box Supplies List

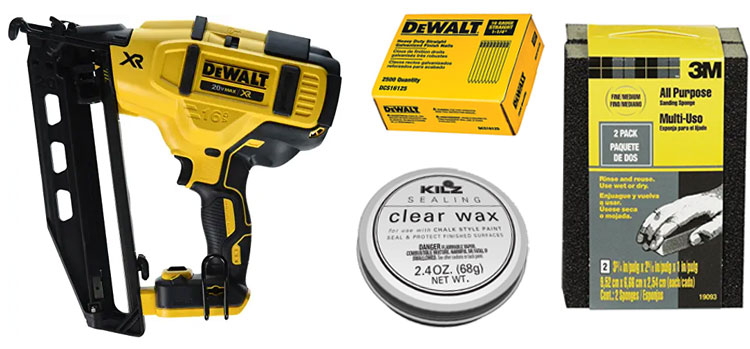
Here are some of the items you will need to complete your project.

  • Common Pine boards (yes they even sell that on Amazon if you can’t get out)
  • Acrylic Paint or stain
  • Paint Brushes
  • Hammer and finishing nails
  • Sanding sponges or Hand Sander
  • Mod Podge (Optional)
  • Paint Wax Sealer (Optional)
  • Brad Nailer (Optional)
  • Quick-Grip Clamps (Optional)


Wood Centerpiece Box Sizes

You can make your wood box just about any size you like. If you want to make the one we have in the photo we provided the size for that. It is a smaller wood box than normal because we made it for a class we were teaching.

We used Common pine board with knots but you can use whatever wood you like. We buy 1 x 4 x 3/4″ and 1 x 6 x 3/4″ boards.

Since these are wood centerpieces boxes that are designed for home decor and not an actual planter box, the height is a bit shorter. If we were going to use these to put herbs and other plants in, I would make them taller – so instead of 3-1/2″ tall they would be 5-1/2″ tall.

Small Wood Box Dimensions

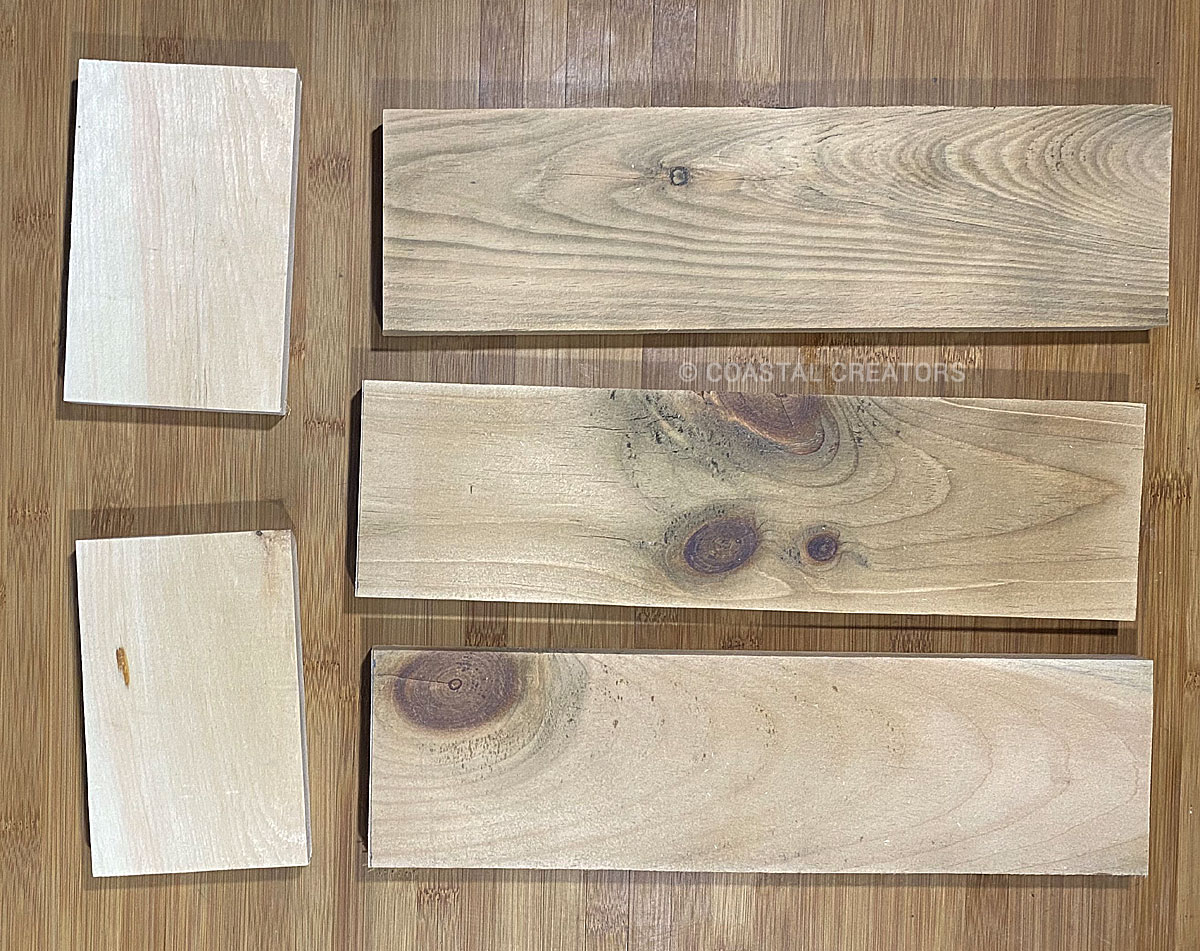
Finished Size: 10-1/2″ l x 5-1/2″ w x 3-1/2″ h

Wood Cut Sizes:

  • 2 @ 9″ x 3-1/2″
  • 2 @ 5-1/2″ x 3-1/2″
  • 1 @ 9″ x 4″

Standard Wood Box Dimensions

Finished Box Size: 14″ l x 5-1/2″ w x 3-1/2″ h

Wood Cut Sizes:

  • 2 @ 12-1/2″ x 3-1/2″
  • 2 @ 5-1/2″ x 3-1/2″
  • 1 @ 12-1/2″ x 4″

Long Table Wood Box Dimensions

Finished Box Size: 25-1/2″ l x 5-1/2″ w x 3-1/2″ h

Wood Cut Sizes:

  • 2 @ 24″ x 3-1/2″
  • 2 @ 5-1/2″ x 3-1/2″
  • 1 @ 24″ x 4″

How to Build a Rustic Wood Centerpiece Box

NOTE: If you don’t want to buy brand new wood, you can use pallet wood too. You can often find free pallets by using the free section on Craigslist and also Facebook Marketplace. That is how we have found ours. You will need a good saw and possibly pliers to take the pallets apart. This tool has helped us a lot

1. Cut your wood. Use the size chart above.

2. Sand your wood. You don’t need to sand it very much. Just lightly to get rid of any rough spots.

3. Build your box. Using a Brad Nailer or hammer and nails, nail one long board to one side of the base. Nail the end pieces to the box next. The last step will be to nail the other side and you have your box made.

TIP: You may want to Quick-Grip Clamps the bottom, front and back boards together first. This helps you line everything up and they stay put while you are nailing them together. Or, put the entire box together, clamp, and then nail.

4. Paint your wood. You can stain your wood or paint it with acrylic paints. I like to put a little bit of acrylic paint in a dish an add a lot of water to it to make it a wash. It looks more like stain when you do this. Or, you can paint it completely with acrylic paint and then sand it later to give it that affect. Staining is also an option.

5. Sand your wood again. This time you are going to sand it a bit rougher to give it that distressed look. I like to really sand the corners and make them round.

6. Drill holes for the handles. At this point you could be done but if you want handles you can drill 2 holes on each end to accommodate either a metal handle or a rope handle.

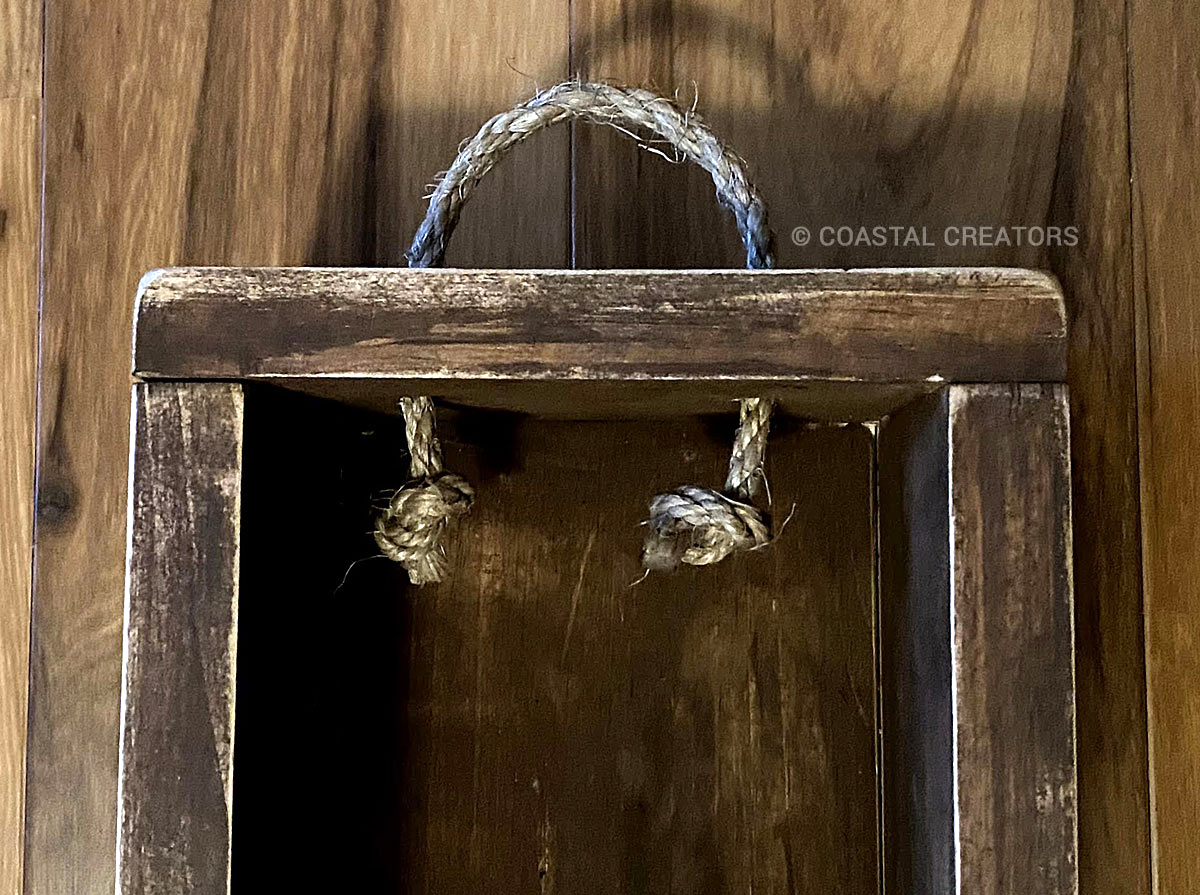
TIP: Wrap masking tape around the ends to make them go through the holes easier. If you are adding rope as a handle I suggest you put one end in one hole, tie a knot and then get it the size you want it and put the second end in and tie a knot. Our handle required about a 12″ of twine.

7. Protect the wood. You can definitely leave the wood the way it is or you can use a Mod Podge or Paint Wax Sealer to protect it.

Notice the brad nails in the corners. A Brad Nailer makes this a quick and easy project. You can, however, build a wooden centerpiece box with just a hammer and finishing nails.

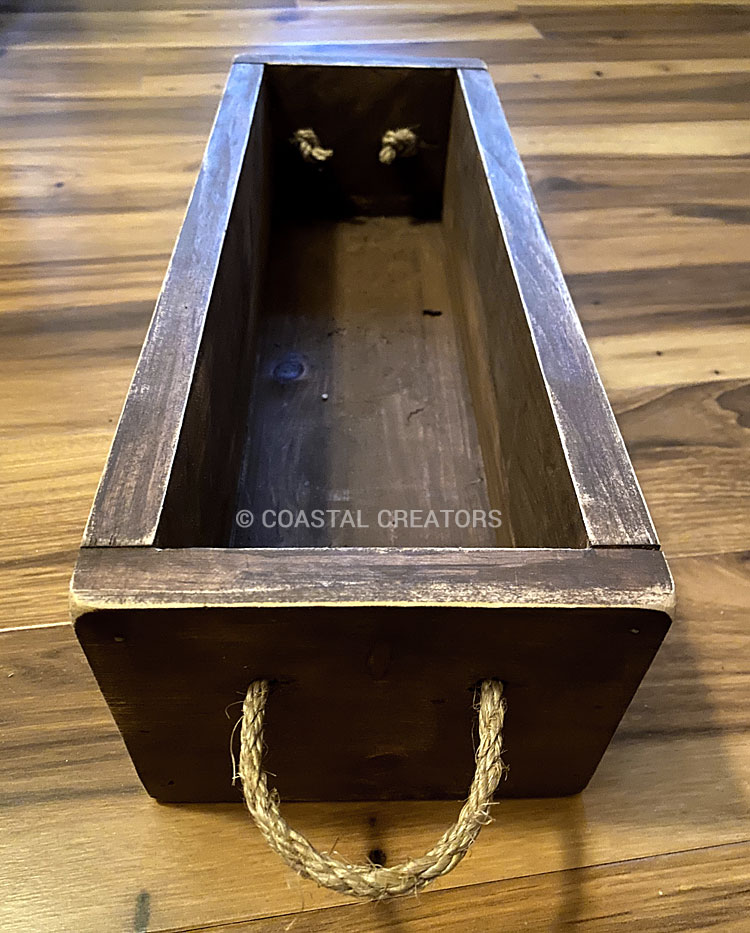
This is what our finished wood centerpiece box looks like when it is painted with brown acrylic paint, sanded and the rope handles attached.

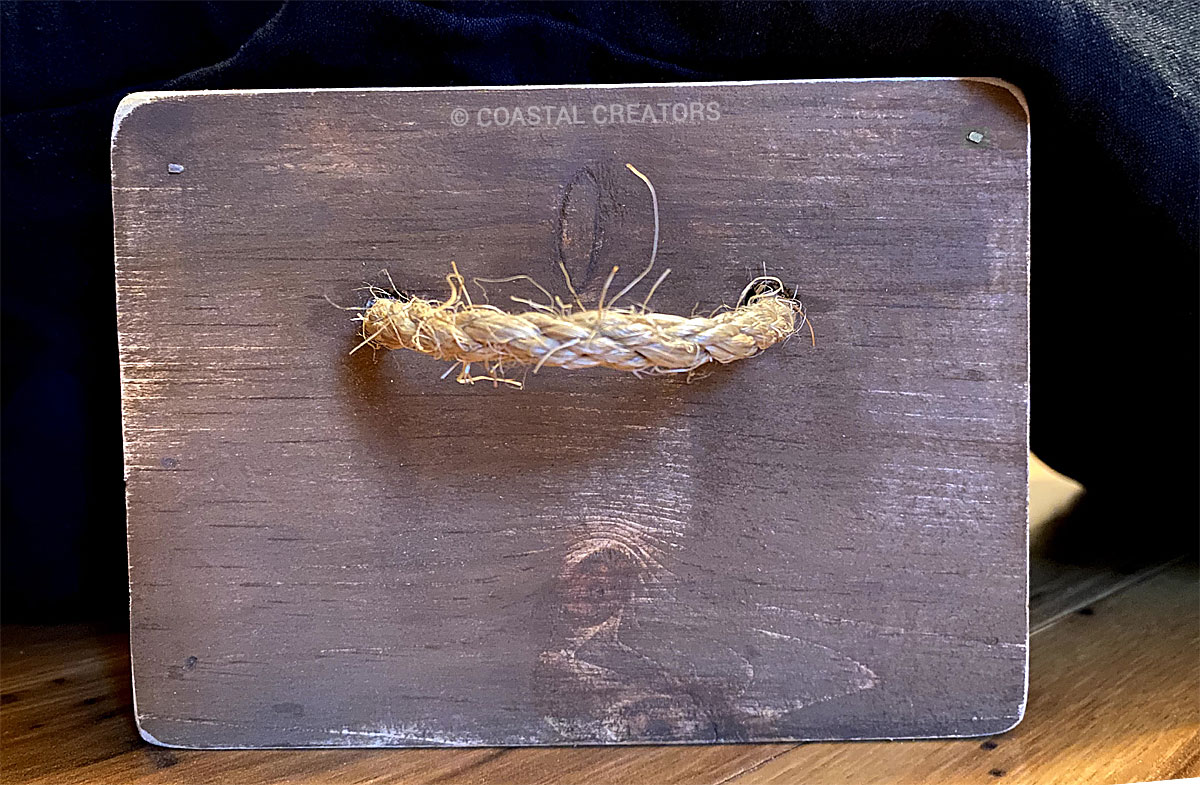
This is what the knots look like inside of the box when you add a twine handle.

The Secret word is candles

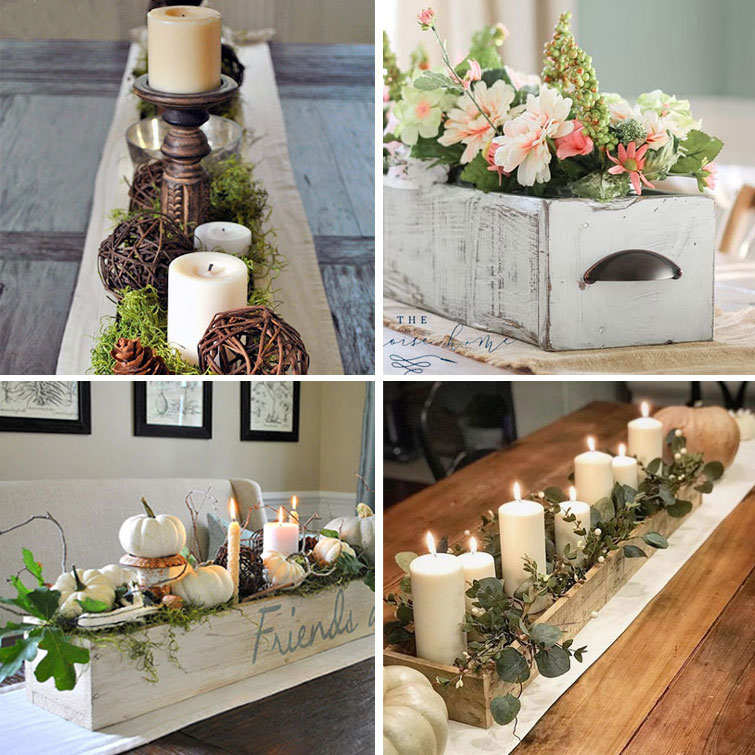
Visit our Wood Centerpiece Box Gallery to get ideas for decorating and filling your box with all kinds of goodies.

How to Build a Rustic Wood Centerpiece Box

Last Minute DIY Beach-themed Gifts to Make in an Hour!

You’ve decorated your Beach-themed Christmas tree and it’s crunch-time for getting your holidays gifts made, purchased, and wrapped up in time for gift giving. With just a short time left, here are some quick and easy DIY beach-theme gifts you can make in under an hour.

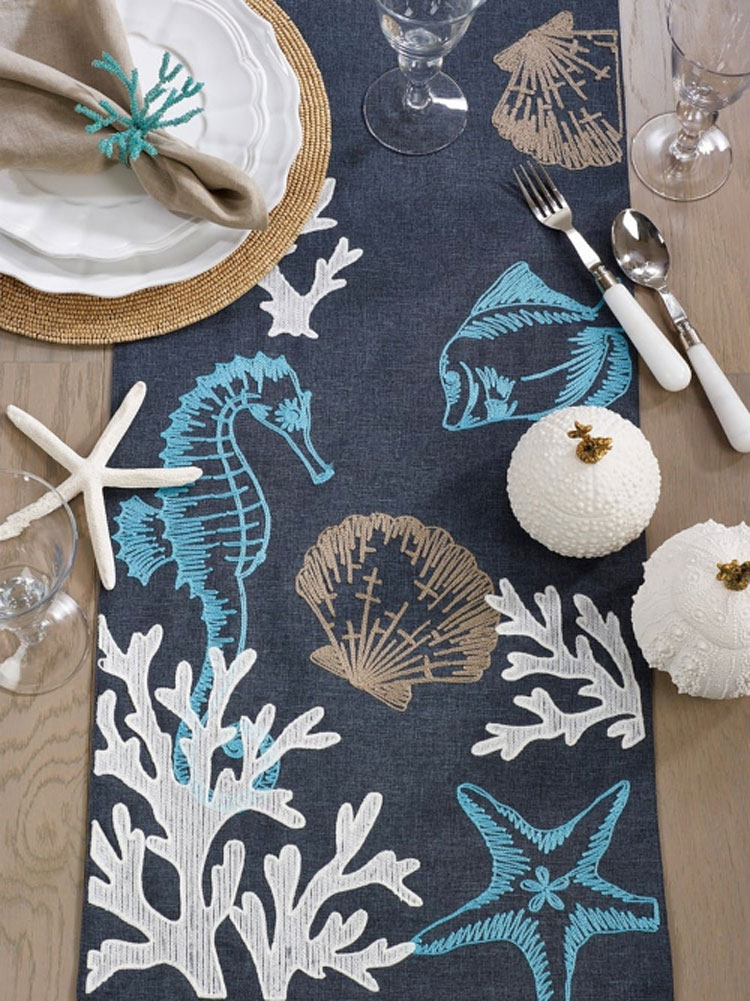
Beach-themed Table Runner

If you know how to sew, whip up a beach-themed table runner. All you need is a piece of beach-inspired fabric, some thread and a sewing machine. Cut the piece of fabric 71″ long x 16-1/2″ wide. Turn the raw edges under 1/4″ and iron. Turn again 1/4″ and sew all around. Your finished table runner should be 70″ long x 16″ wide.


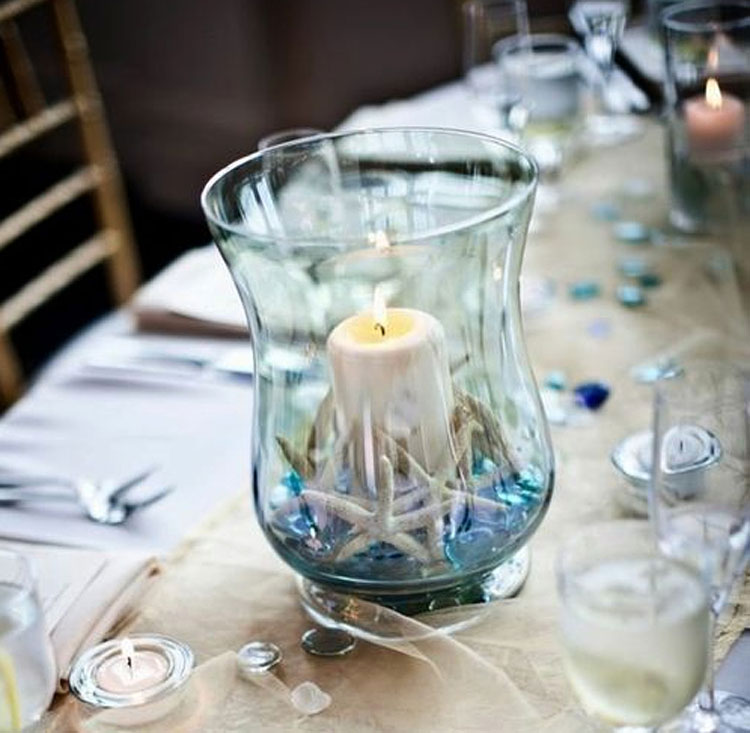
Coastal Hurricane Candleholder

This last minute DIY Beach-themed gift is easy and doesn’t require sewing, gluing or any crafty talent. Get a large glass hurricane vase, fill it with glass stones, some star fish, and a wide pillar candles and you have the perfect gift. You could even use a battery-operated pillar candle instead of the traditional wax candle.


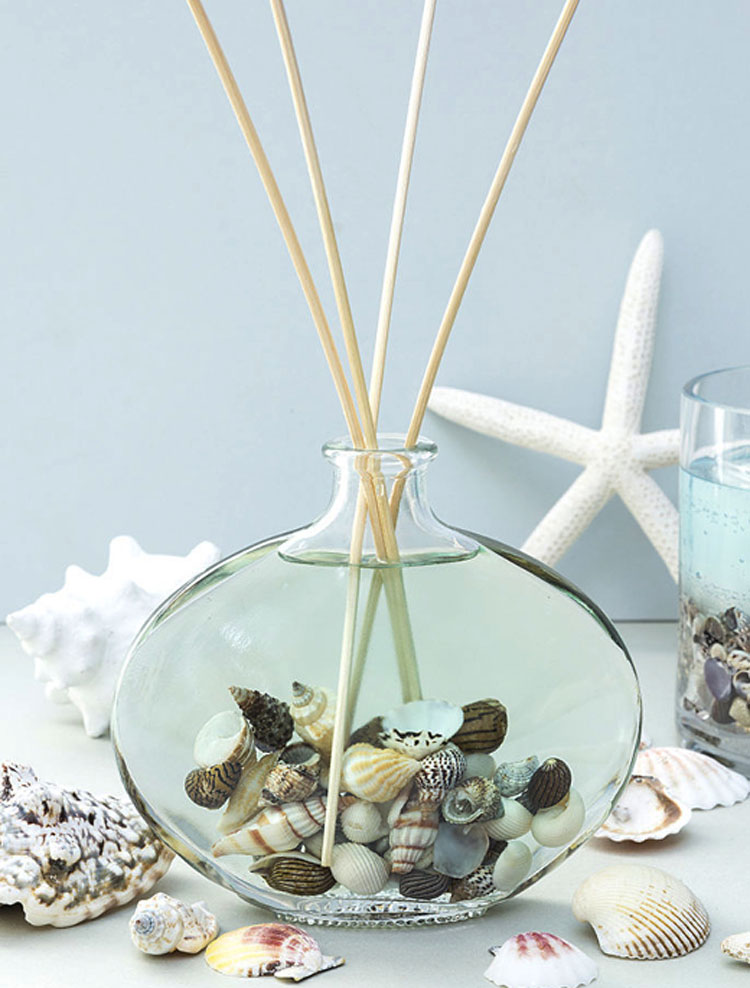
Beach Theme Reed Diffuser

Reed diffusers make great gifts and to kick it up a notch and make it a DIY beach-themed gift, add some small shells  to the base of the glass bottle. If you purchased a diffuser, just open the box, add the shells, pack the bottle with some tissue so the shells don’t come out and then put everything back in the box for wrapping.


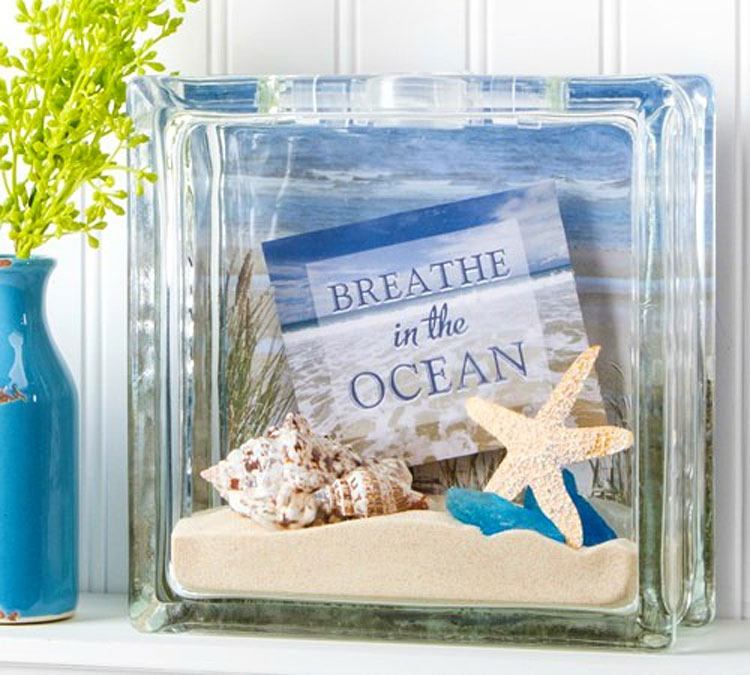
DIY Beachy Glass Block

Here is another DIY Beach-themed gift you can make that doesn’t require special tools or talent. Grab one of these Glass blocks from Michaels or Amazon, fill it with sand, shells and a glue a beachy photograph, postcard, or event picture from a magazine to the inside. You could even add a string of fairy lights for some added sparkle. This is a great gift for the beach lover in your life! You could actually this as a DIY craft kit for our crafty friends. You buy the supplies and let them put it all together!


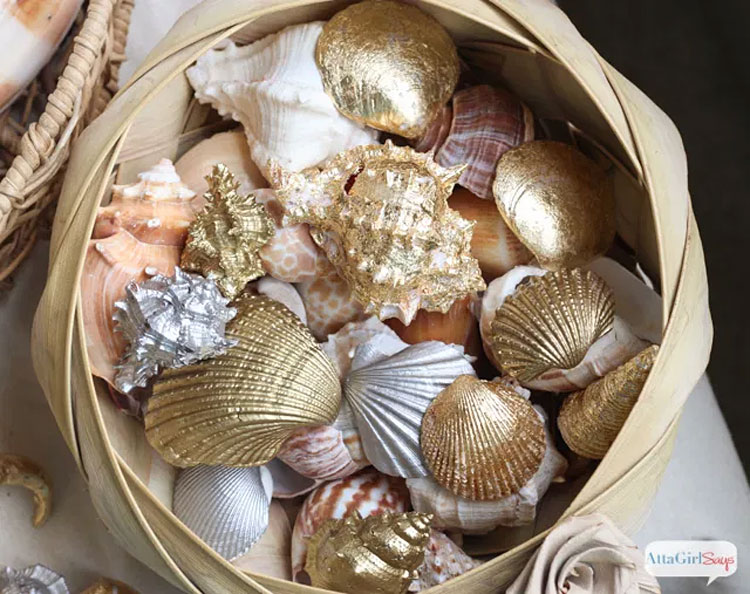
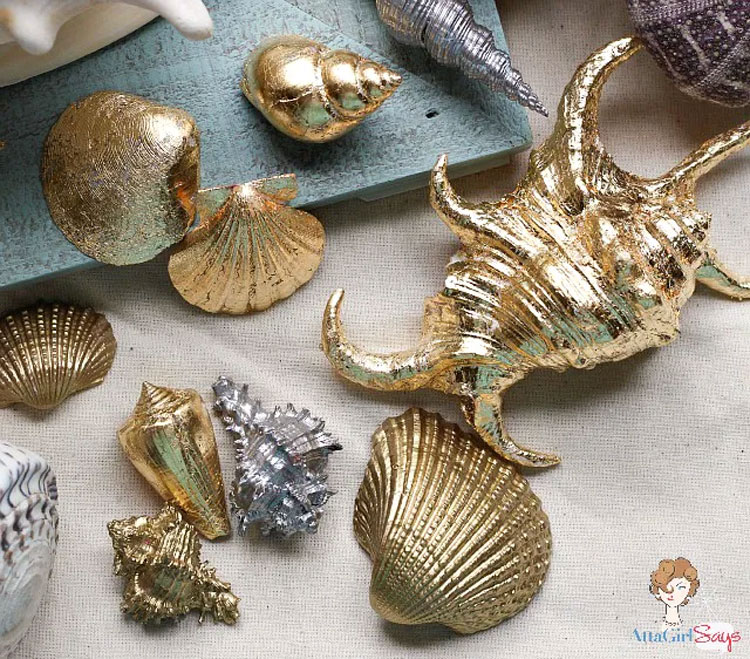
Gold and Silver Gilded Shells

Gold and Silver Gilded Shells


Our last DIY beach-themed gift idea is gilded shells. Turn ordinary shells into something extraordinary with gold or silver gilding. Add the gilding is similar to painting because it is a liquid. All you need is the gilding, a paint brush and some shells. If you need some guidance for adding the gilding, Amy from AttaGirlSays.com can show you how to do it.

Now that we’ve given you some great last minute DIY beach-theme gifts to make, get cracking because it’s almost time for gift giving.

Free Easy DIY Wood Birdhouse Plans

When Spring comes we think about the birds and wildlife coming back into our yard. Birds will be searching for places to nest, hatch their eggs, feed their young and you can help by building a wood birdhouse or wood nesting box.

When deciding what birdhouse design is best for the birds in your backyard, take into consideration that every bird is different. A birdhouse with a small hole may not be suited for a larger bird that needs a larger opening.

Wood Birdhouse Sizes

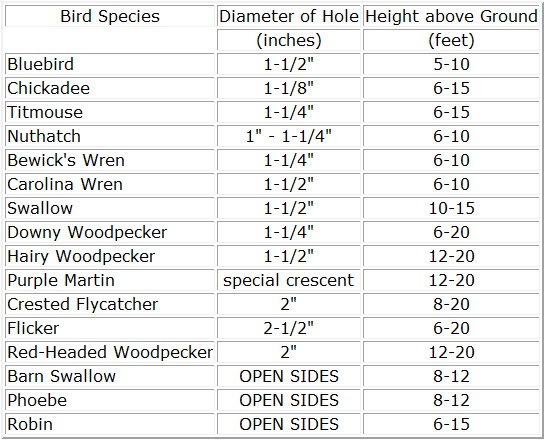
Value Home Centers not only has a Free Bird DIY birdhouse using just one board, they also came up with a chart to give you an idea of the sizes needed for a variety of birds.

Birdhouses Size Reference Chart

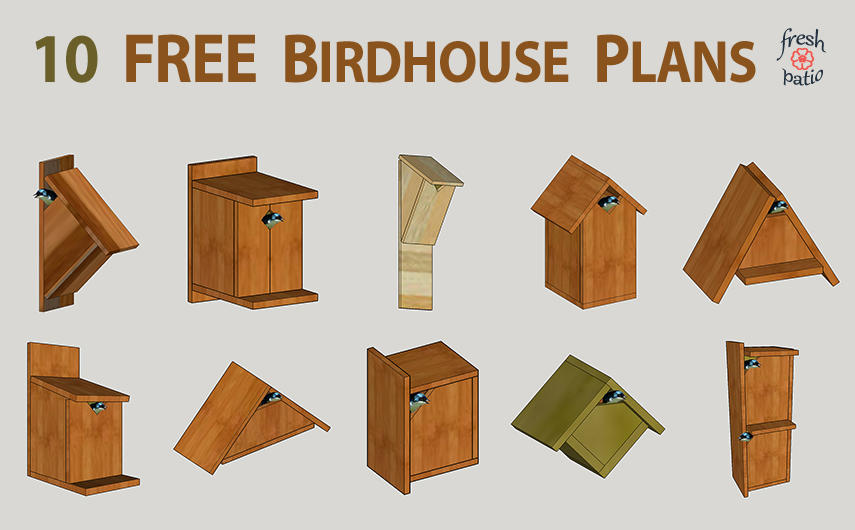
For a different kind of birdhouse, check out these 10 Free Birdhouse Plans from Fresh Patio. You will be able to build one of these birdhouses for just around $3 by using a single 4″ x 6′ wood plank from your local hardware store. There is nothing complicated and you can even use a hand saw to cut the boards.

Free DIY Birdhouse Plans

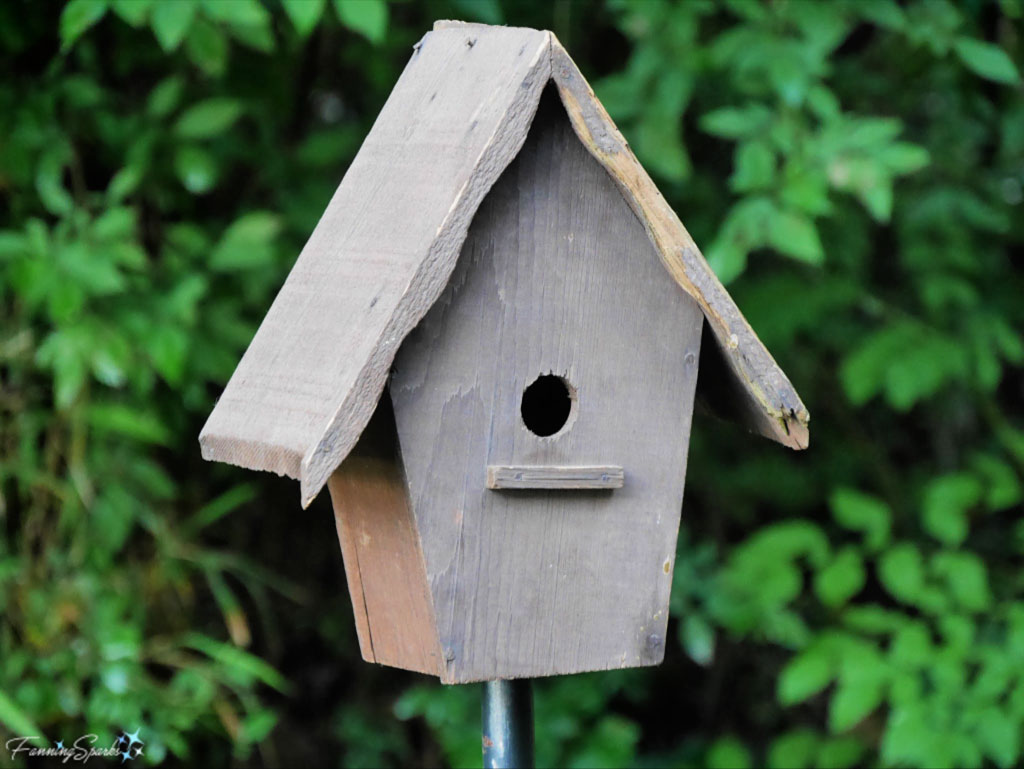
Build a Bluebird House

Fanning Sparks will show you how to build a proper Bluebird house. Even if you don’t have any bluebirds in your yard, chickadees and wrens may also choose to nest in this birdhouse because it is just the right size having a 1-1/2″ opening that only allows for small birds to enter.

Free DIY Birdhouse Plans

Build a Cedar Fence Picket Birdhouse

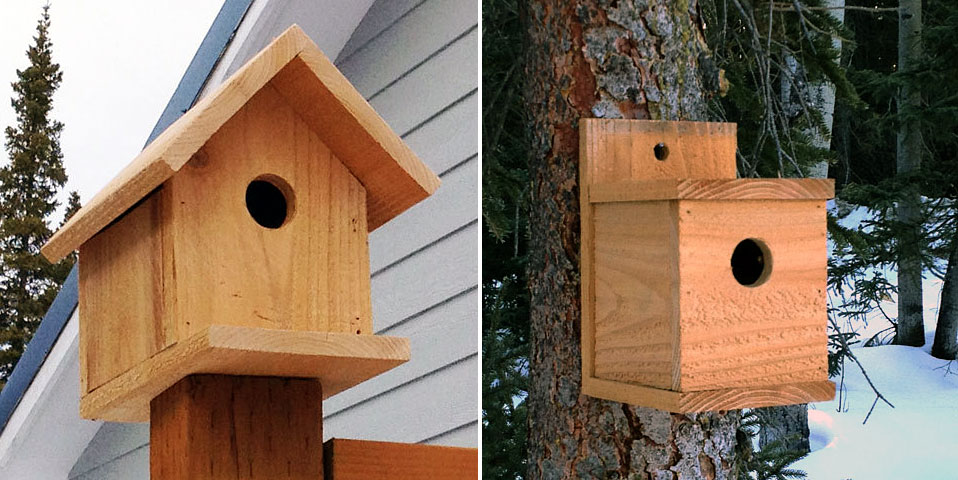
The Cedar Fence Picket Birdhouse by Ana White can be built for just $2 using a cedar fence picket. This also makes a good kids project or a fun group project. She also offers free plans for a Modern Cedar Birdhouse that can be nailed to a tree.

Free DIY Birdhouse Plans

Build a Simple Birdhouse

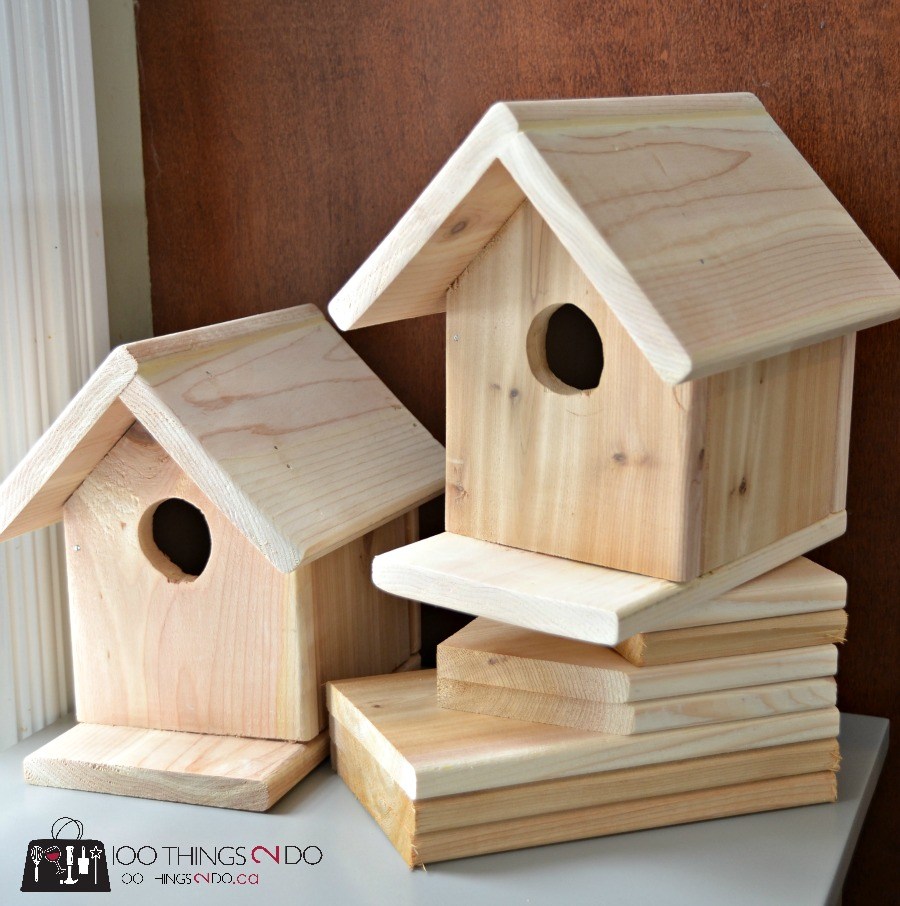
Shelly from 100 Things 2 Do in Canada used Ana White’s birdhouse plans and changed it up a bit to create her own unique take on simple birdhouse plans.

Free DIY Birdhouse Plans

Build a Sparrow Bird Box

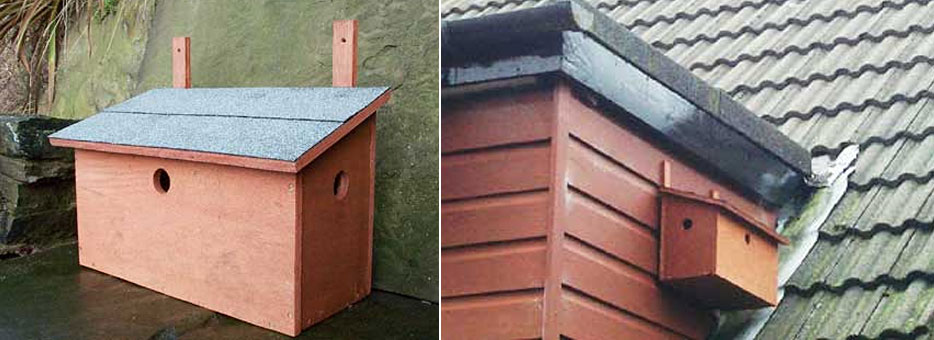
If you have sparrows in your area, you may want to consider building a Sparrow bird box. This birdhouse is placed under the eaves of your house because sparrows often nest there.

Sparrow Bird Box Free DIY Plans

Build a Cardinal Nesting Box

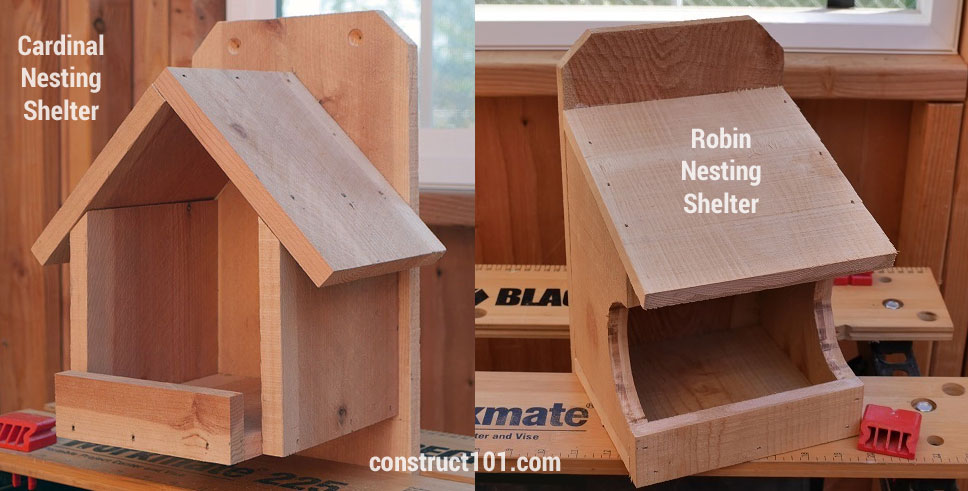
Cardinals are beautiful birds with their brilliant red feathers. You may want to build a Cardinal nesting shelter birdhouse. This can also be make out of one single fence board. The best location for a Cardinal box will be to place underneath the overhang of the house and about 6 feet or higher to prevent predators from attacking it.

Similarly, robins also like to nest in open boxes. By building them a nesting shelter you will give them some added protection while they raise their young.

Cardinal Robin Nesting Shelter free DIY plans

Build a PVC Birdhouse

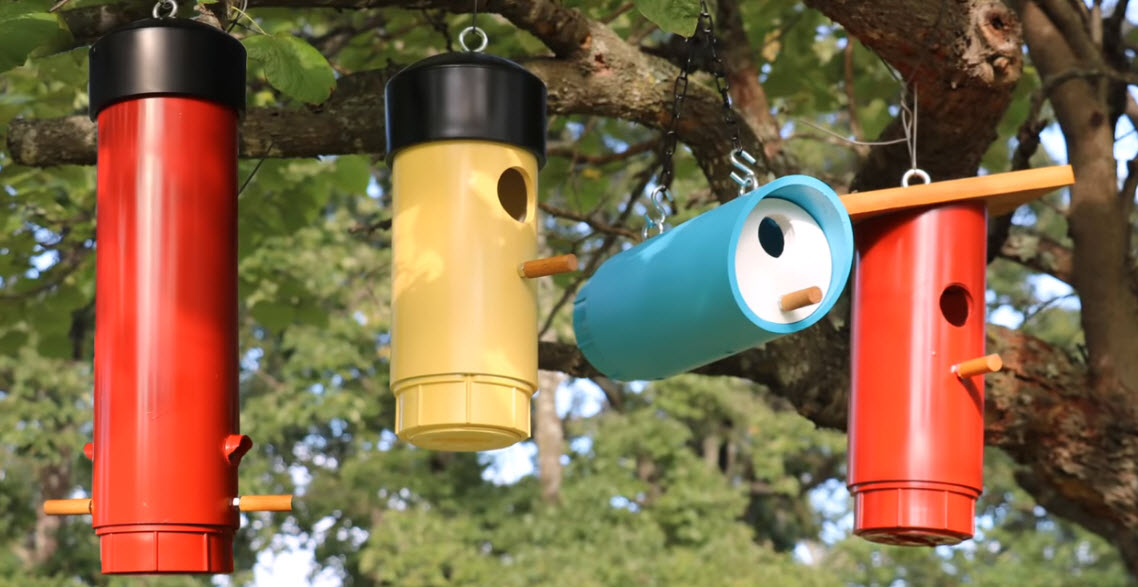
For an even more unique style of birdhouse, Bill from Suncatcher Studio came up with an easy way to use PCV piping to create fun and unique birdhouses. PVC is cheap so this is a good material to use for your next birdhouse build.

PVC DIY Free Birdhouse Plans

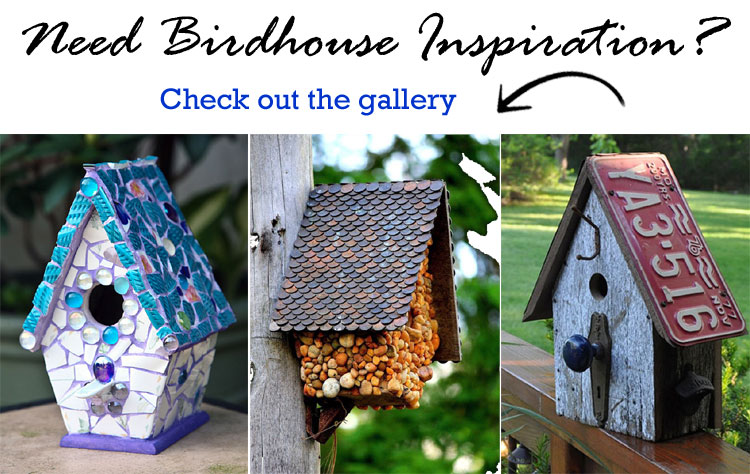
Birdhouse Decoration Ideas

  • 1
  • 2
  • 3
  • Next Page »

Coastal Christmas Trees

DIY Coastal Home Decor Ideas

Sea Glass Crafts to Make and Sell

10 Beautiful Rustic Wood Centerpiece Boxes

Coastal Creators participate in the Amazon Services LLC Associates Program, an affiliate advertising program designed to provide a means for sites to earn advertising fees by advertising and linking to Amazon and other affiliate programs. Read more

  • HOME
  • BLOG
  • YOU TUBE
  • CONTACT

Copyright © 2023 · Coastal Creators · Our Policies