Coastal Creators of Connecticut

Coastal Creators of Connecticut coastalcreatorsct.com

  • HOME
  • BLOG
  • YOU TUBE
  • CONTACT
    • Our Policies

FREE Rock Flower Garden Projects

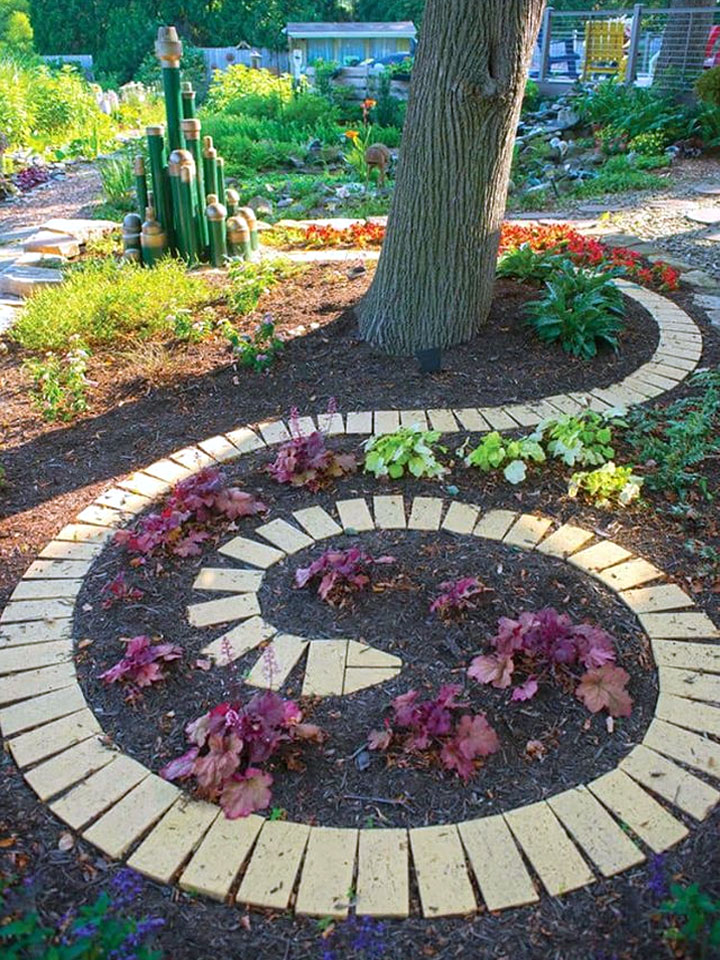
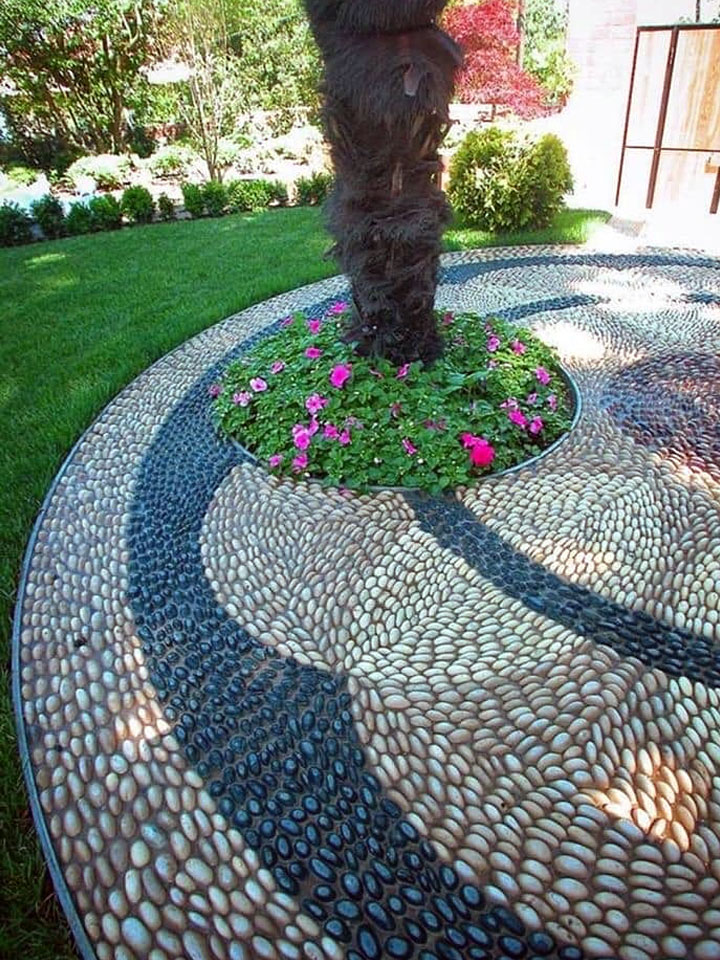
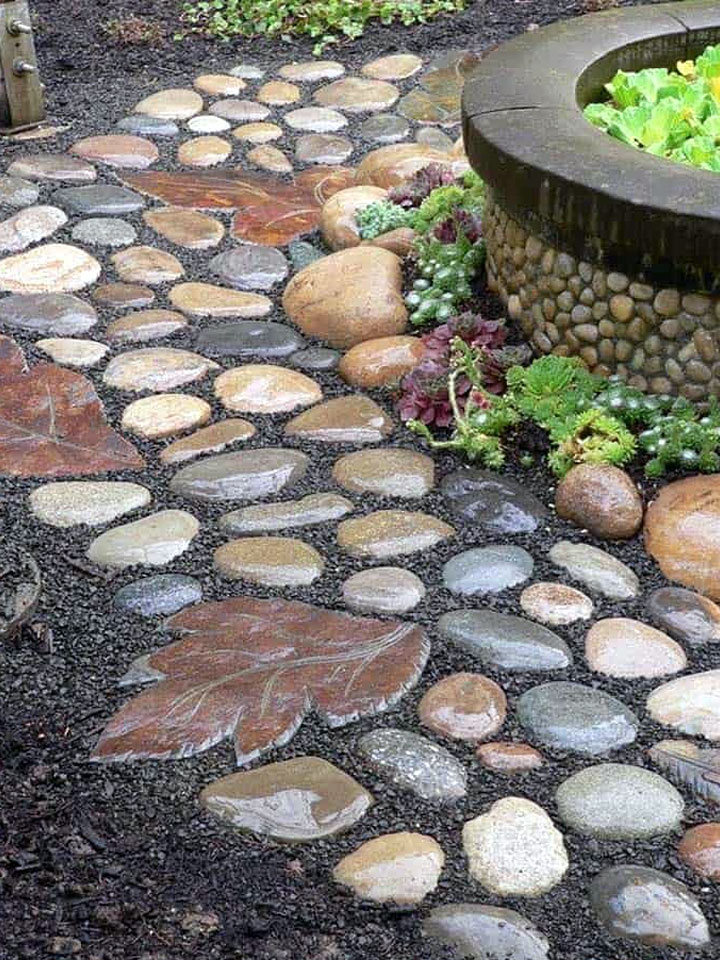
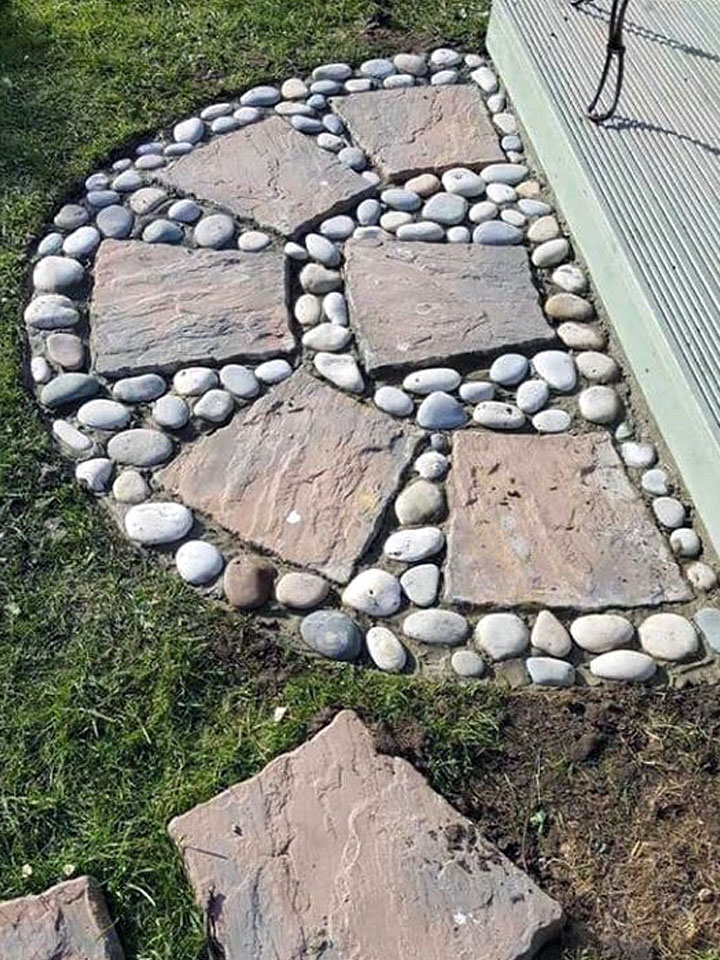
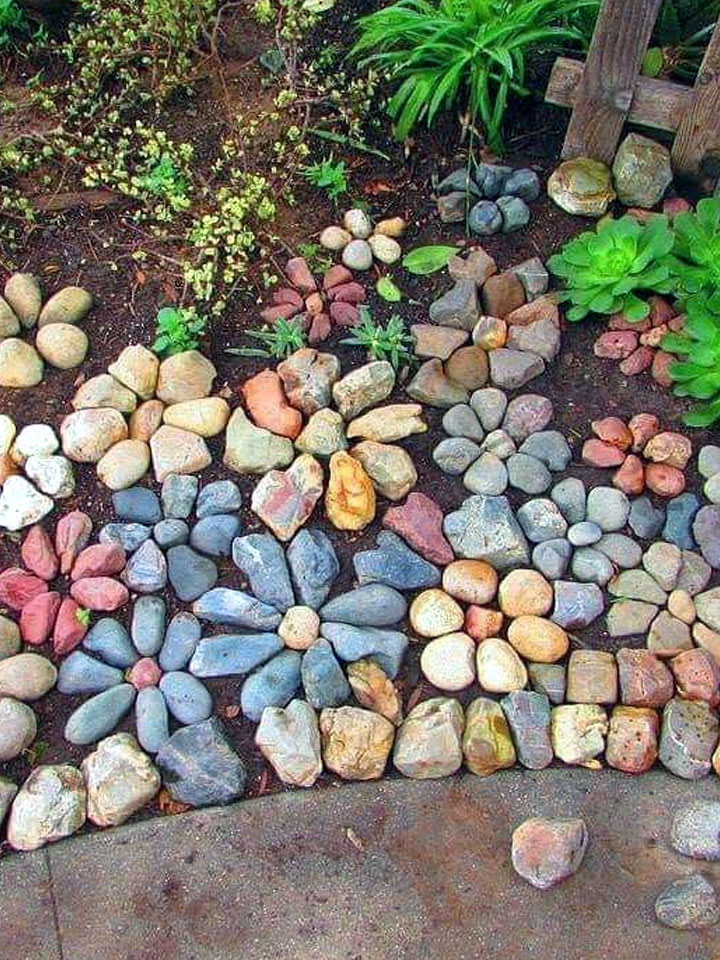
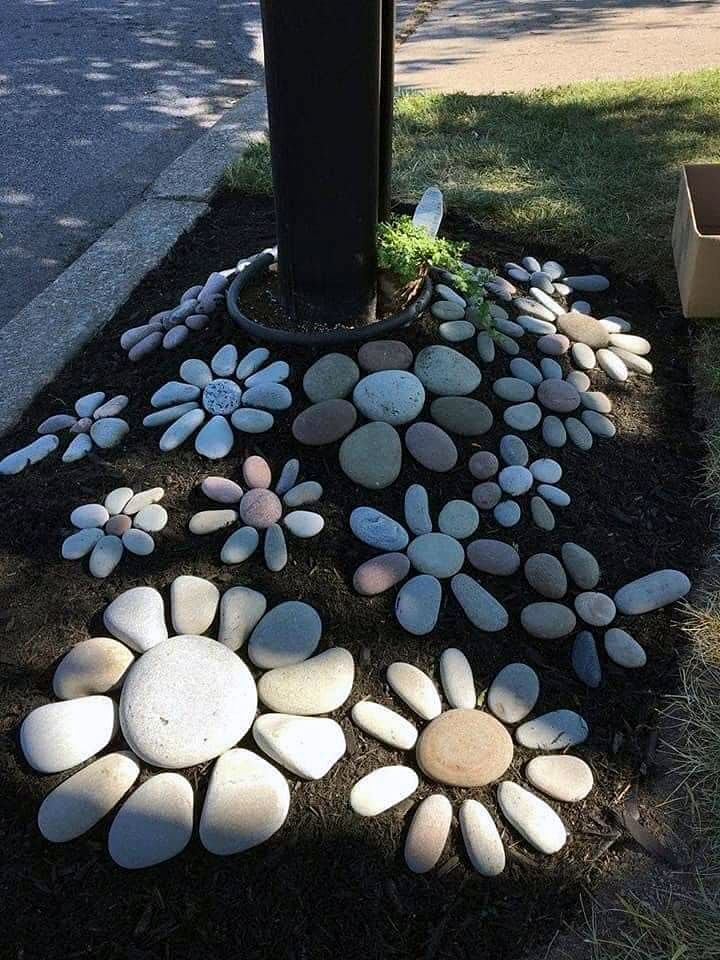
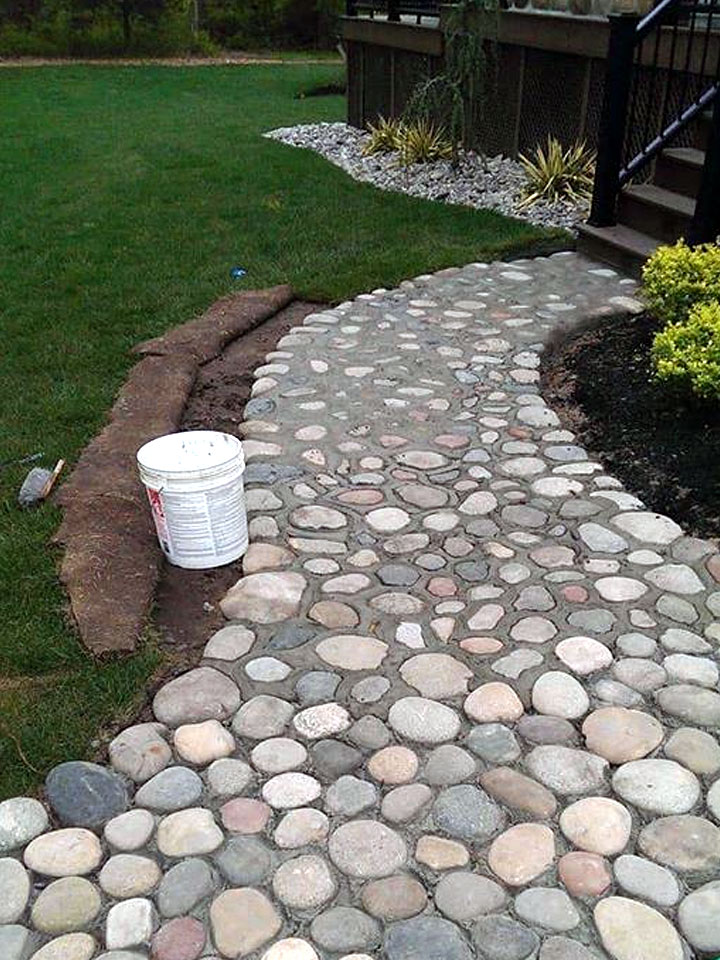
We don’t always think of taking a plain rock and using it to decorate our yard and garden. Rocks are free so what better material to use when money is tight.

We have so many ideas for creating fun yardscapes with rocks and stones to share with you. Stones and rocks are an affordable way to create a majestic yard and garden. You just need some ideas to get you started and then the sky is the limit in what you can create. You can gather stones in your yard, at the beach, in the woods, at the park, or even purchase them.


Rock Flower Garden DIY Project Ideas

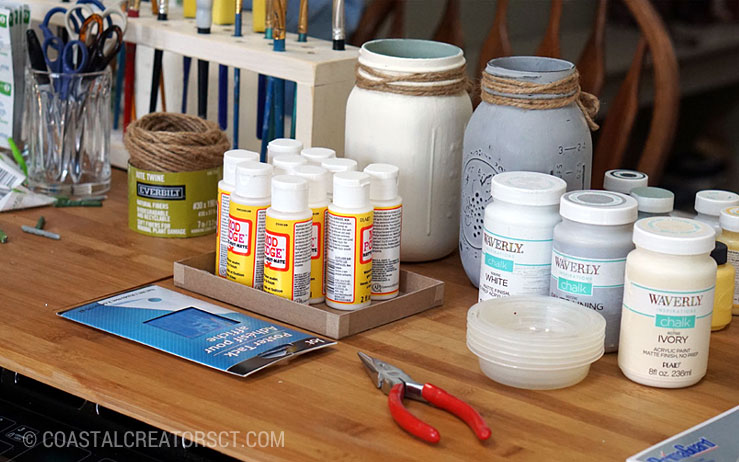
For some of the rock garden projects we listed, you may need basic supplies like quick grout or quick cement to put in between the cracks but those items are fairly cheap to buy.


Rock Flower Garden DIY Project Ideas

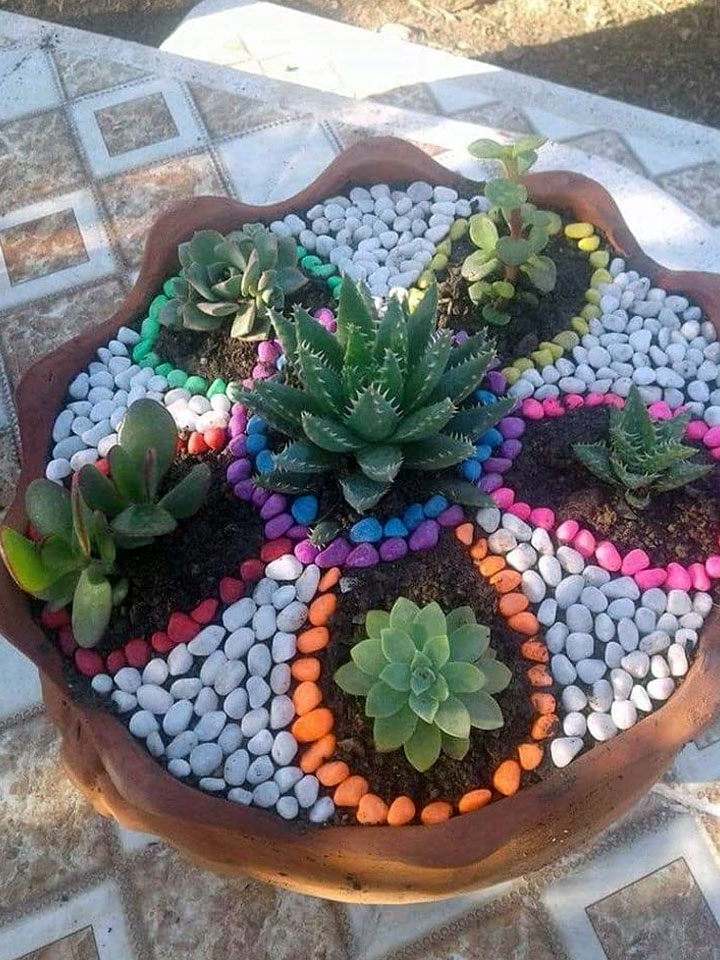
Some rock garden projects may require outdoor paint. Outdoor house paints or acrylic paints work well for these rock garden projects. My favorite paint for outdoor projects is Rust-Oleum. It really projects outdoor projects against the elements and looks great with a sleek finish. For kids, Spray Chalk paint is a good option.

Rock Flower Garden DIY Project Ideas

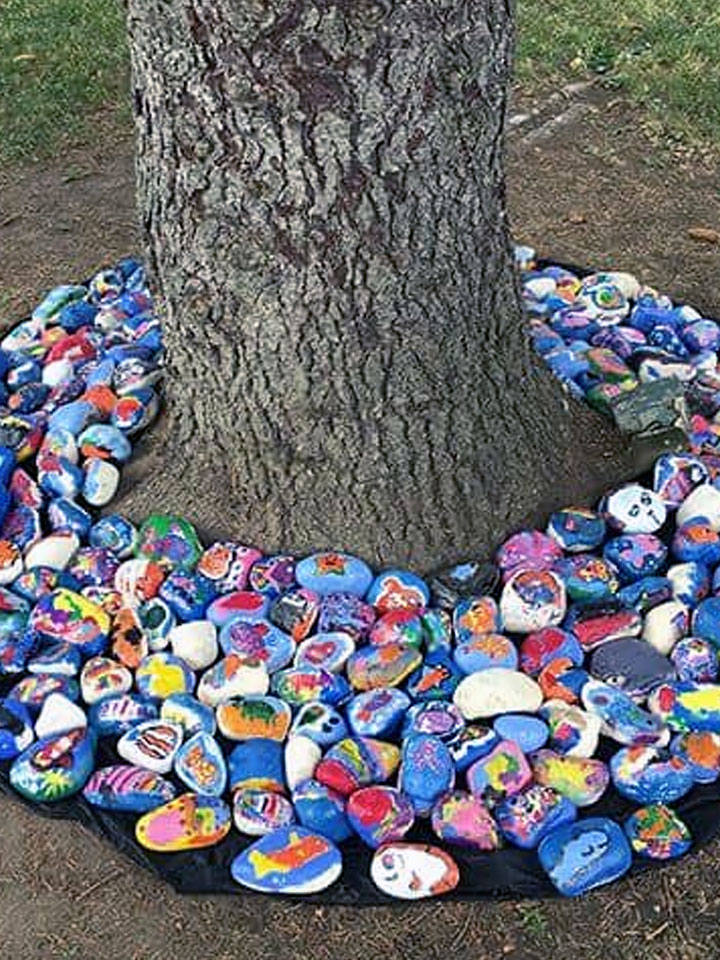
Great family project!

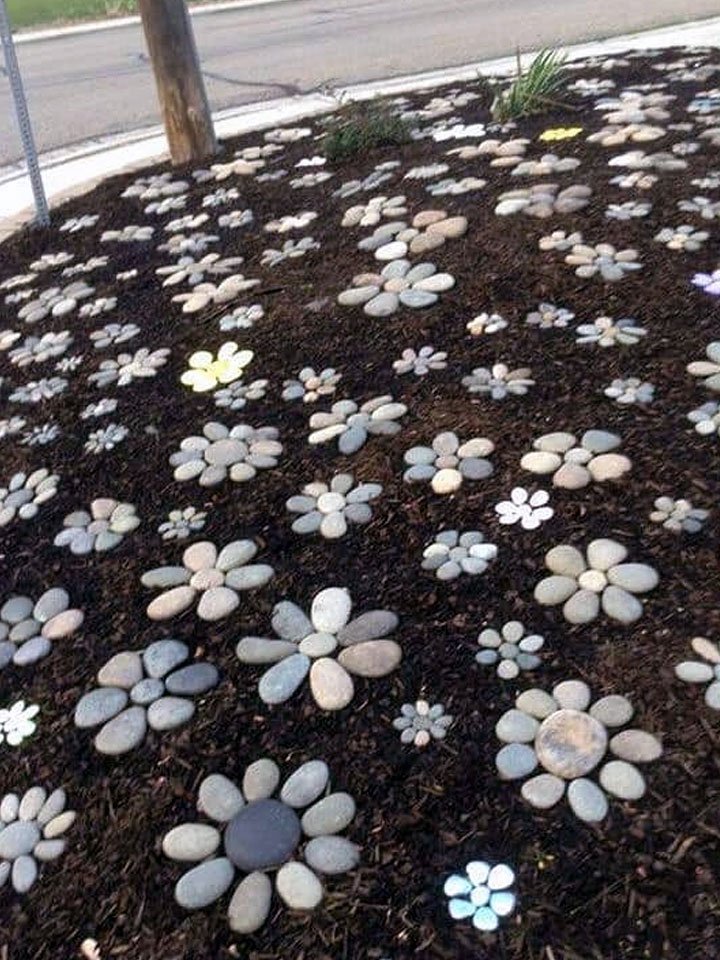
If you have kids you can get them involved in the fun of creating a colorful rock garden and remember, it’s a free project so it’s a win-win. Let them scavenge for rocks in your yard or take a trip to a park, go hiking and make it a family event. This could even be a summer project. Start by coming up with the one project you want to create, figure out how many rocks you will need to collect. When school is out for the summer, start your project by making a making a chart to show what days you found the rocks on and where. It will make a fun record of your project and keep the kids interested for the whole summer break. By the time summer is over you will have collected rocks, painted rocks, and right before school starts again, you can assemble your rocks into a fabulous rock flower garden.

Rock Flower Garden DIY Project Ideas

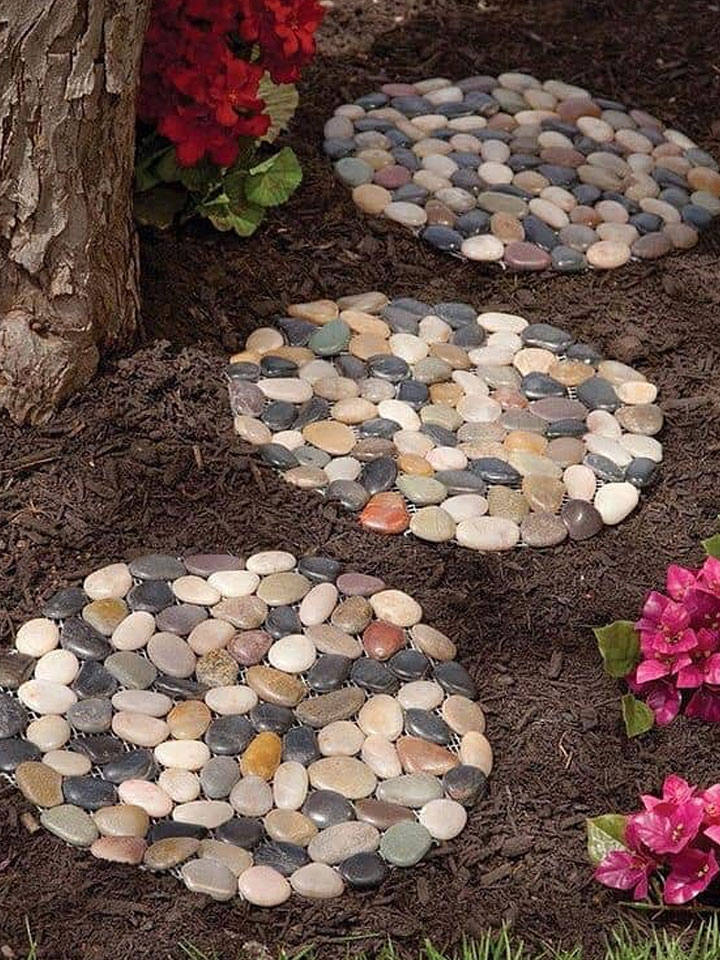
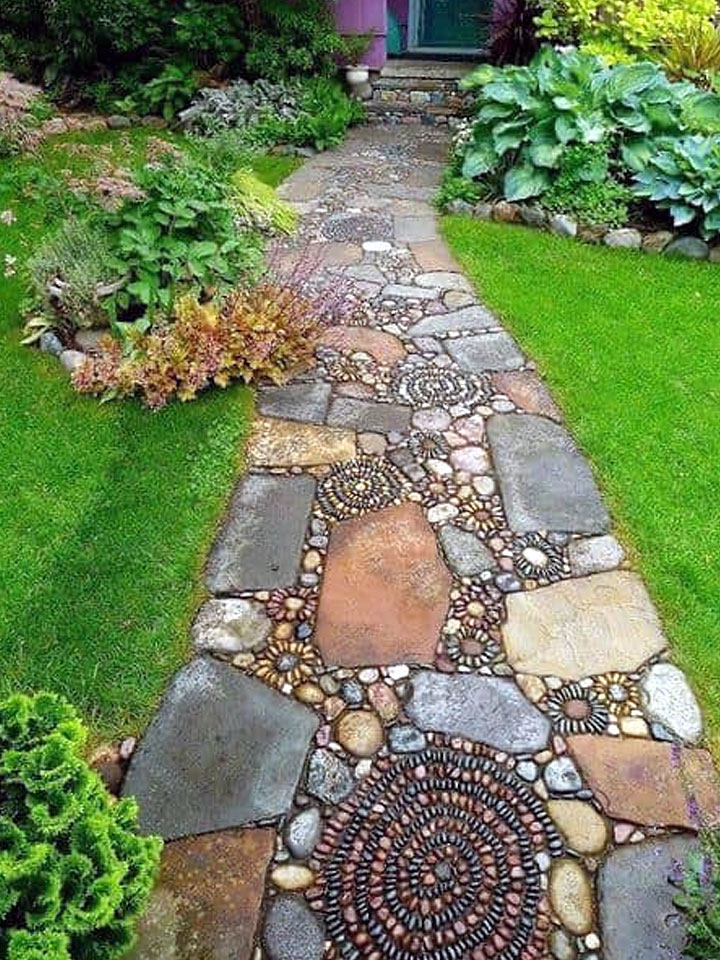
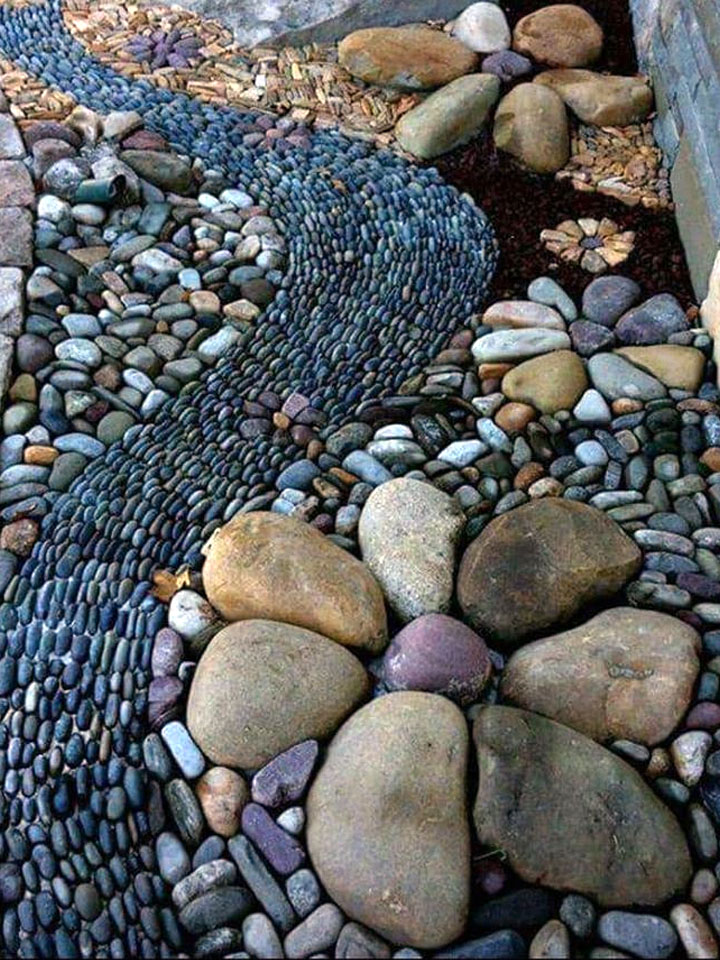
These free rock flower garden projects will put you in your happy place. They are also easy and fun to create. Go all out and fill a space in your yard with color rocks, or take ordinary rocks and make a design like a butterfly or a flower design.

Glass Gardening Art Projects

Bring your garden to life with glass garden art. Glass reflects in the sun and brings your garden alive with color. Create drama that carries over from one season to the next. Sun catchers, glass orbs, hanging glass wind chimes are just some of the ways you can enhance your garden with glass.

Glass Gardening Art Projects
Source: Empress of Dirt

Glass Hummingbirds is waiting to decorate your window sill or hang in the window as a reminder of our fine feathered friends who come to our garden for a season and are gone with the chill in the air.

Glass Gardening Art Projects, Glass Hummingbirds

Glass Garden Art Balls, Orbs, or Globes – or sometimes called Gazing Balls – are making by adding colorful flat glass stones to a round sphere. A bowling ball can work for your base but since it is very heavy you may want something lighter like a child’s play ball. If you want the glass to show through you could use a round Christmas ornament. You can often find them large enough to make a glass art ball.

Glass Gardening Art Projects
Garden art by Karen Weigert Enos. DIY by Empress of Dirt


Glass Gardening Art Projects

If you are looking for a touch of fantasy or whimsy in your garden add a sun-catcher. Maybe you want some plant bling these handmade glass garden wands are the perfect sun catcher that will beautify your garden. The bits of color will peak out from behind the leaves of your plants like little fairies.

Garden Glass Art Projects, Garden Glass Stakes
Source: Threads and Wicks

Glass bottles are useful as garden art. Recycle old bottles and add them to metal display stand and you have an instant garden art project that is simple for any DIYer.

Garden Glass Bottles Art

Glass Wind chimes move in the wind so the sun plays on the glass and catches you eye everywhere you look. Use element from nature like drift wood and shells to enhance your glass wind chime.

Glass, Bead, Shell Wind Chime
Source: My Pinterventures

DIY Clay Pot Lighthouse Bird Feeders

Whether you are feeding birds to help them through the long, cold winter months or feed birds during warm weather, having a functional bird feeder will attract a lot of variety of birds to your yard. Birds are enjoyable to watch. You can attract different birds by using a variety of seeds. You will attract titmouse, finches, sparrows, and chickadees with tiny seeds like nyjer, thistle, millet, cracked corn, flax and safflower. Cardinals, blue jays, doves, thrashers, and cowbirds like black oil sunflower and larger seed mixes.


DIY Clay Pot Lighthouse Bird Feeders

Here is an idea for a cute coastal bird feeder and garden decor all in one. These lighthouse bird feeders are made using clay pots that have been glued together and then painted. Get your creative juices flowing and grab your paints because it’s time for another coastal craft project.

Clay Pot DIY Lighthouse Bird Feeder
Image Credit: Crafts by Courtney

A lighthouse bird feeder made from Terra Cotta clay pots is very easy to assemble. You can feature a lantern on top to cast a warm glow. Place it in the garden as a decoration or add the clay pot saucer on the top or bottom and fill the edges with bird seed to feed our hungry feathered friends.


Clay Pot DIY Lighthouse Bird Feeders
Image Credit: Unknown

Let these examples show you how you can take clay pots to make a lighthouse bird feeder. Add a solar light to the top. The pot’s saucer is placed on top as the bird feeder. Now you have a coastal bird feeder that is also coastal garden decor.


Clay Pot DIY Lighthouse Bird Feeders
Image Credit: Jonathan Fong

Not all of these Terra Cotta Pot lighthouses feature a bird feeder but you can easily change that by adding the pot saucer to the top or the bottom.

Clay Pot DIY Lighthouse Bird Feeders
Image Credit: Mae


Clay Pot DIY Lighthouse Bird Feeders
Image Source: Pinterest
Clay Pot DIY Lighthouse Bird Feeders
Image Credit: Thrifty Fun

How to Chalk Paint Mason Jars

We recently offered a craft class and taught our guests how to chalk paint on Mason Jars. It’s quite simple and the results are stunning. These chalk painted Mason jars are the perfect addition to our Simply Blessed wooden centerpiece box.

How to Chalk Paint Mason Jars

How to Chalk Paint Mason Jars

Disclaimer: this article contains affiliate links. Please read our affiliate policies.

How to Chalk Paint Mason Jars

Chalk Paint Mason Jars Supplies List

Here are some of the items you will need to complete your project.

  • 32 oz. Mason Jars (quart size is what we used but you can use smaller)
  • Alcohol pads (Rubbing Alcohol and paper towels work too)
  • Chalk Paint (we like FolkArt Brand)
  • Paint Brushes
  • Sanding Block
  • Twine
  • Rubber gloves (Optional)
  • Mod Podge (Optional)

How to Chalk Paint Mason Jars

How to Chalk Paint Mason Jars

How to Chalk Paint Mason Jars

1. The first thing to do is lay out your supplies and be ready with your chalk paint.

2. Next, you need to clean your Mason jar with the alcohol wipe. Put your hand inside of the jar and wipe all around the outside of the jar up and around the rim. Make sure you do not touch the jar once you have cleaned it. By using the alcohol wipe you are removing any dirt or oil. If you have oil on the jar your paint won’t stick properly.

3. The alcohol should dry almost immediately. Begin painting the jar with even brush strokes. Take a look at how the paint is looking on the jar and if you want the lines to go one way then paint all in the same direction. If you find that your paint does not stick you will have to clean those spots with the alcohol again.

TIP: I like to keep my hand inside of the jar (well not all of the way) and guide the jar down on the mat once I am finished painting, using the paint brush to hold the bottom of the jar so I can remove my hand as I place it on my mat or table to dry.

How to Chalk Paint Mason Jars

4. If you are painting more jars, continue to the next jar. If you are only painting the one jar, then wait for about 15 minutes before adding a second coat.

5. Let the second coat dry to the touch. Using your sanding block, distress your jar as much or as little as you like.

How to Chalk Paint Mason Jars

OPTIONAL: For added protection to the finish, you can use a coat of Matte Mod Podge once the final coat of paint is dry and you have distressed the jar.

Our Chalk Painted Mason Jar Gallery

Take a look at the finish Chalk Paint Mason Jar project. Our students did a fantastic job to transform a simple jar into a specialty home decor piece that can be used in so many ways. They look amazing in our wooden centerpiece box too.

How to Chalk Paint Mason Jars

How to Chalk Paint Mason Jars

Coastal Blue Marble Painted Pumpkins

Blue marble painted pumpkins are a unique coastal take on a traditional Fall pumpkin. If you like to decorate with shades of blue, these marbled pumpkins are for you. They are easy to create and take just a few supplies.

Get into the Fall spirit by making your own Marbled blue Pumpkins! It’s an easy DIY for a super cool effect! Great for Halloween party decorations or just for impressing your friends.

Supplies you’ll need:

  • Nail Polish
  • Toothpicks
  • White Pumpkins
  • Plastic Container

Can you believe that these blue marbled pumpkins are created by adding 4 to 5 drops of nail polish to a cup of water? As long as the water isn’t too cold the nail polish will stick to your pumpkins, creating a marbled effect.

If you don’t can’t find white pumpkins in your local area, you can always buy rustic harvest white pumpkins from Amazon. You will also need Indigo blue nail polish.


This craft idea was originally posted on AliceandLois.com

Coastal Blue Marble Painted Pumpkins
Source: Alice & Lois
  • « Previous Page
  • 1
  • 2
  • 3
  • Next Page »

Coastal Christmas Trees

DIY Coastal Home Decor Ideas

Sea Glass Crafts to Make and Sell

10 Beautiful Rustic Wood Centerpiece Boxes

Coastal Creators participate in the Amazon Services LLC Associates Program, an affiliate advertising program designed to provide a means for sites to earn advertising fees by advertising and linking to Amazon and other affiliate programs. Read more

  • HOME
  • BLOG
  • YOU TUBE
  • CONTACT

Copyright © 2025 · Coastal Creators · Our Policies