Coastal Creators

Wholesale stickers and gift shop items

  • HOME
  • BLOG
  • YOU TUBE
  • CONTACT
    • Our Policies

Free Easy DIY Wood Birdhouse Plans

When Spring comes we think about the birds and wildlife coming back into our yard. Birds will be searching for places to nest, hatch their eggs, feed their young and you can help by building a wood birdhouse or wood nesting box.

When deciding what birdhouse design is best for the birds in your backyard, take into consideration that every bird is different. A birdhouse with a small hole may not be suited for a larger bird that needs a larger opening.

Wood Birdhouse Sizes

Value Home Centers not only has a Free Bird DIY birdhouse using just one board, they also came up with a chart to give you an idea of the sizes needed for a variety of birds.

Birdhouses Size Reference Chart

For a different kind of birdhouse, check out these 10 Free Birdhouse Plans from Fresh Patio. You will be able to build one of these birdhouses for just around $3 by using a single 4″ x 6′ wood plank from your local hardware store. There is nothing complicated and you can even use a hand saw to cut the boards.

Free DIY Birdhouse Plans

Build a Bluebird House

Fanning Sparks will show you how to build a proper Bluebird house. Even if you don’t have any bluebirds in your yard, chickadees and wrens may also choose to nest in this birdhouse because it is just the right size having a 1-1/2″ opening that only allows for small birds to enter.

Free DIY Birdhouse Plans

Build a Cedar Fence Picket Birdhouse

The Cedar Fence Picket Birdhouse by Ana White can be built for just $2 using a cedar fence picket. This also makes a good kids project or a fun group project. She also offers free plans for a Modern Cedar Birdhouse that can be nailed to a tree.

Free DIY Birdhouse Plans

Build a Simple Birdhouse

Shelly from 100 Things 2 Do in Canada used Ana White’s birdhouse plans and changed it up a bit to create her own unique take on simple birdhouse plans.

Free DIY Birdhouse Plans

Build a Sparrow Bird Box

If you have sparrows in your area, you may want to consider building a Sparrow bird box. This birdhouse is placed under the eaves of your house because sparrows often nest there.

Sparrow Bird Box Free DIY Plans

Build a Cardinal Nesting Box

Cardinals are beautiful birds with their brilliant red feathers. You may want to build a Cardinal nesting shelter birdhouse. This can also be make out of one single fence board. The best location for a Cardinal box will be to place underneath the overhang of the house and about 6 feet or higher to prevent predators from attacking it.

Similarly, robins also like to nest in open boxes. By building them a nesting shelter you will give them some added protection while they raise their young.

Cardinal Robin Nesting Shelter free DIY plans

Build a PVC Birdhouse

For an even more unique style of birdhouse, Bill from Suncatcher Studio came up with an easy way to use PCV piping to create fun and unique birdhouses. PVC is cheap so this is a good material to use for your next birdhouse build.

PVC DIY Free Birdhouse Plans

Birdhouse Decoration Ideas

Fun Birdhouses to Make, Sell and Just Enjoy!

Birdhouses are functional but they can also be decorative. We like to paint, use broken china, tiles, embellishments, flowers, and even dollhouse shingles for the roof of our birdhouses. There are so many creative ways you can decorate a birdhouse. Let us give you some ideas.

Let your imagination run wild with these painted birdhouse ideas. Bright colors and fun designs will bring your birdhouse to life and fill your garden with color and flair.

Decorative Birdhouses to paint

decorative birdhouses

Broken China Mosaic Birdhouse

Build a Broken China Birdhouse

painted birdhouse ideas

Bright and whimsical colors make this birdhouse a great addition to any garden, indoors or out!

Stacy McFadden Art

Stone Birdhouse Ideas

Have you ever thought of using coins or stones to decorate a birdhouse? These birdhouses utilize stones and coins to decorate roofs and walls. These DIY birdhouse are embellished with stones and a roof made out of pennies

DIY Birdhouse with a Pretty Penny Roof
Source: Dream a Little Bigger

Repurpose those old pennies you have lying around and use them to add a roof to a birdhouse. The copper will age over time and turn a nice patina shade. This rustic birdhouse is definitely something fun to create.

Rock Bird House
Plow & Hearth

How cute is this rock bird house with it’s flower pot. rocking chair, screen door, window box, side window, and dormer roof window added as embellishment. The birds will want to move right in!

Stained Glass Red Blue Bird House

Note the beautiful craftsmanship in the stained glass design on this birdhouse.

Free DIY Birdhouse Plans

Crafts by Amanda

Do you have old maps not being used? If you don’t you can always find some at flea markets, thrift shops and yard sales. There are so many things you can do with old maps. Here is an idea for a decorative birdhouse. Amanda took the original idea from Midwest Living Magazine to paint and then glue old maps to her wood birdhouses using Mod Podge.

Home Bazaar Windy Ridge Stone Birdhouse

Create an enchanted feel in your bird garden with the Home Bazaar Windy Ridge Stone Bird House. Blending style with realistic details, this cottage will certainly bring a charming touch to your home or backyard in moments. The stone covered façade lends a rustic feel to the piece, furthered by the faux wood pile, bird house, and window box with fabric flowers.

Mosaic Birdhouses
Desert Rose Art Glass
Blue Tile Mosaic Birdhouse
Elzabieta Frydel

You can make a Rustic pallet wood birdhouse with a license plate for a roof for little or no money. Inspire to Make shows you how on his YouTube channel. It’s a very easy DIY woodworking project for beginners that requires minimum amount of tools.

license plate birdhouse ideas

Add a bit of whimsy to your birdhouse by using an old license plate as the walls. Felt Magnet provides step-by-step instructions for this birdhouse condo.

This Stained Glass Birdhouse is easy to achieve. Purchase an unfinished wood birdhouse or build your own birdhouse, use painter’s tape and create an exquisite stained glass design. Paint inside of the sections, remove the painter’s tape, use a ruler and draw lines around each section with a thin paintbrush and black paint or a Sharpie marker.

Stained Glass Birdhouse Pattern Instructions

Let your creative juices run wild, grab your paints and paintbrushes and paint a garden scene on a birdhouse.

Handpainted Birdhouse

Build a She Shed in a Weekend with These Plans

Want to build a She Shed? Try out these free plans to get you started plus learn how to get over 12,000 other shed plans so you can find the one you really want to build

Build an amazing outdoor she shed

These plans include complete step-by-step details. If you are a first time builder trying to figure out how to build a shed, you’re in the right place!

Click Here to get your Free Plans

These shed plans are designed to be easy to follow by anyone, in other words no blueprint reading experience necessary.

She Shed Plans

If you’re going to invest the time, money and energy in building a shed yourself. Then make sure the plan you’re using has EVERYTHING you need to get it done in to create the kind of shed, your neighbors and other woodworkers will secretly ENVY.

Click Here to get your Free Plans

Build a She Shed in a Weekend with These Plans

10 Beautiful Rustic Wood Centerpiece Boxes

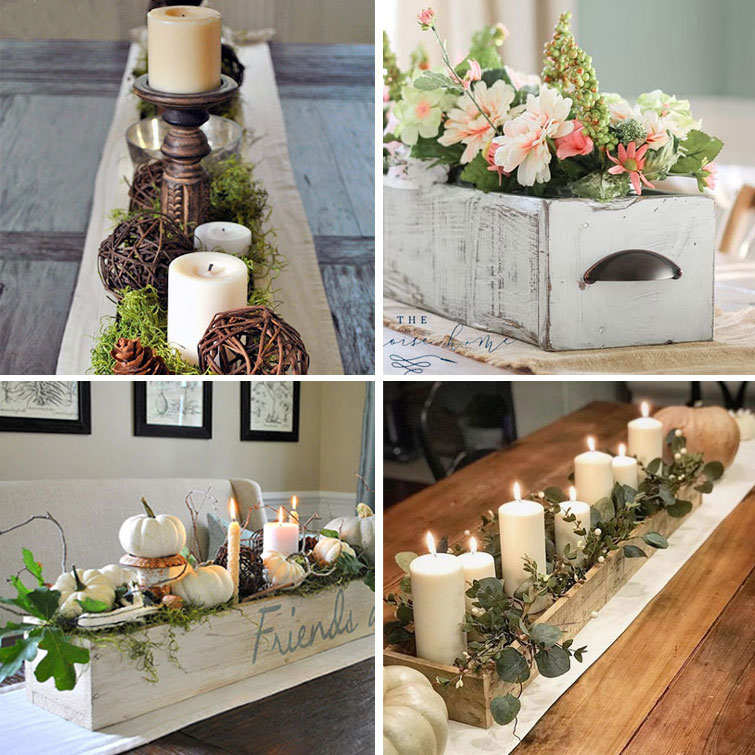
Get inspired by rustic wood centerpieces that you can use to decorate your dining room table, a bench by the window, or even a wedding table centerpiece. Rustic wood makes these natural centerpieces fit in with many home decor settings.
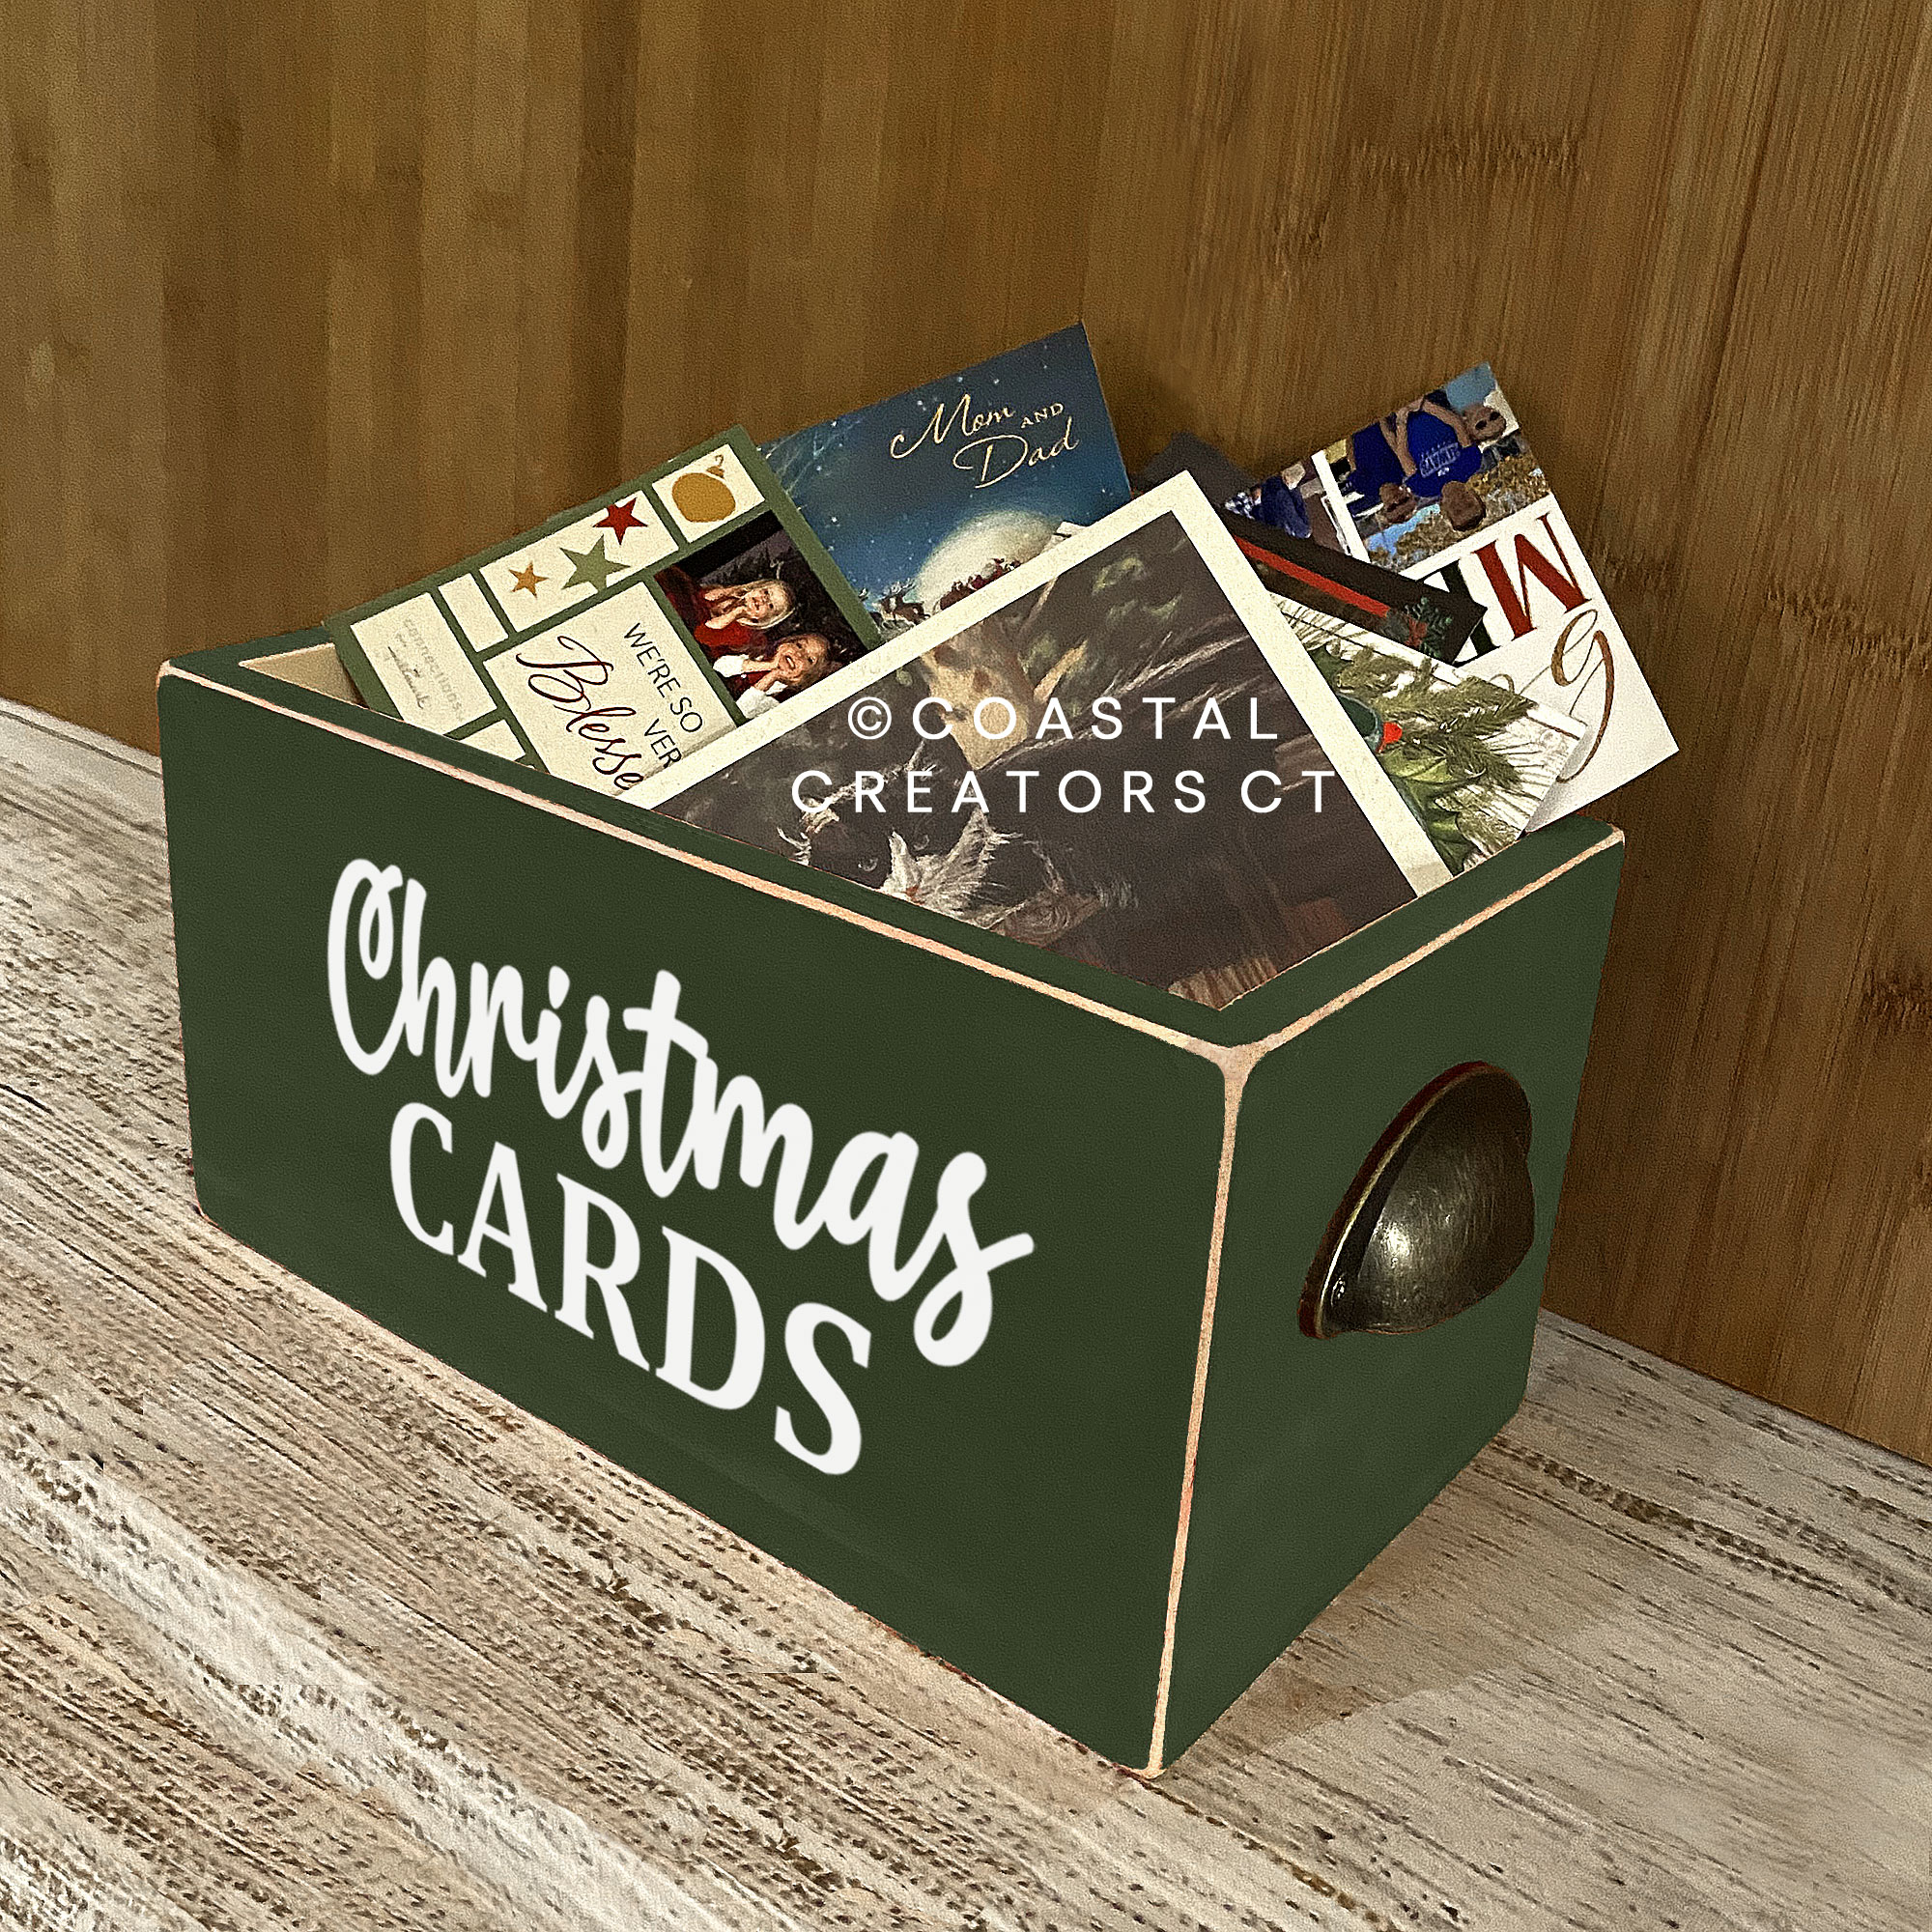
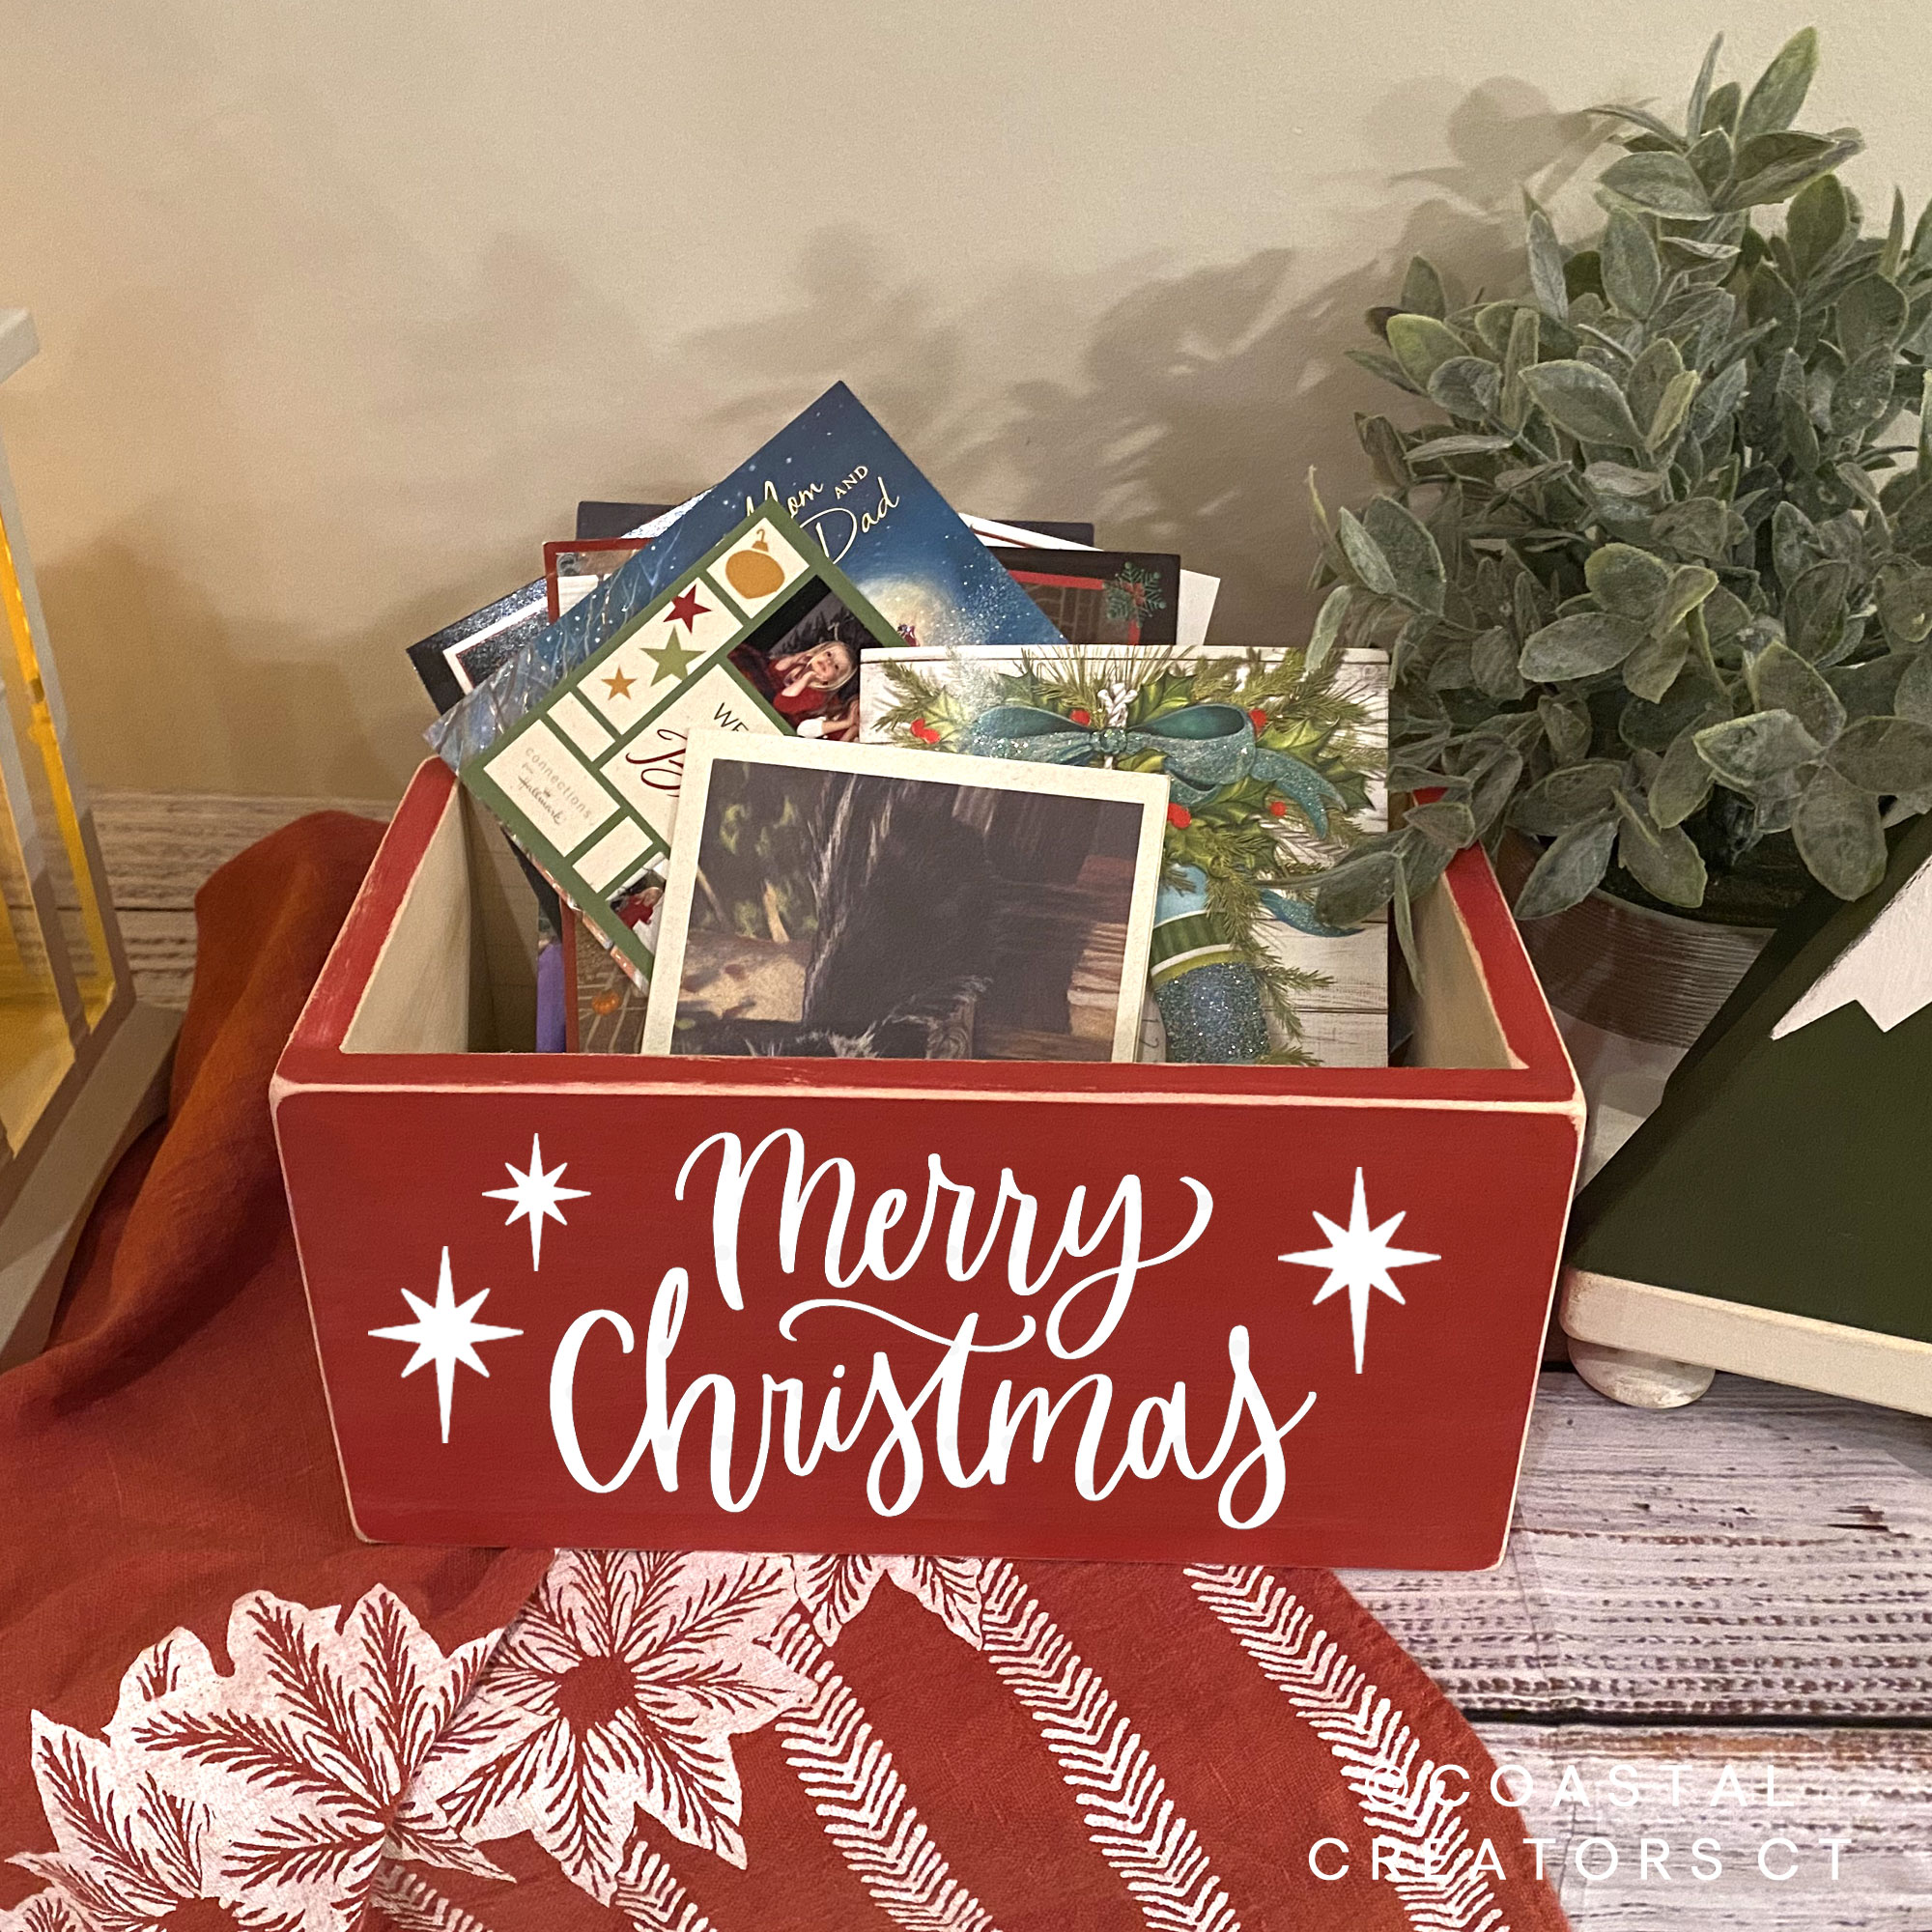
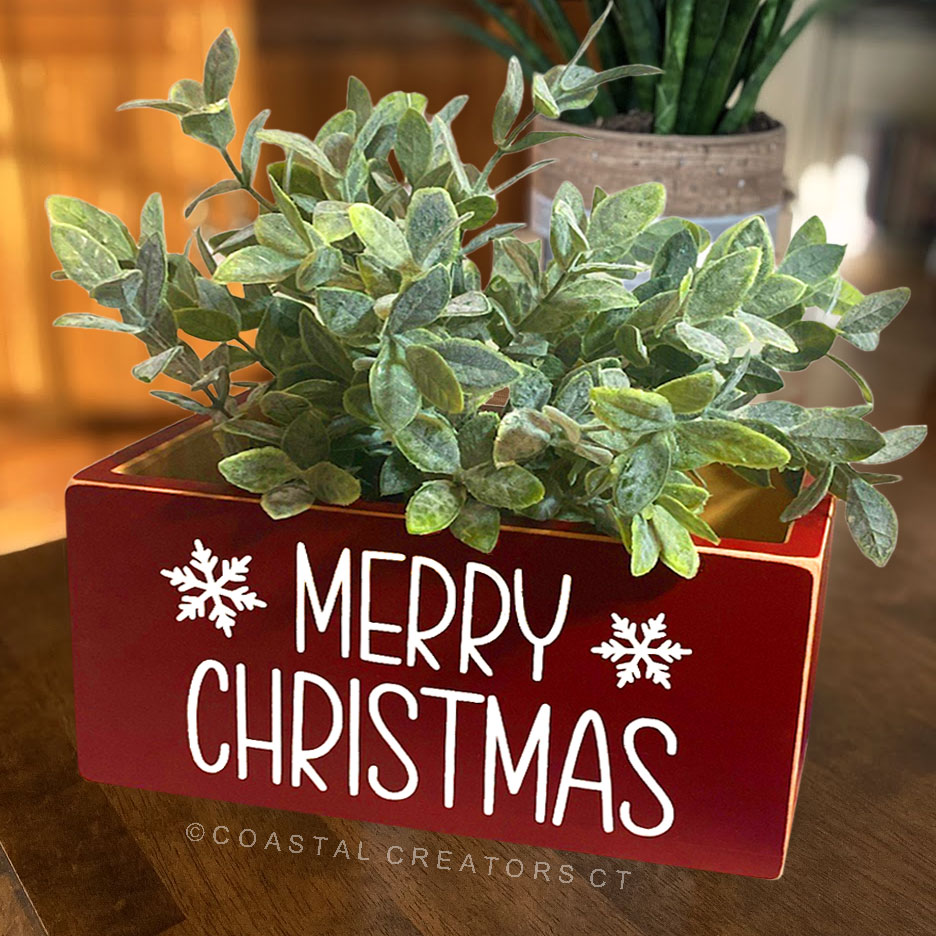
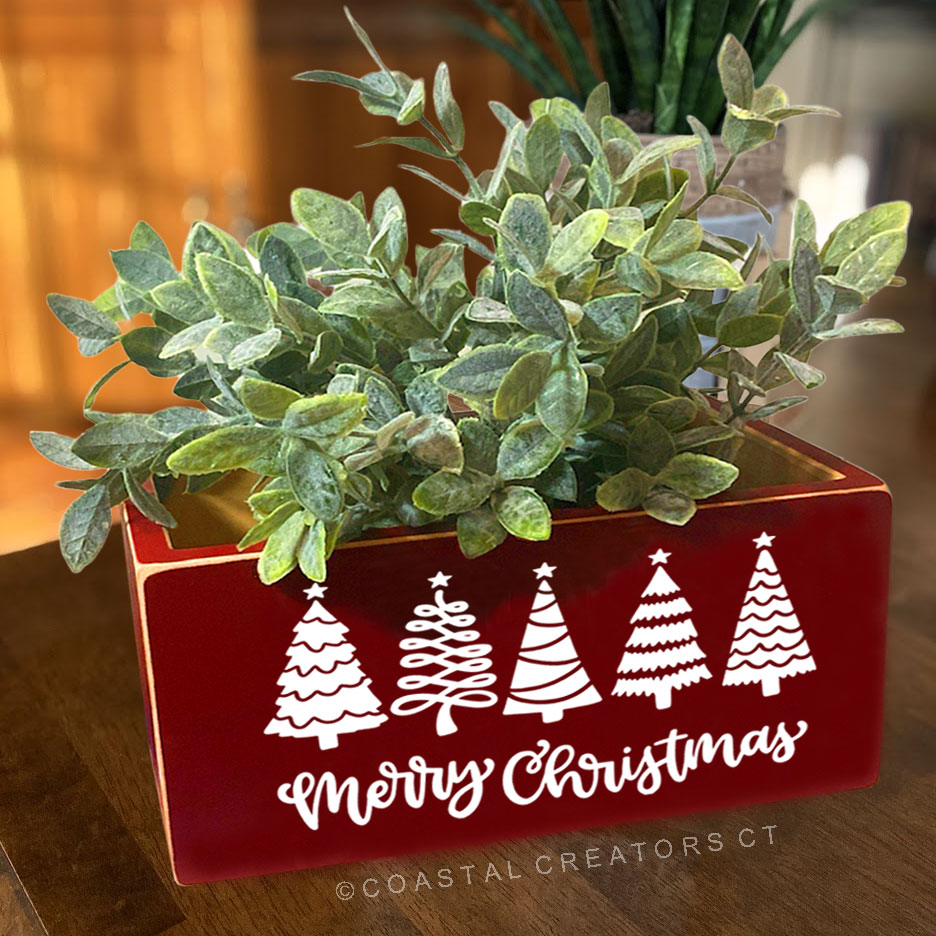
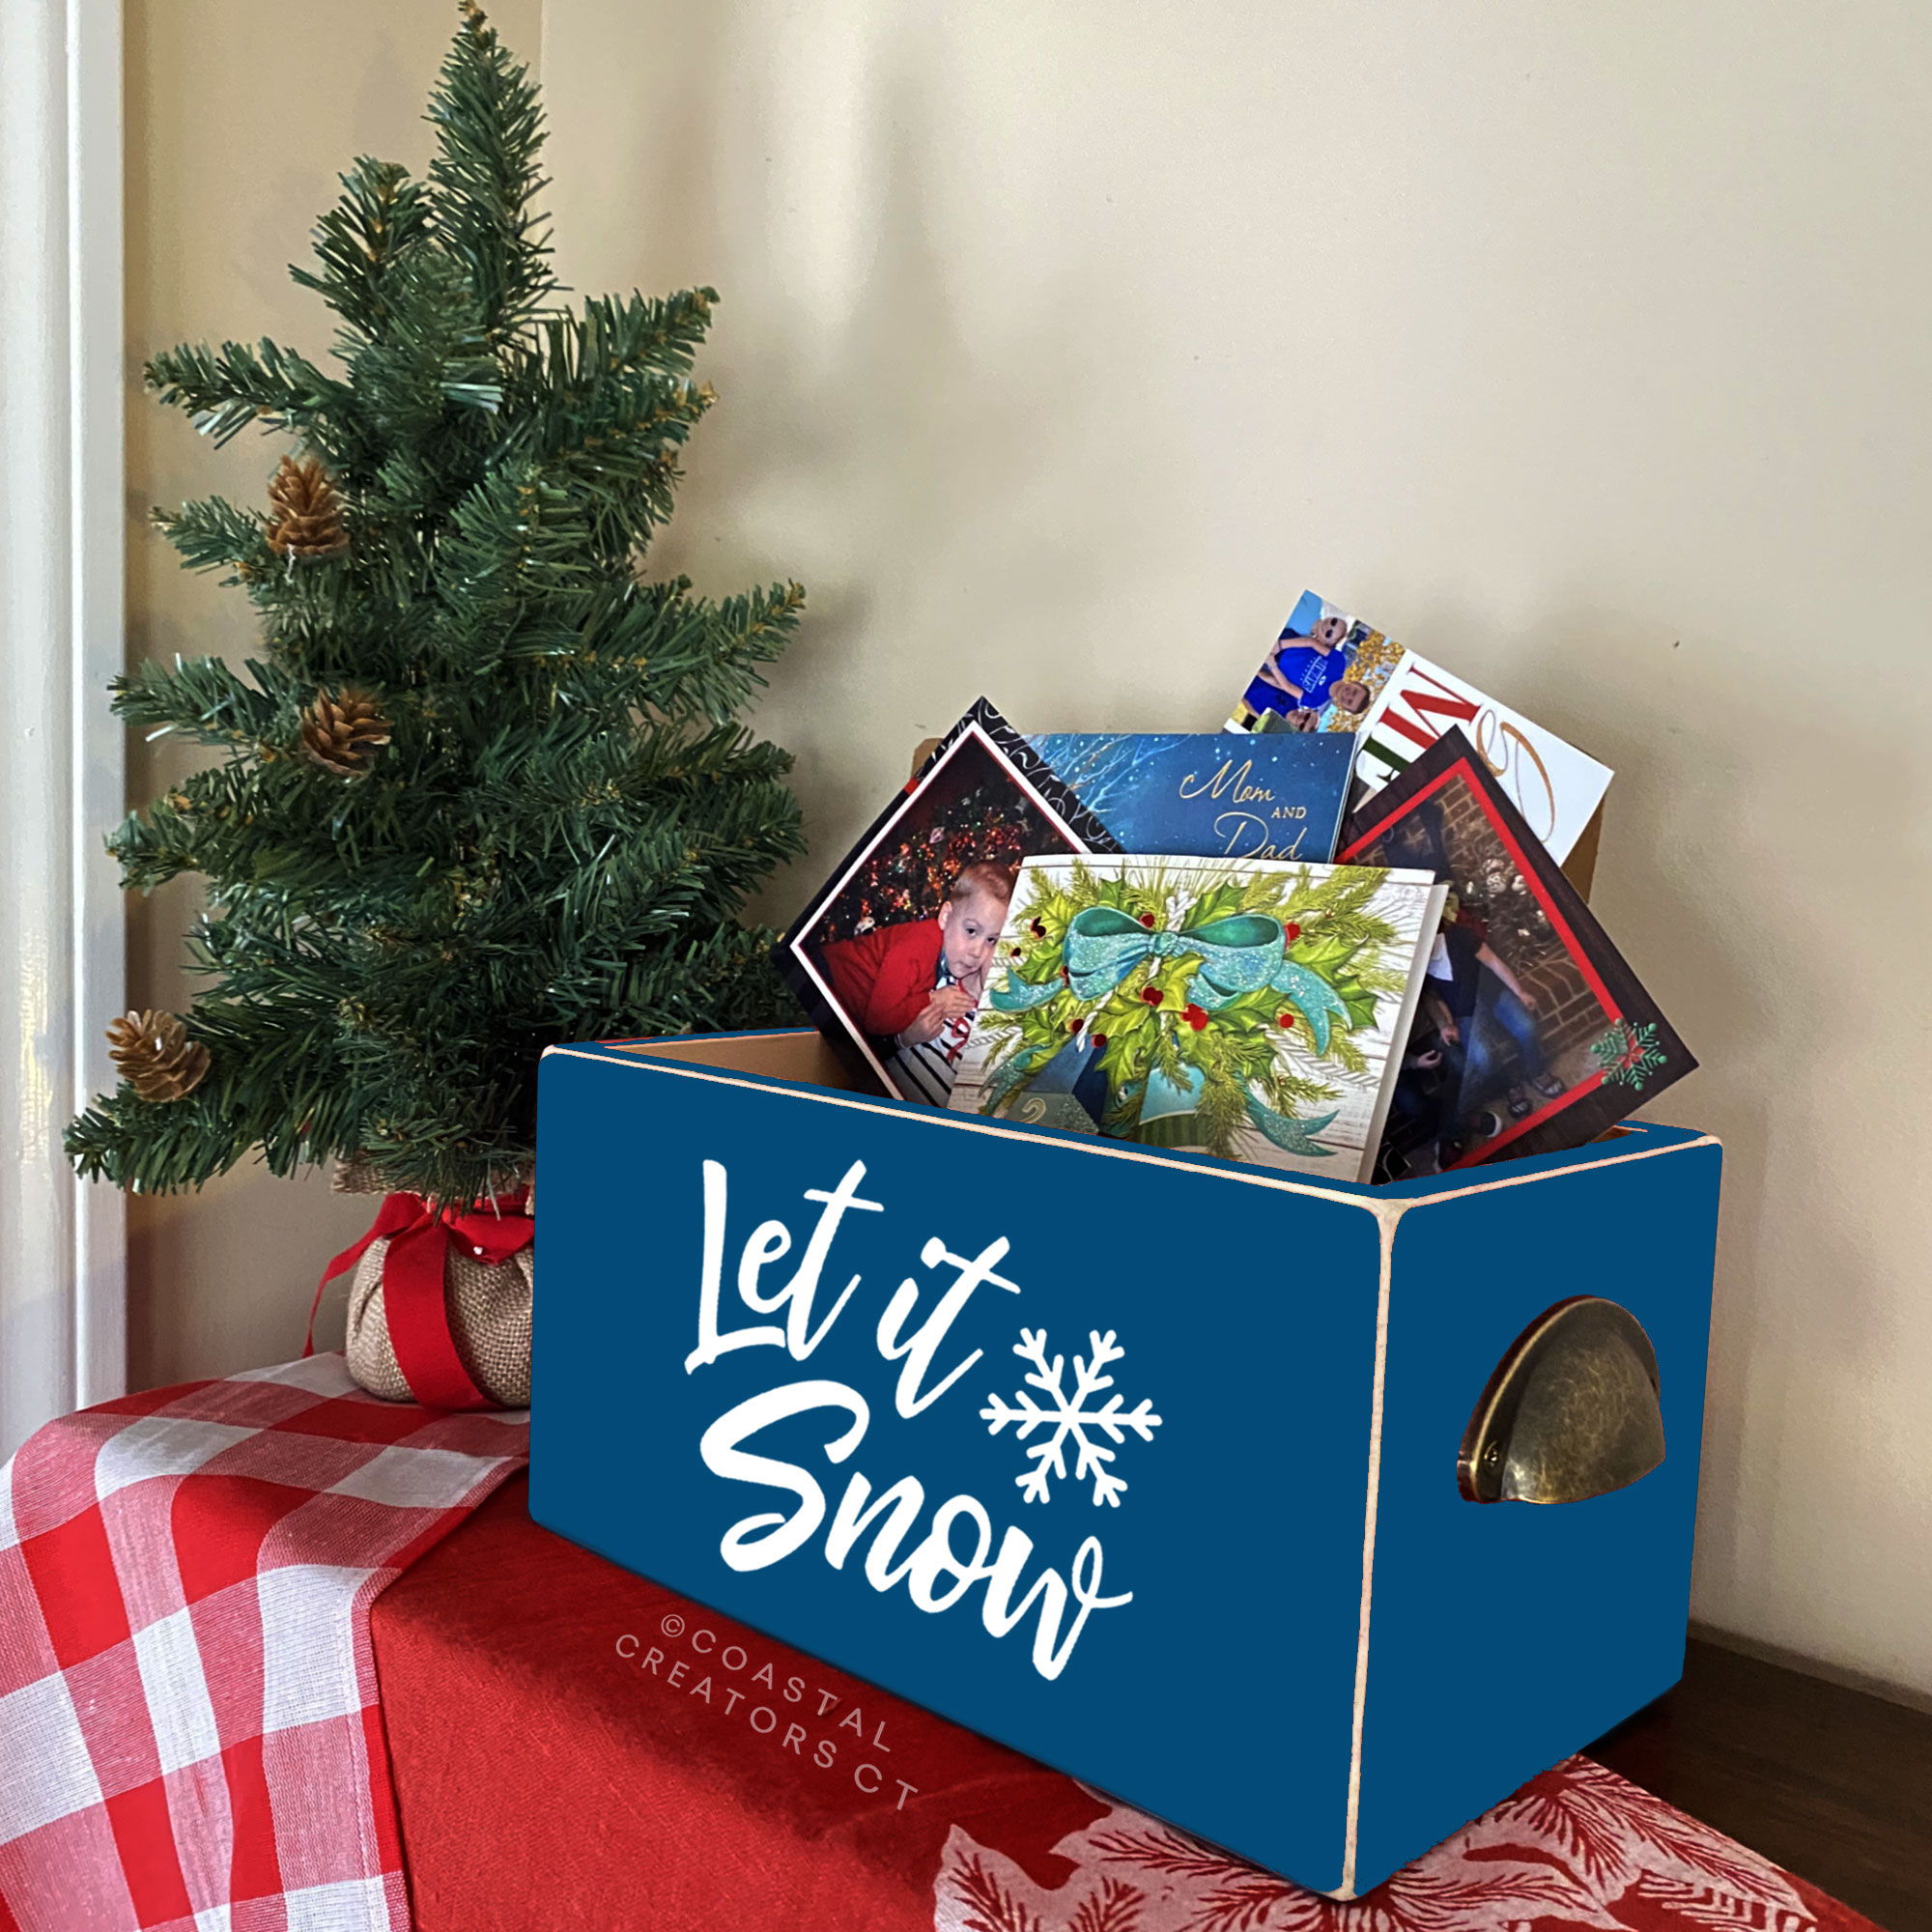
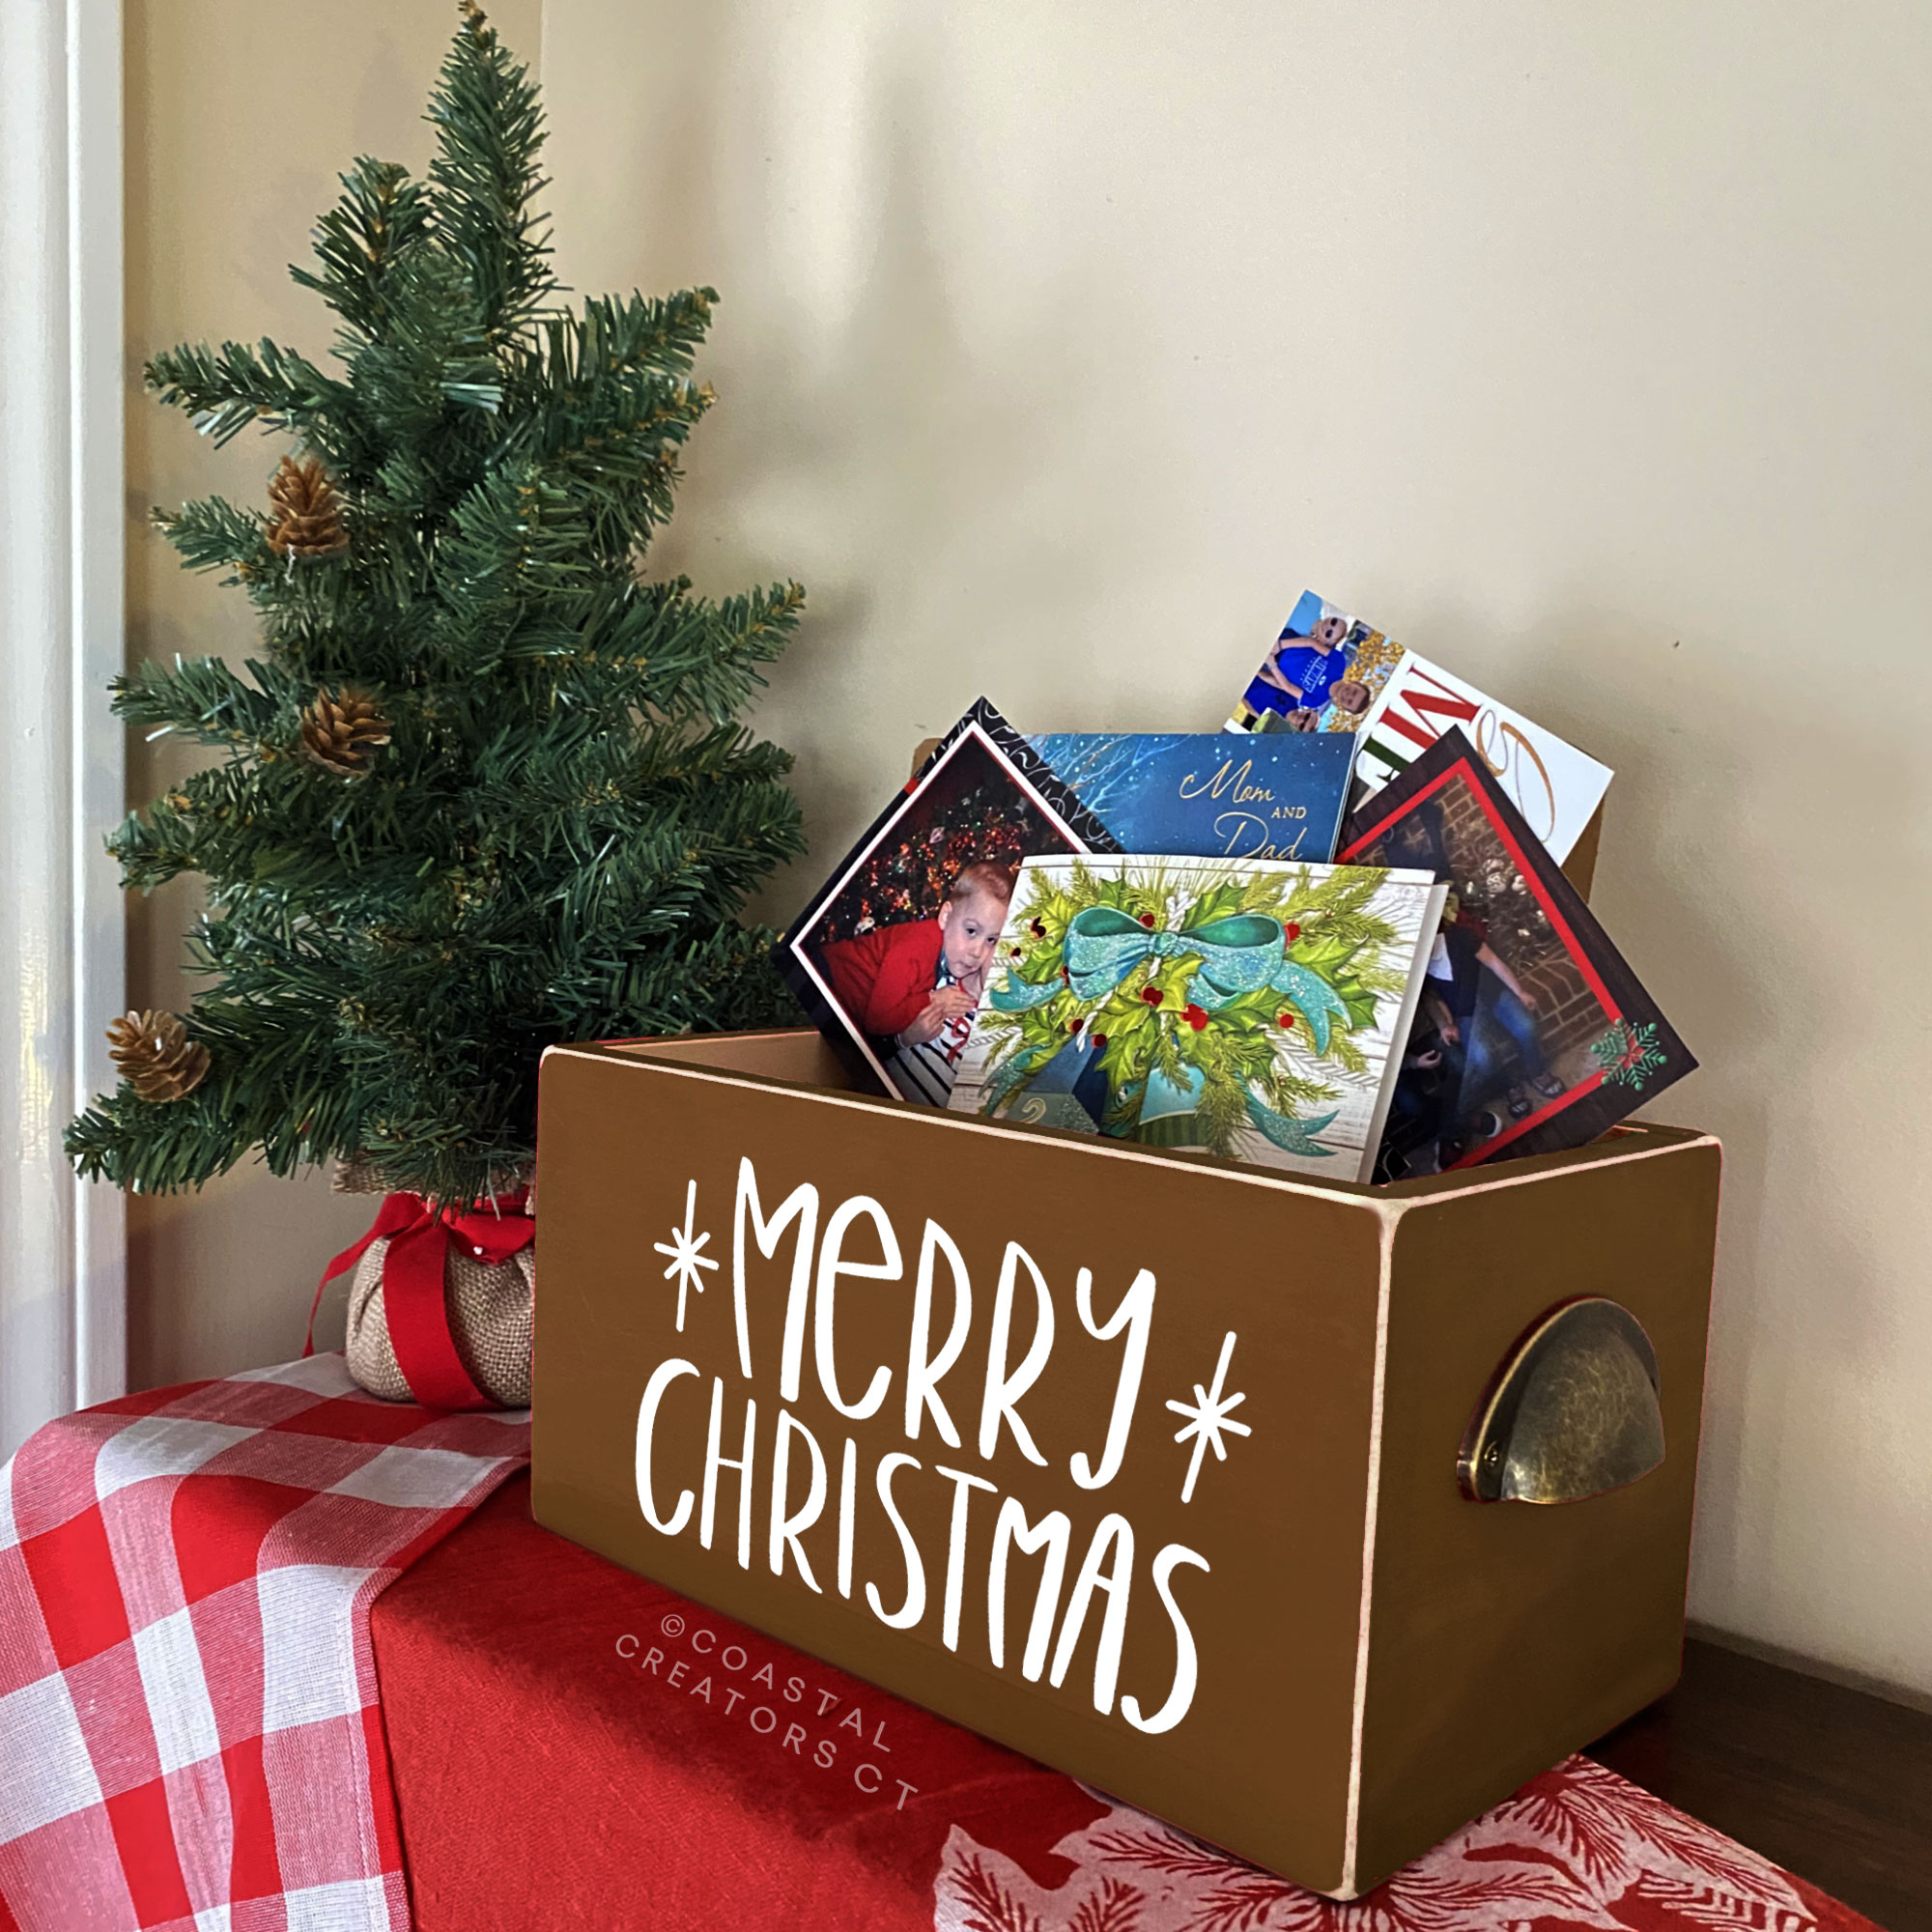
Add Clear or Chalk painted Mason jars to a wood planter and then fill the jars with florals or greenery. Faux or real florals such as lavender, hydrangea or peonies or greenery such as faux boxwoods, will make your centerpiece pop with color. Stones and shells are also good centerpiece fillers. Pillar candles, small pumpkins, boxwoods pieces, and other baubles transform your simple wood box into an awesome centerpiece. The designs choices are endless.

To help you get inspired, we have put together a collection of 10 beautiful wood centerpieces boxes that do not require much skill beyond some basic crafting knowledge.

how to make a Rustic Wood Centerpiece Boxs

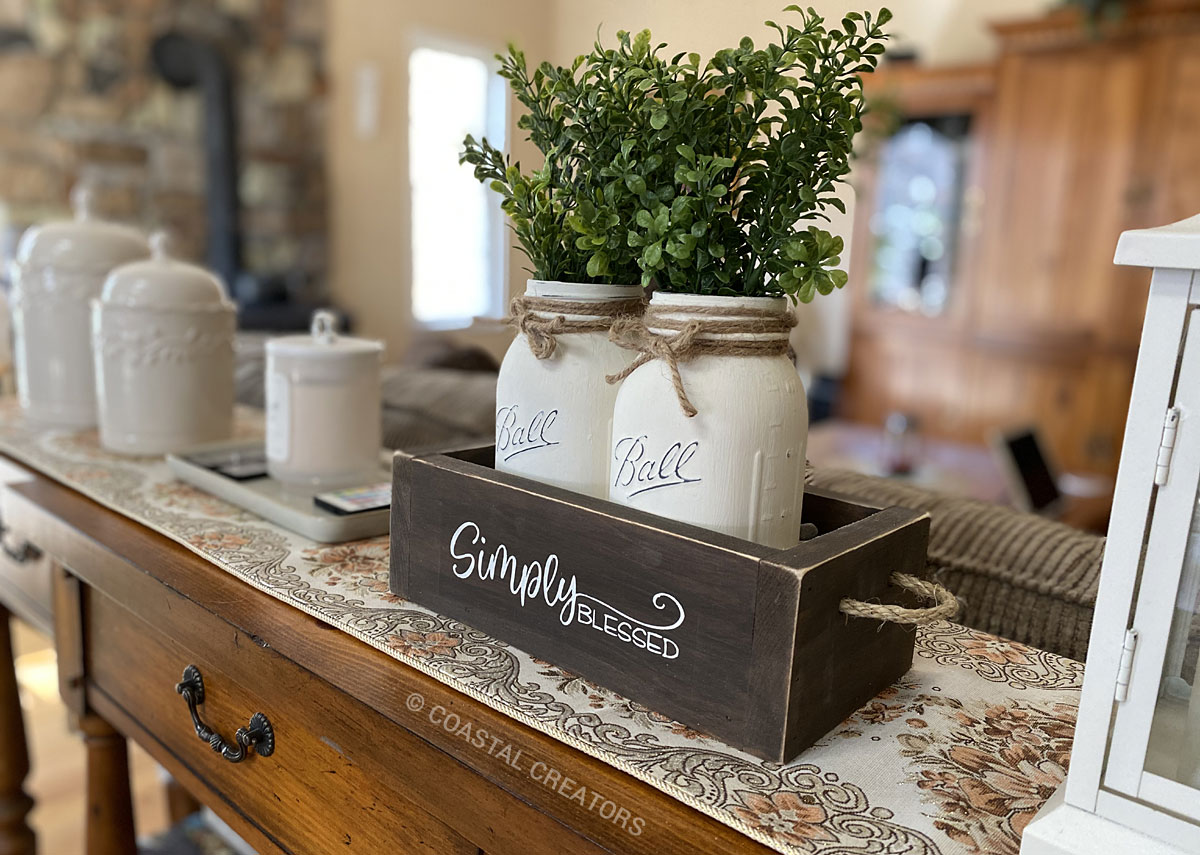
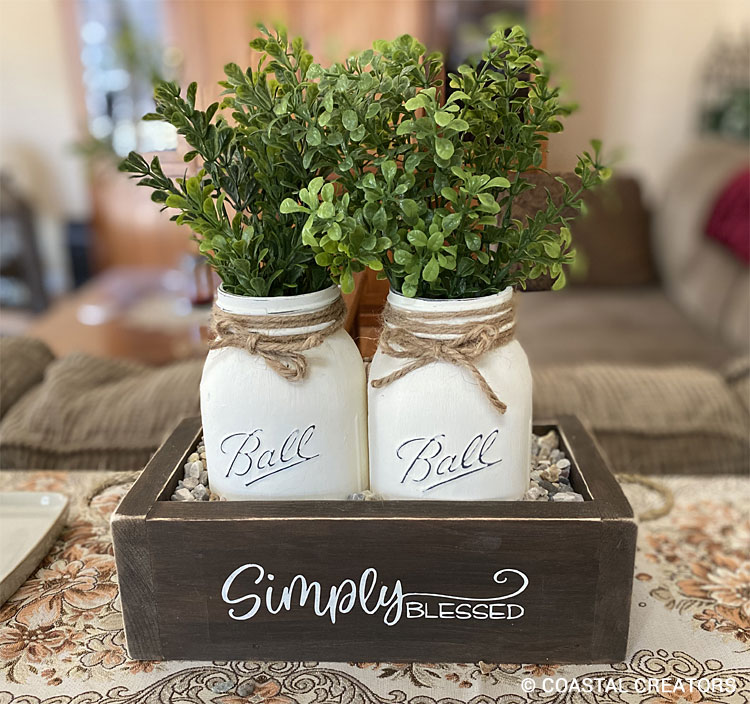
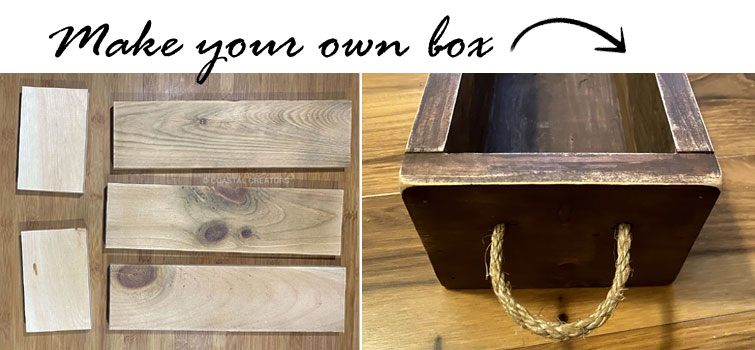
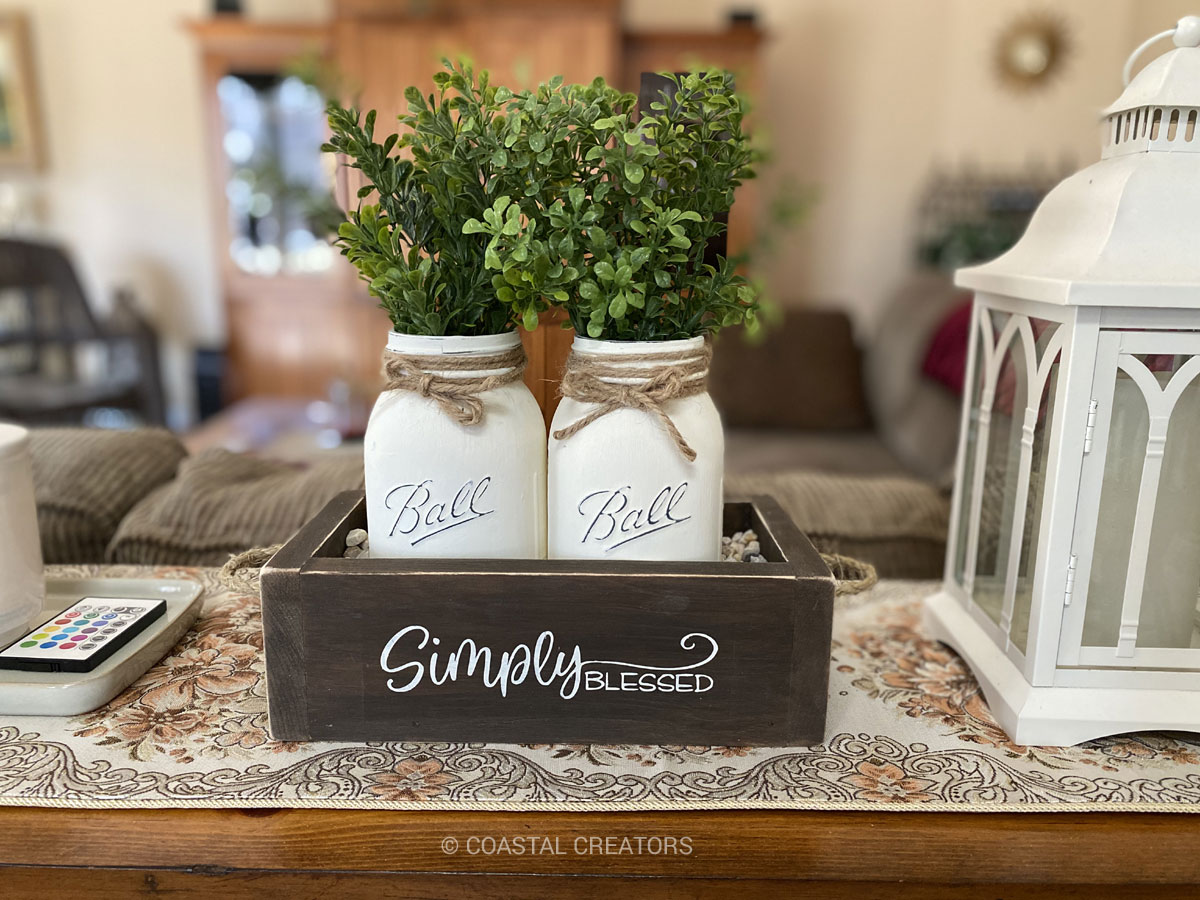
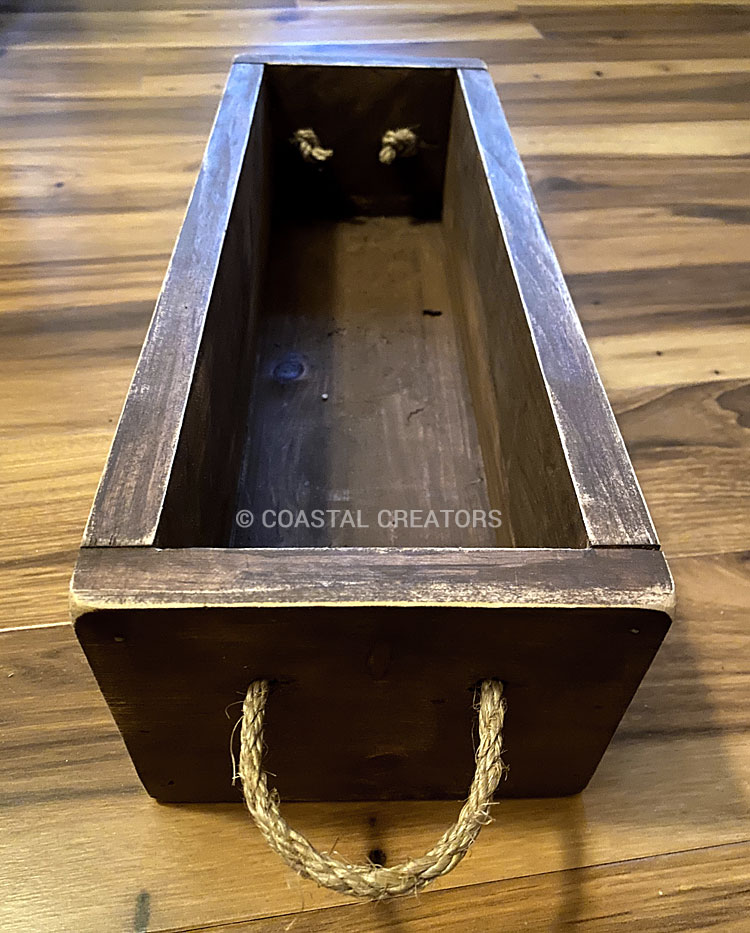
1. Simply Blessed Rustic Wood Centerpiece Box

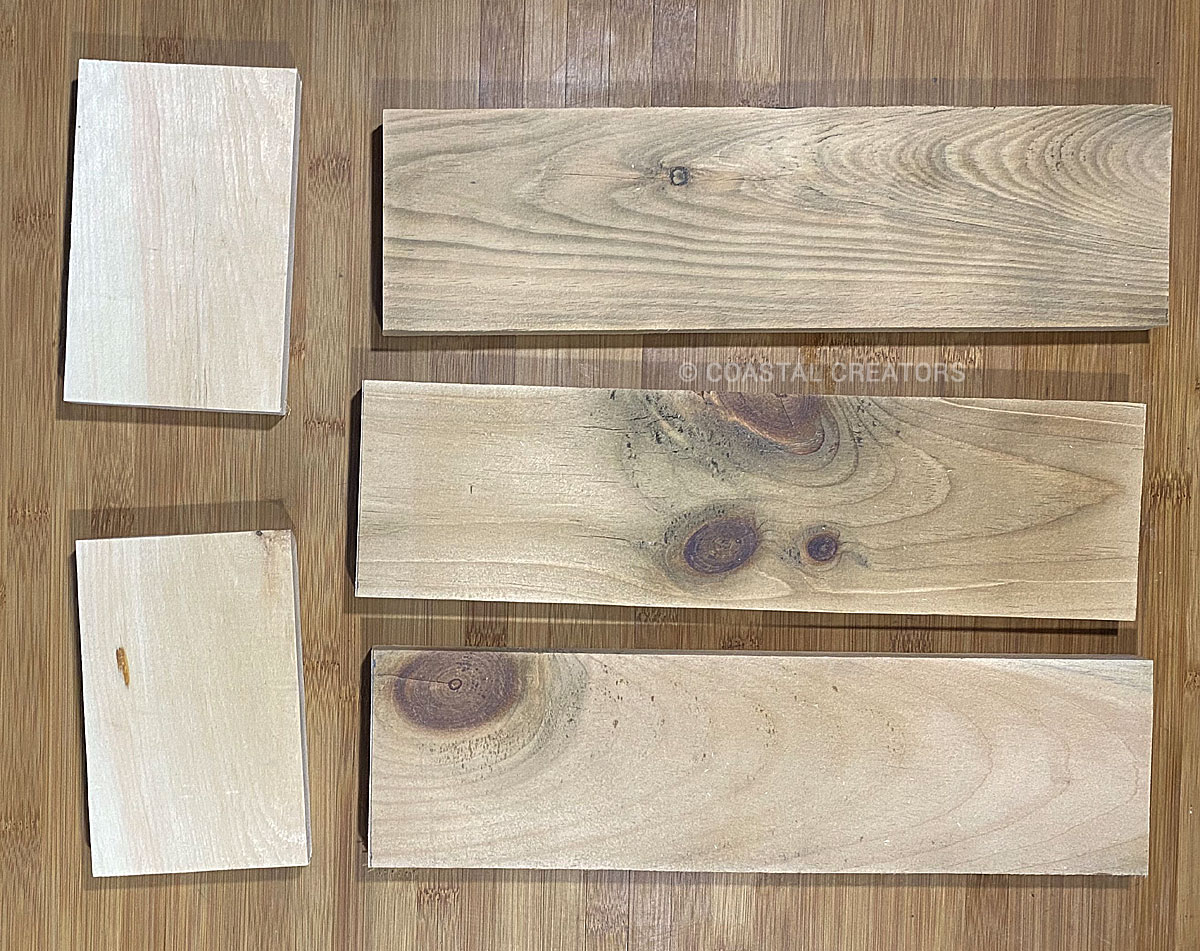
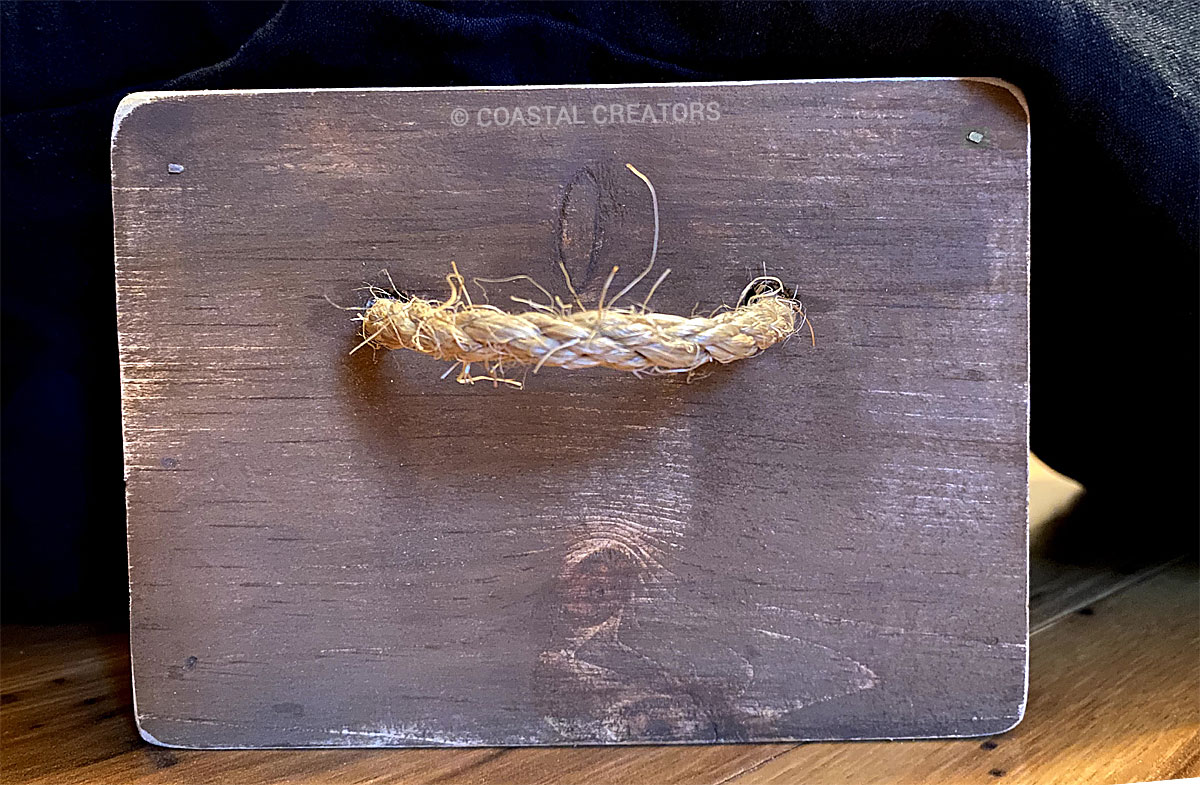
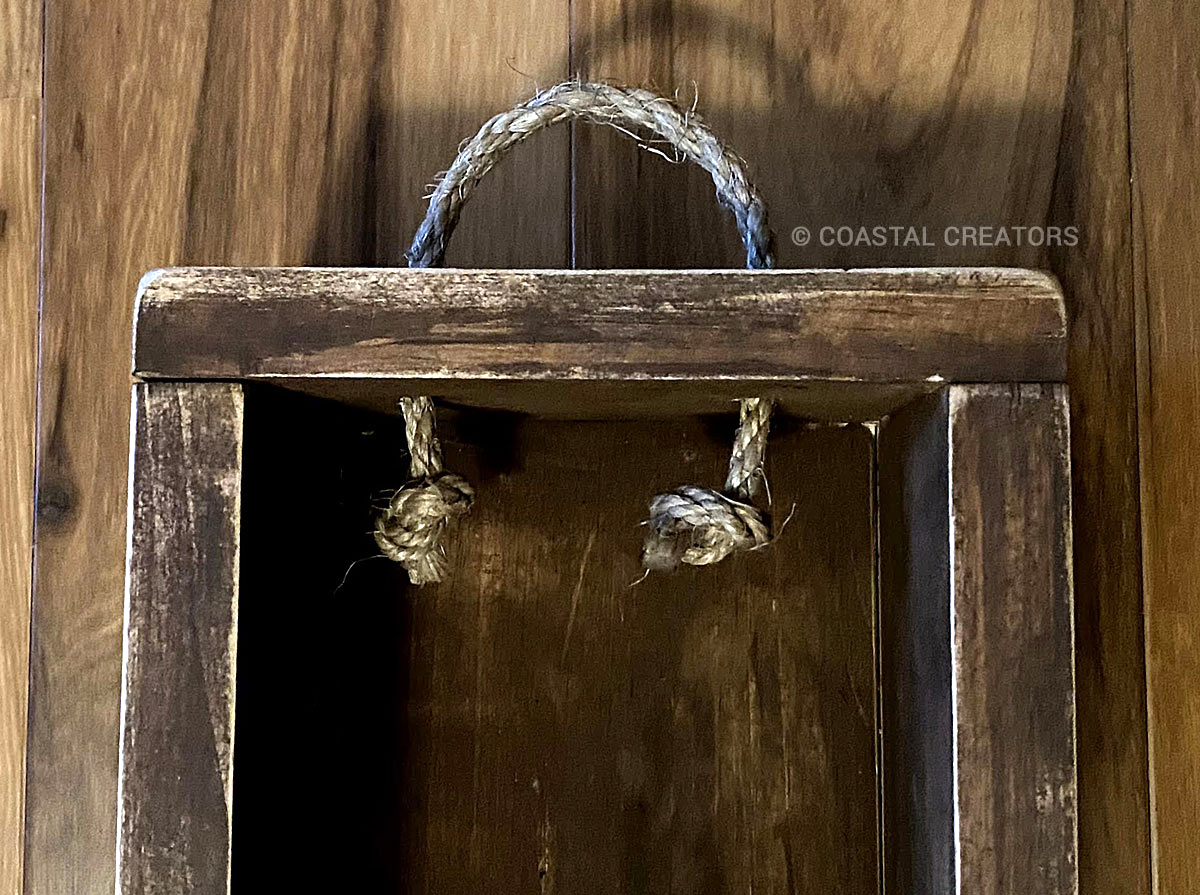
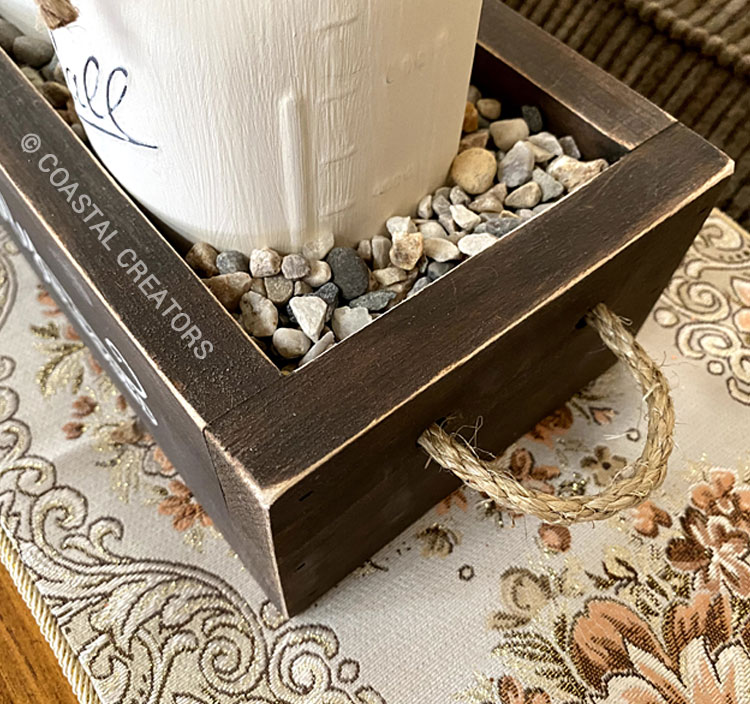
This is our own design. We actually used new pine boards to create our wood centerpiece box. We then painted the box with an Espresso brown acrylic paint, and used a sanding block to give it that rustic look, especially on the corner. Instead of buying handles, we made our own out of rope and attached them by drilling two holes in each end of the box and forming knots inside of the box.

The Simply Blessed wording is a vinyl cutout using the Cricut machine. You can create a vinyl stencil and paint the words on, or use white vinyl and create a vinyl sticker, which is much less mess. Once everything was finished we added pea gravel inside of the box around the chalk painted Mason jars to complete our look.

Simple Blessed Rustic Wood Centerpiece Boxes

D and E Customs

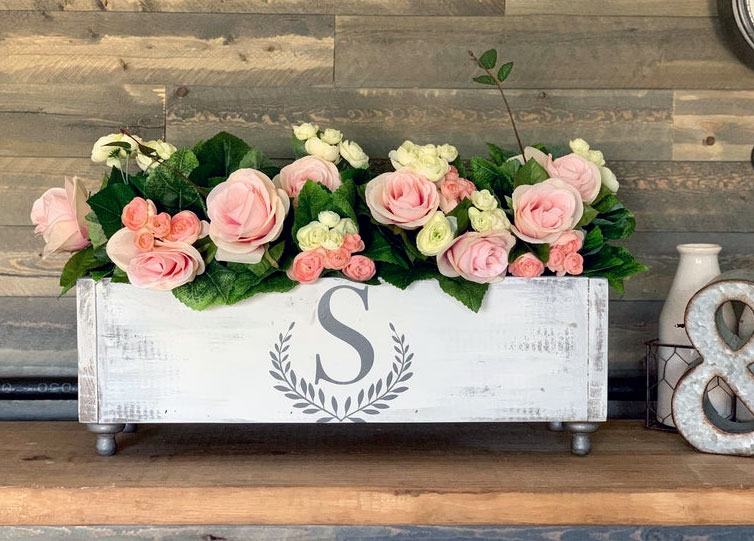
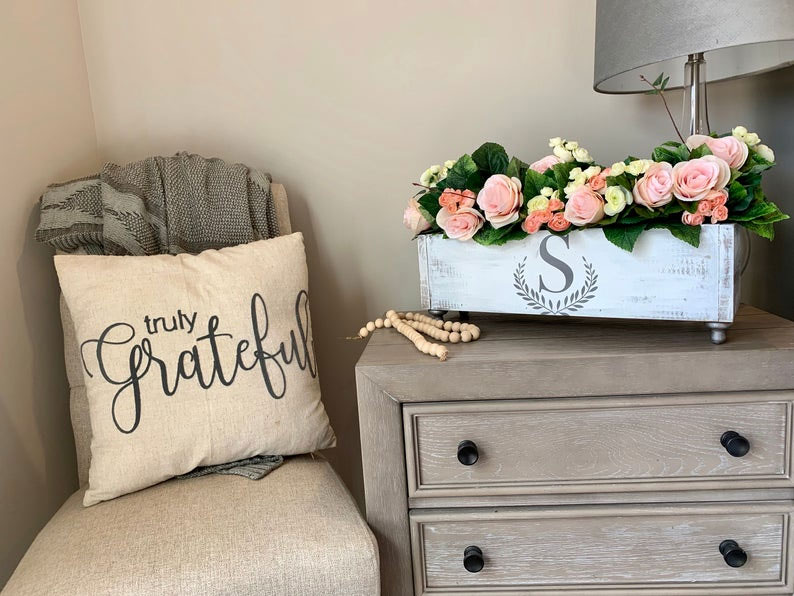
2. Monogrammed Wood Centerpiece Box

Not a fan of mason jars? This centerpiece is a rustic farmhouse planter box that stands are four homemade pegs to elevate its beauty. Add a monogram to make a custom piece. Perfect as a wedding gift. Fill it with peonies or roses for a chic look.

DIY Farmhouse Wooden Box Centerpiece
Lenny and Jenny Designs

3. Reclaimed Wood Centerpiece Box

This is one of the most versatile centerpiece you’ll ever own! These centerpiece boxes can be used for decorating any season or occasion. This box is handmade from rustic weathered pallet and barn wood. Because these boxes are handcrafted, the look of the wood will vary, as no two pieces of wood are the same.

DIY Farmhouse Wooden Box Centerpiece
The Turquoise Home

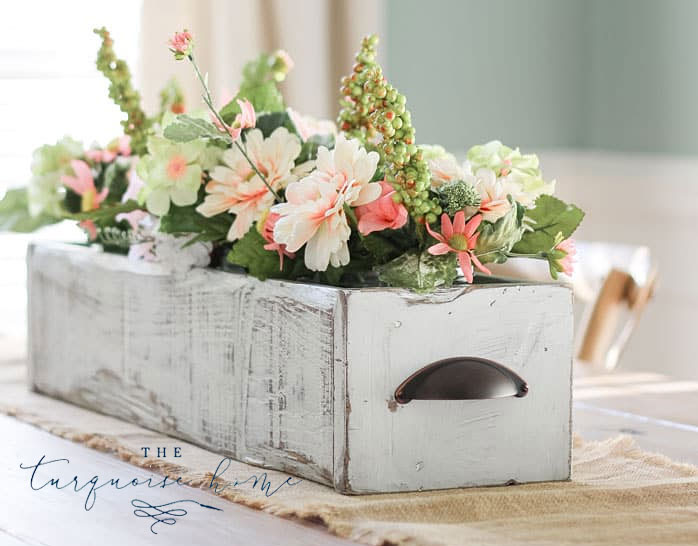
4. DIY Farmhouse Wooden Box Centerpiece

This DIY Farmhouse Wooden Box Centerpiece was made with rustic wood, a few screws and some paint. It’s a super simple project and works up as a cute centerpiece for your table, mantel or wherever you want to put it! The simple elegance of a rustic box with flowers will warm your heart and it’s perfect for spring or decorated for fall or Christmas with greeneries.

Rustic Wood Centerpiece Box

Rustic Wood Centerpiece Box
Sophia’s Decor

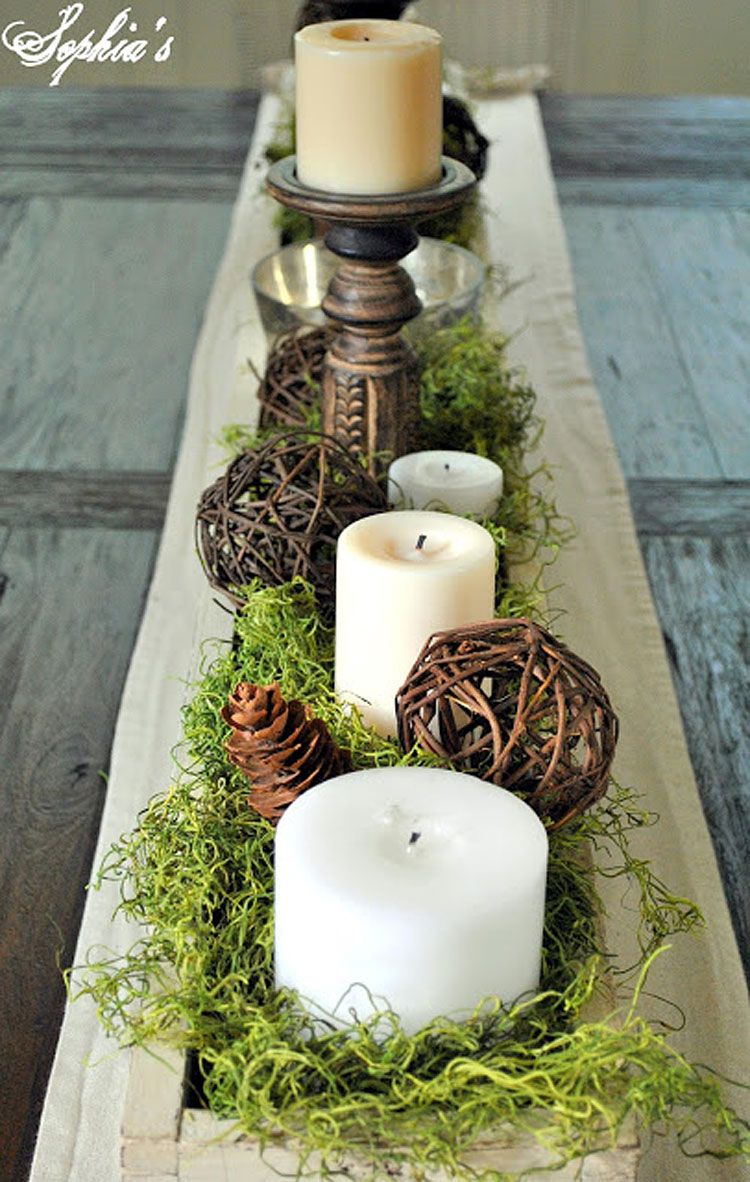
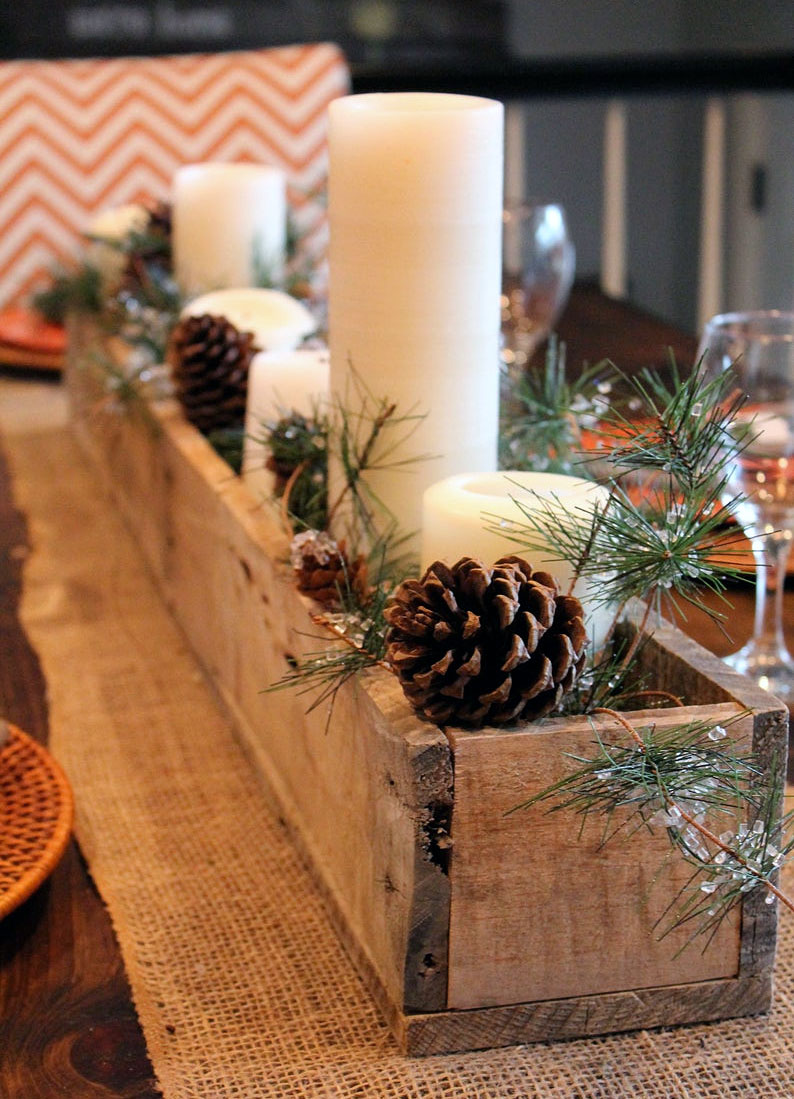
5. Rustic Wood Centerpiece for a Long Table

Are you hosting a dinner on the patio or on the terrace? Think of highlighting the long table with a rectangular rustic wood box centerpiece, decorated to your personal taste.

Rustic Wedding Wood Centerpiece Box
Love Grows Wild

We have a tutorial to show you how to make this wooden box

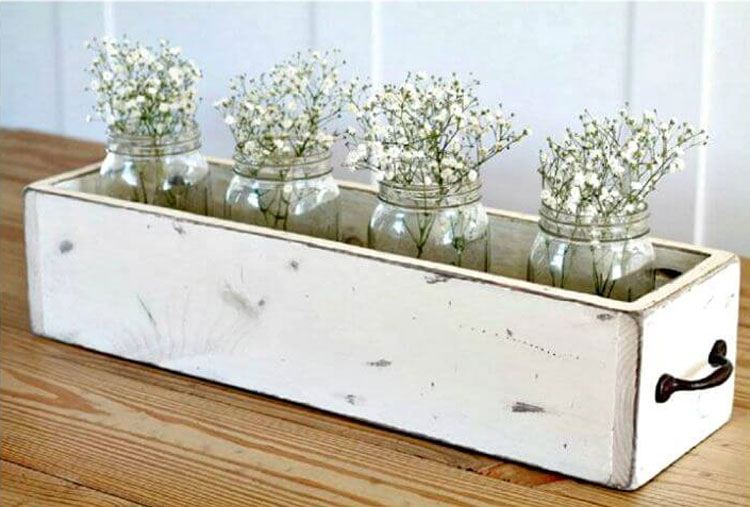
6. Rustic Wedding Wood Centerpiece Box

Add a little rustic flair to your wedding table with this wood centerpiece box with handles. This also makes a lovely gift for new couples. Fill the box with glass jars filled with babies breath or roses.

Candlelit Fall Inspired Wood Centerpiece
Addicted 2 DIY

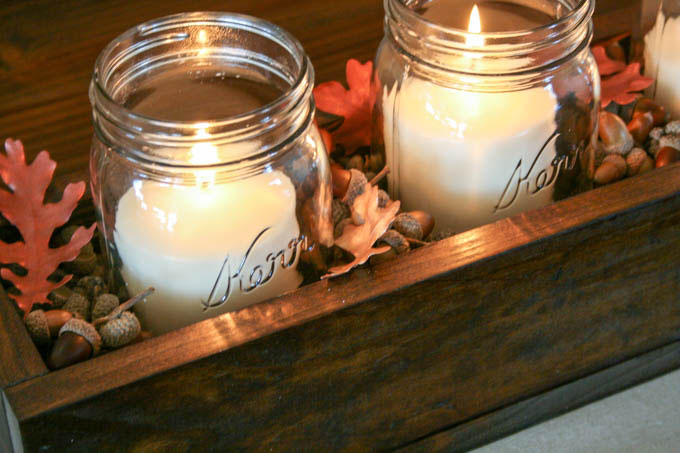
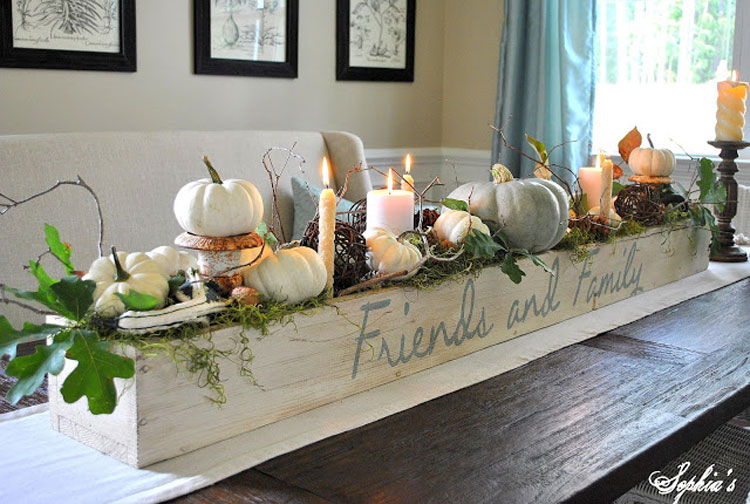
7. Candlelit Fall Inspired Wood Centerpiece

You will need Mason or Kerr jars and pillar candles to create this look. During the Fall season, fill a wooden centerpiece box with acorns, leaves, cinnamon sticks, mini pumpkins and more.

Reclaimed Wood Centerpiece Box
Her Tool Belt

The secret work is reclaimed.

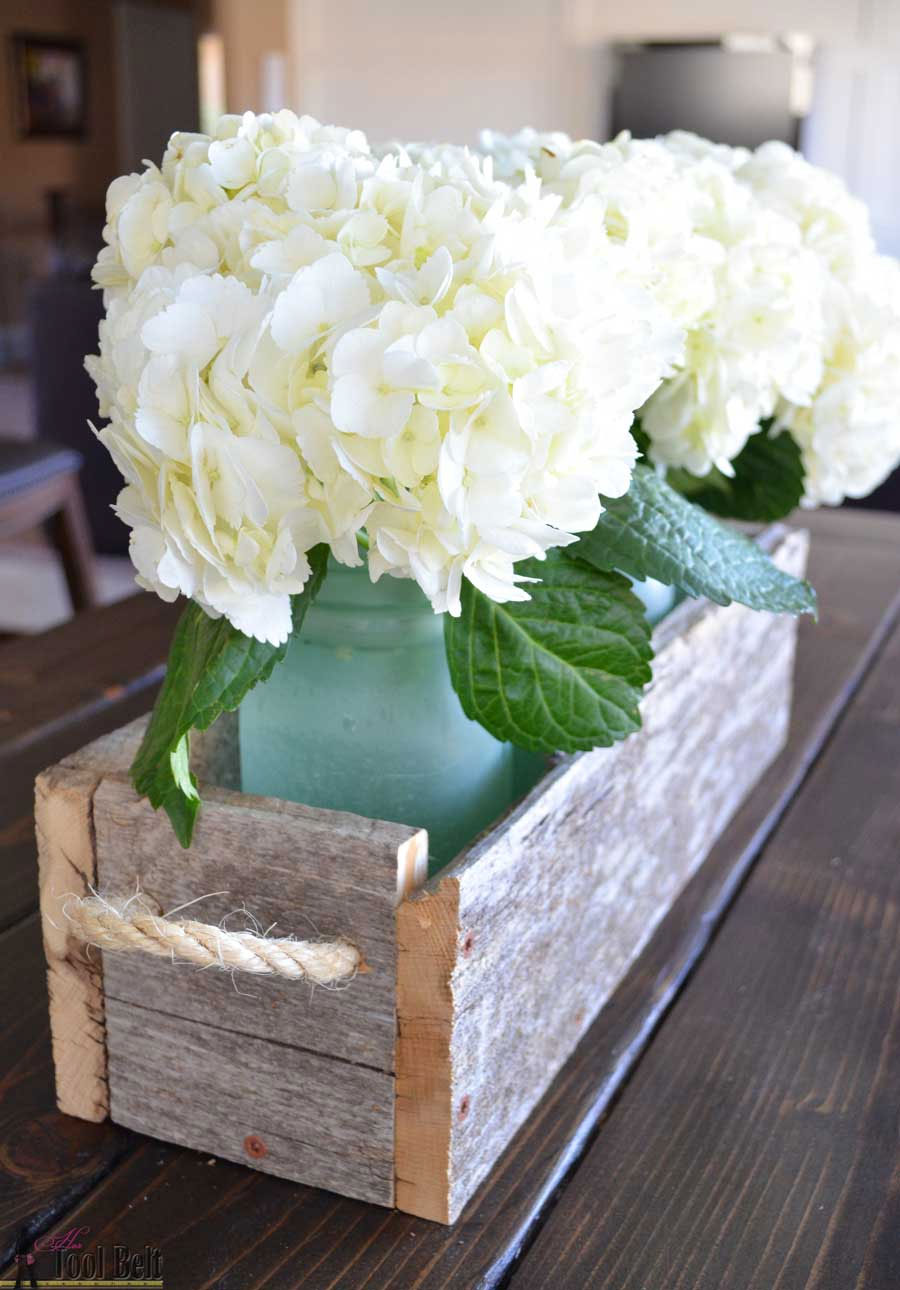
8. Reclaimed Wood Centerpiece Box

We’re back to Mason jar decor because we find these jars to be so versatile. These Mason jars have been tinted with a Sea Glass spray to make them look like they are made out of sea glass. The wood box is made out of reclaimed barn wood. White hydrangeas complete our decorative wood centerpiece box.

Wood Centerpiece Box with Raised Fee
Maple Nest

9. Wood Centerpiece Box with Raised Feet

Illuminate your dining table while displaying candles surrounded by succulents. This versatile wood centerpiece box serves as a candle holder and planter for real or faux succulents. Fill it with rocks, moss, plants, wine corks and more. The little feet elevate this wood box to give it a unique look to any decor.

Rustic Wood Centerpiece Boxes
source unknown
Rustic Wood Centerpiece Box
source unknown

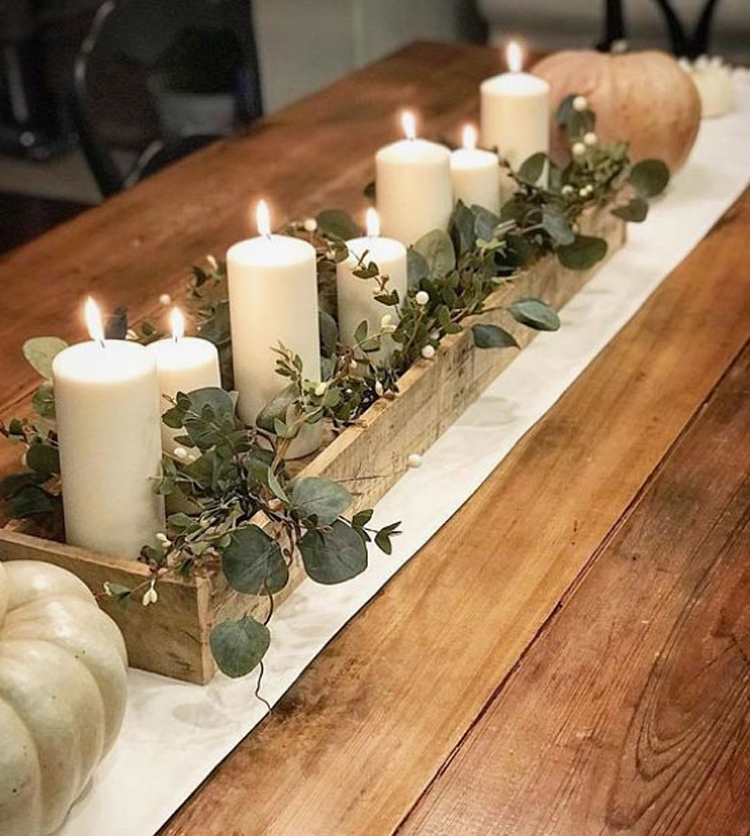
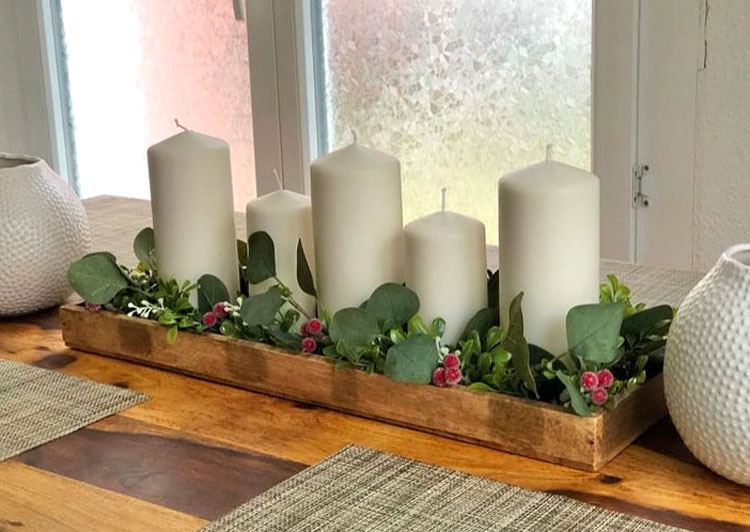
10. IKEA Pillar Candles & Eucalyptus Centerpiece

The glow from candles can add atmosphere to any moment as they light up dark. Complete your seasonal décor with festive and elegant white candles, berries and vines.

Do you want to make your own wood Centerpiece box?

We have full step-by-step instructions.

DIY Wood Centerpiece Box Instructions

How to Make & Decorate a Rustic Wooden Christmas Tree

Coastal Creators Crafters group met for our monthly craft class in December and we decorated Rustic Wooden Christmas trees.

Disclaimer: this article contains affiliate links. Please read our affiliate policies.

Each person received two trees – one traditional pine tree and the other more like a birch tree with straight lines. We provided the wooden trees, paint, decorative papers, ribbons, stickers, stencils and embellishments and students brought their creativity to decorate their trees with their own unique flair!

Take a look at some of the Christmas tree designs our students came up with.

Scroll down to find out how to make your very of Wooden Christmas Tree.

Rustic Wooden Christmas Tree Supplies List:

If you are following along at home, you will need the following supplies to make your own set of Wooden Christmas trees. These make great accents to put on the mantel, dresser, foyer, or anywhere you decorate for the holiday season.

Wooden Christmas Tree Supplies List

  • Pine boards or plywood
  • Decorative Scrapbook Papers
  • Double-back tape, Modge Podge, Tacky Glue, Glue Runners, or glue sticks
  • Acrylic Paint
  • Paint Brushes, Makeup sponge applicators for dabbing
  • Tiny clothes pins
  • Bakers Twine
  • Tiny Ribbon Bows
  • Sanding blocks
  • Stencils (see below)
  • 4mil to 6mil Mylar
  • Embellishments

How to Cut a Wooden Christmas Tree

We created our own template to make these trees. You can download the stencil to make your own. Trace the tree onto the wood and then use a jigsaw to cut out the design.

  • Large Christmas Tree Stencil
  • Small Christmas Tree Stencil

The large tree measures approximately 7″ x 9-3/4″ (10-1/2″ high with base) and the smaller tree measures 3-1/4″ x 7-1/2″ (8-1/4″ high with base). These are just guidelines and you can make them any size you wish. We even made a larger 16″ high trees to make a “Sweater Christmas trees” (see photo above)

Wooden Christmas Tree Base

You may want a base to keep your trees from falling over. We used a 1×2 board to create the bases. Scraps of wood work fine as well. The large tree base measures 3-1/4″ x 1-1/2″ x 3/4″ thick and the small tree base measures 1-1/2″ x 1-1/2″ x 3/4″ thick.

We glued the bases on the bottom of the trees and then used Quick-Grip Clamps to hold them in place. Then we used Cordless Nail Gun to staple the base into place. We let the bases dry overnight.

Use a power sander or sanding block to shape the edges and get rid of any rough edges and bumps on the surface of the wood.

How to Decorate a Wooden Christmas Tree

The first thing you will want to do is paint your tree with a base color. Even if you are using decorative papers on your tree you want to make sure the wood is painted because the edges will show and maybe some of the wood around the paper. We also created our own stencils and used 4mil Mylar with our Cricut machine to cut them out. You can also create vinyl stencils.

Free Christmas Stencils

Here are some of the stencils we created for our students that you can download and use for free. You can use these .png files and upload them to your Cricut or other cutting machine and cut out stencils from Mylar, or make vinyl sticker stencils or even vinyl stickers.

  • Star border
  • Holly leaf border
  • Poinsettia
  • Large Snowflake
  • Merry Christmas – Design #1
  • Merry Christmas – Design #2
  • Wreath with berries

If you want to use decorative papers to decorate your wooden tree, use the original tree stencil to cut out the shape of the tree on the decorative paper. By laying the stencil on the paper you can see what the design will look like once it is glued to the tree.

TIP: Since the tree may be a slightly different shape than the original stencil once you are done cutting it out, you may want to make your decorative paper cutout slightly larger and then trim the edges around the tree.

You can use glue sticks, Double-back tape, Modge Podge, Tacky Glue, Glue Runners, or glue sticks to adhere decorative paper to your trees.

You may want to use Baker’s Twine and tiny clothespin to add to your tree and then you can hang tiny greeting cards or photos from the clothespins.

Paint or decorate both sides of your trees and if you get tired of looking at one side, you can turn them around.

Wooden Christmas Tree Decoration Inspiration

These handmade Wooden Christmas trees make great gifts and so much fun to make if you are hosting a craft class.

Take a look at how some of our students decorated their wooden Christmas Trees. Hopefully they will inspire you to make your own. Most of the students decorated both sides of each tree.

How to Make & Decorate a Rustic Wooden Christmas Tree


  • 1
  • 2
  • 3
  • Next Page »

Free DIY Birdhouse Plans

Free Easy DIY Wood Birdhouse Plans

Mosaic Birdhouse

Fun Birdhouses to Make, Sell and Just Enjoy!

Gypsy Sky Mosaic Garden Bird Bath

Exquisite Mosaic Bird Baths To Make & Enjoy

Sea Glass Crafts to Make and Sell

Coastal Creators participate in the Amazon Services LLC Associates Program, an affiliate advertising program designed to provide a means for sites to earn advertising fees by advertising and linking to Amazon and other affiliate programs. Read more

  • HOME
  • BLOG
  • YOU TUBE
  • CONTACT

Copyright © 2022 · Coastal Creators · Our Policies