Sea glass crafts are in high demand in shops, online, Etsy and at craft fairs. We will give you sea glass craft ideas that you can make and sell for a profit. Sea glass is an exciting hobby that can also turn into a side business to make extra income. Some fantastic crafts you can make with sea glass include stepping stones for the garden, sea glass wall art, coasters, sea glass jewelry, picture frames and more.
Sea Glass is so beautiful that you will want to craft an item or beauty like a sea glass coaster, window frame, mosaic table, and sea glass stepping stones that you can make and sell for profit online and at craft fairs.
Where to Find Sea Glass
Almost all of us remember going to the beach as kids and gathering seashells with our parents. We would also search for colorful bits of sea glass and if we found any it was like finding gold because it is hard to find on many beaches. You can still scour the beach today for sea glass but it will take quite awhile to find enough to make a successful craft project. And, if you want to sell multiple sea glass crafts you will need to have a lot of sea glass on hand.
Sea Glass is readily available for purchase online at Amazon. They sell both small quantities and larger, bulk quantities of sea glass. If you are going to be making a lot of sea glass crafts you may want to consider purchasing sea glass in bulk. When buying in bulk you will get a reduced price too. You need to keep your supplies costs down if you are planning on reselling your sea glass crafts so buying in bulk will help.
What is the Best Glue for Sea Glass Crafts
The type of glue to use for sea glass crafts depends on the type of projects you are working on.
Clear Drying Glues If you want light to reflect through the sea glass you should use an adhesive that dries clear such as Vigor Jewelers Epoxy or E6000 Jewelry Epoxy.
Strong Bond Glues If you are working on a piece that has a lot of sea glass attached, you will want to use ceramic cement to bond sea glass to the surface. You need to make sure the sea glass stays firmly attached and has no chance of coming off your piece. Gorilla Glue works well to attach sea glass to any surface. You can also get it with a clear finish.
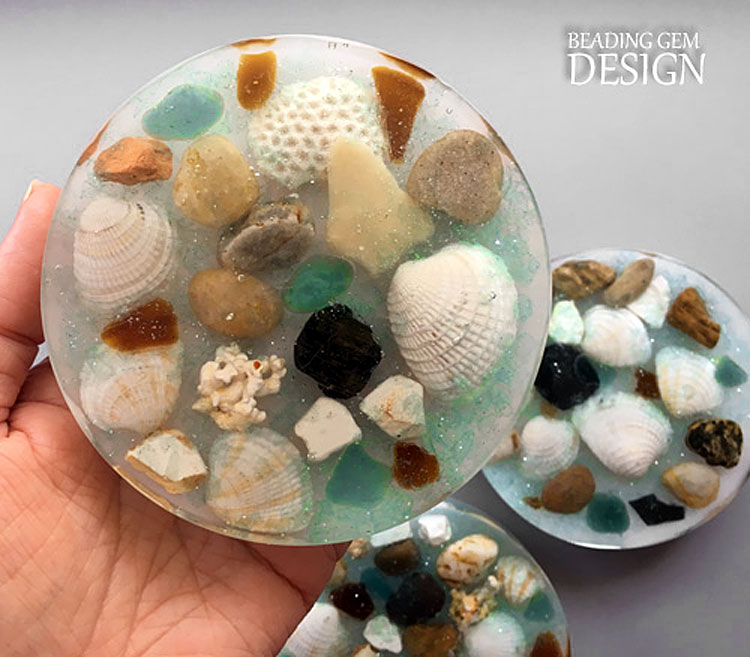
Sea Glass Resin Coasters
You can make sea glass resin coasters using Little Windows’ Brilliant Resin, a bit of white resin pigment and sea glass. You will also need some type of mold to create the round shape. A silicone mousse pan works well. It would be best if you had some measuring cups and paper towels as well. The Resin proportion you need to use is 2:1 of part A, and part B. Start with layers where the first layer is white, which gives you an opaque bottom so you can’t see through it. Add the sea glass pieces, and with a toothpick, you can adjust the elements. This specific sea glass craft also includes some glitter gravel to add sparkle. Pour the clear Resin on top and let everything set overnight.
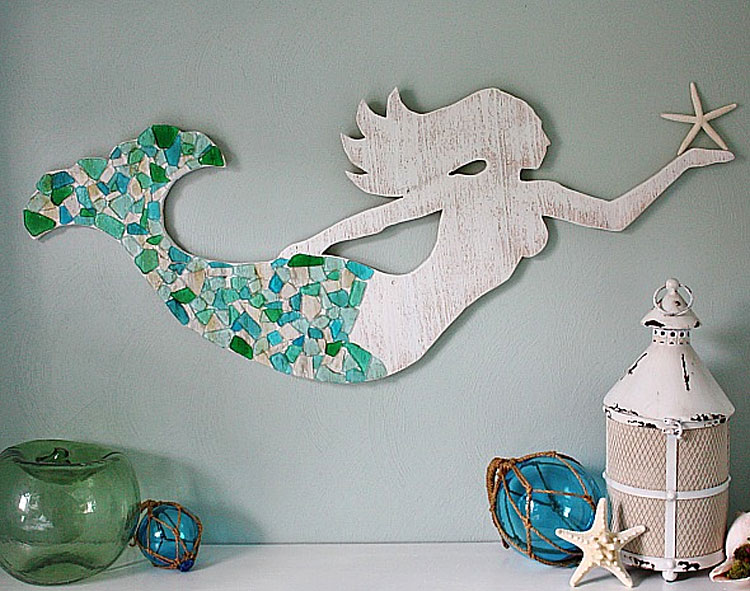
Sea Glass Mermaid Wood Wall Art
To create a Sea Glass Mermaid wall art piece you will first need to draw a mermaid design on a piece of wood and then cut it out using a saw. You could use plywood or cedar. You may want to paint the wood with chalk paint and sand it to give it a weathered look. Flat pieces of sea glass are preferred for this project because you are not covering the whole piece of wood and you don’t want the glass to be raised up that much.
Arrange the sea glass pieces to create the Mermaid tail and glue the pieces to the board using a strong glue such as Gorilla Glue. You need to ensure that you let it dry for at least for an hour but overnight is preferred.
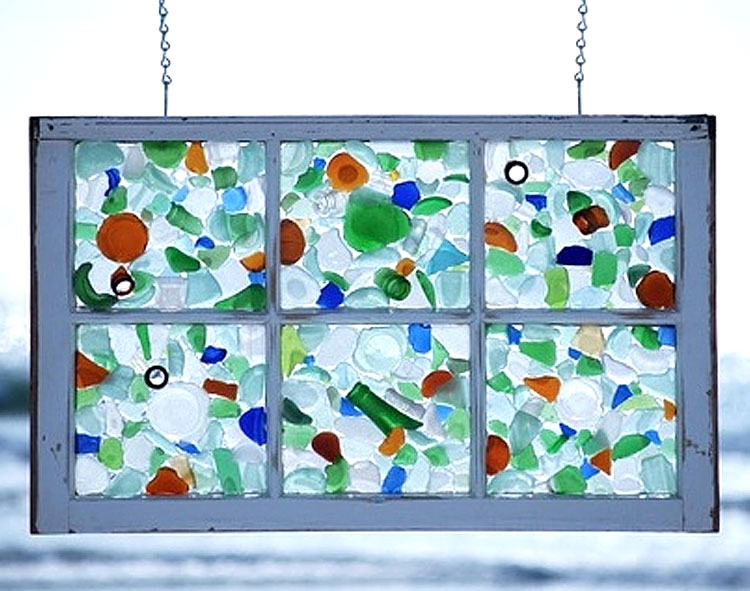
Sea Glass Hanging Window Frame
If you want to make a fantastic hanging sea glass window frame, you need to fill each window pane with sea glass pieces. You could add bits of broken glass and other embellishments as well. Ensure you use enough glue and let it dry for a sufficient amount of time. You can find old window frames at antique shops and try looking on Craigs List and also Facebook Marketplace as someone is always getting rid of old window frames. You can turn an old window frame into a fantastic sea glass art that you can keep to enjoy or sell for a profit. You will need chain for this project and probably eye hooks to screw into the window pane to hook the chain onto.
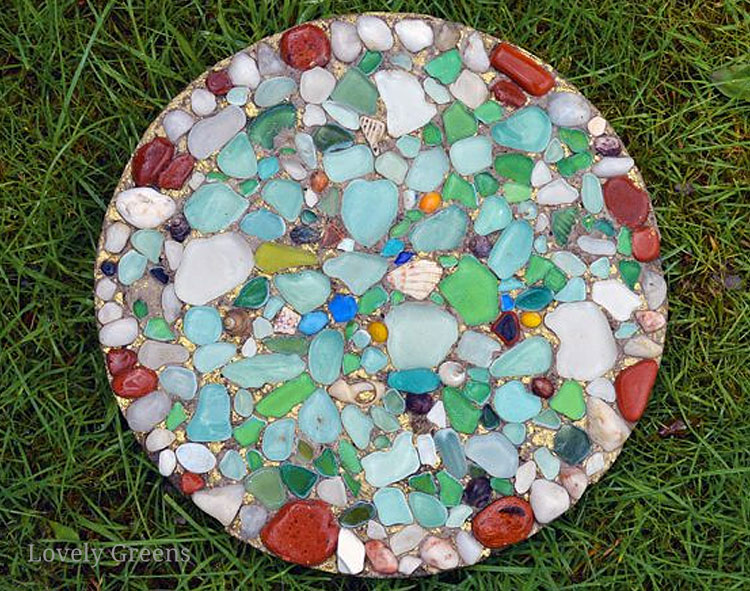
Sea Glass Garden Stepping Stone
After collecting or purchasing your sea glass, you will need to find a mold such as a cake pan or plastic tub to get this project started. Some other supplies you will need are cement, gold spray paint (I like to use DecoArt Metallic paint and brush it on), matte white paint, and clear spray paint. If you prefer you don’t have to use spray paint. You can use other water-based paints you have on hand. You will also need a bit of chicken wire or metal fencing that you can fit inside of your mold.
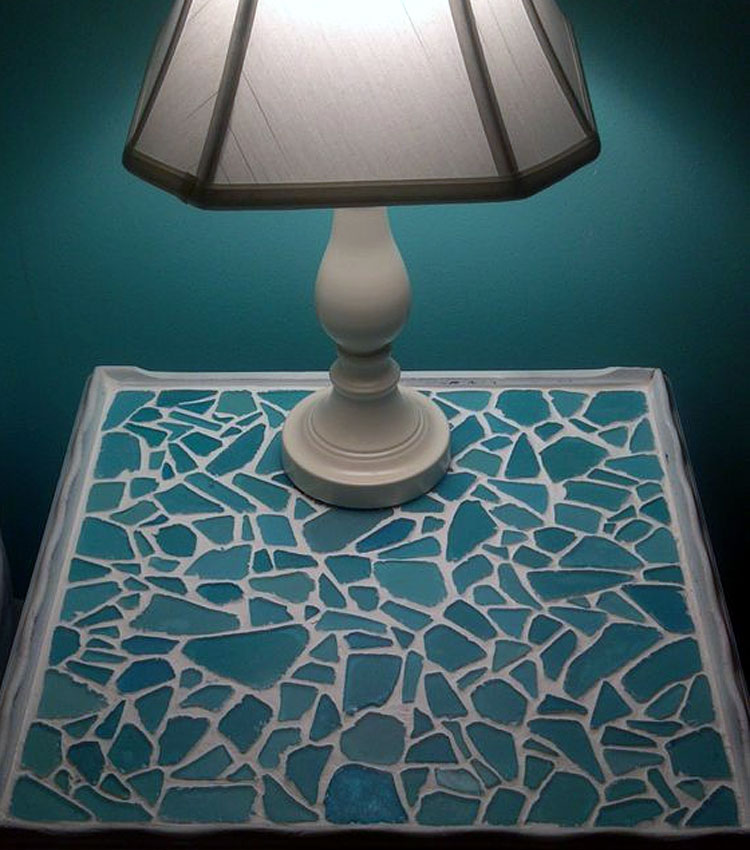
Sea Glass Mosaic Table
If you have an old table that is in need of a face-lift, you can cover the top with sea glass and then use grout to fill in the gaps. You could paint the table white first to give it a more nautical look. As with any sea glass craft project, you will need a strong glue to adhere the sea glass to the wood table. Once it is dry, use a plastic spatula and spread the grout over the sea glass and around the gaps. Let it dry overnight. You may want to give it a protective finish by adding a layer of Miracle Sealants Grout Sealer on top.
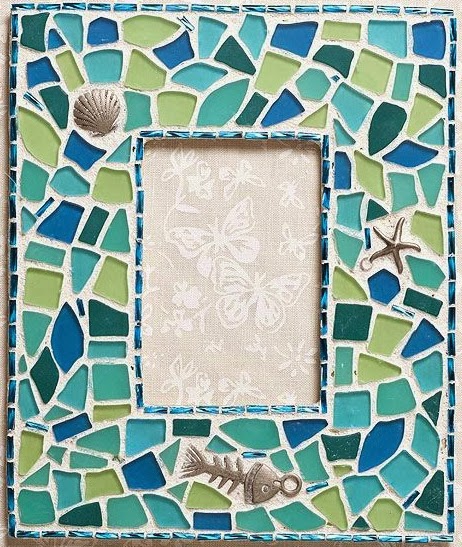
Sea Glass Picture Frame
Here is a unique way to hold a photo, a sea glass picture frame. Take an ordinary picture frame and turn it into a masterpiece that you can keep or sell. You will need flat, clear sea glass pieces for this project. You will also need pre-mixed grout, strong glue and sealant. Some embellishments like starfish and shell jewelry findings will give it a nautical touch.
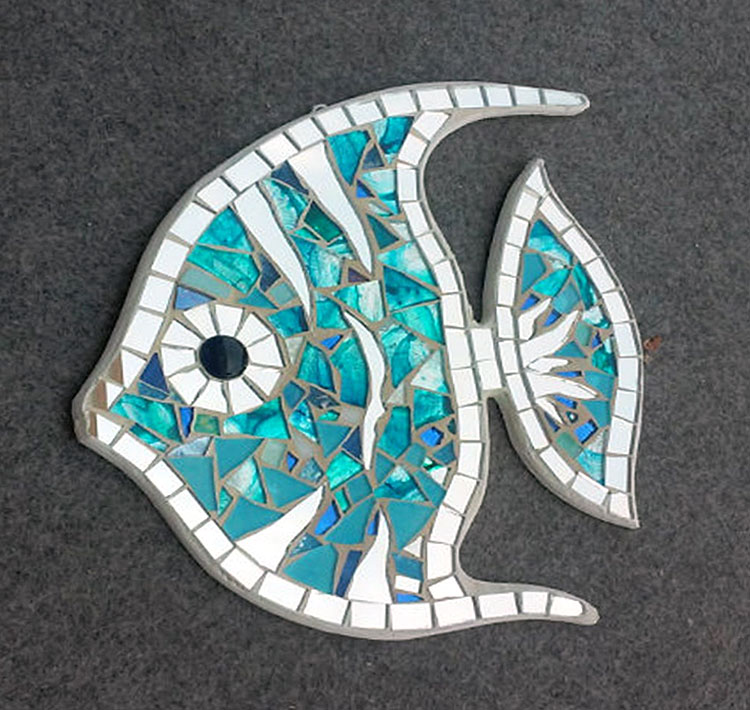
Sea Glass Angelfish Wall Hanging
This stunning sea glass Angelfish wall hanging is made of mosaic pieces of mirror and colorful and iridescent glass. The mirror reflects every glow of light giving freshness and vitality to every environment.